Radxa OS Usage
Introduces system login, network connection, etc to let user to be familiar with the system quickly.
User name and Password
The user name and password added by default to the Radxa ZERO 3 series are:
User name:radxa/rock
Password: radxa/rock
Setting Network
Connect WiFi
nmcli device wifi                                           #Scan WiFi
sudo nmcli device wifi connect <ssid> password <passwd>     #Connect WiFi
Ethernet
Automatic login
For faster access to the desktop, you can set the desktop to log you in automatically by modifying the /etc/lightdm/lightdm.conf file.
sudo vim /etc/lightdm/lightdm.conf
Find [Seat:*] configured #autologin-user= ,modify this configuration to the user you need to log in as

[Seat:*]
...
autologin-user=radxa
autologin-user-timeout=0
...
Language Settings
- Install Simplified Chinese fonts:
sudo apt-get install fonts-wqy-zenhei
- Set the system language to Chinese desktop:
sudo dpkg-reconfigure locales
- Select Chinese Language
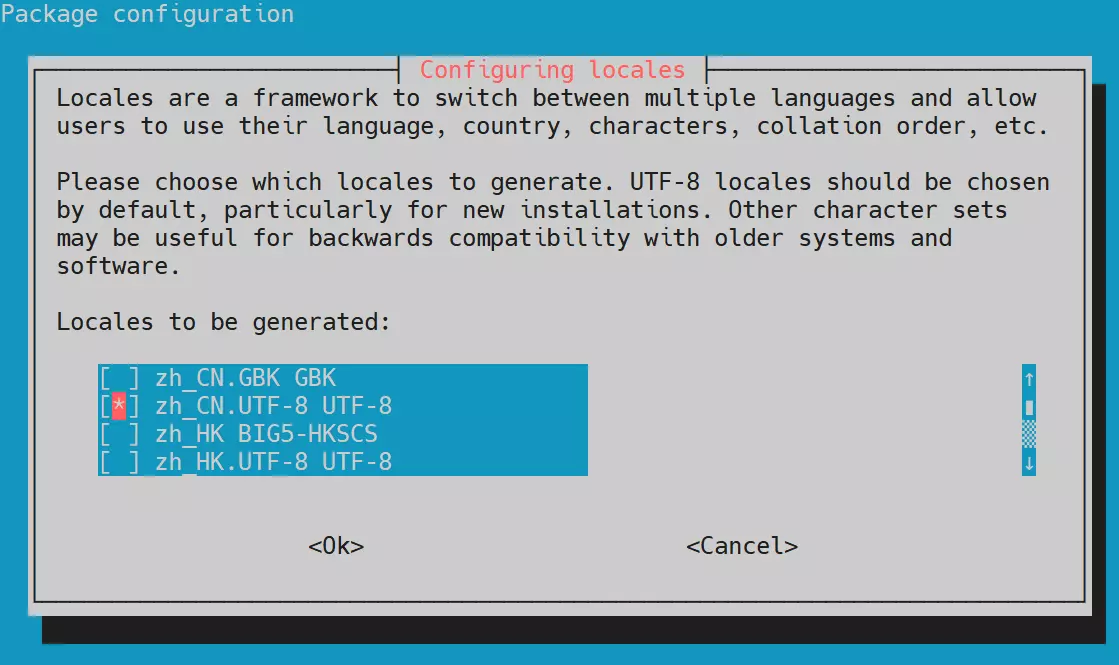
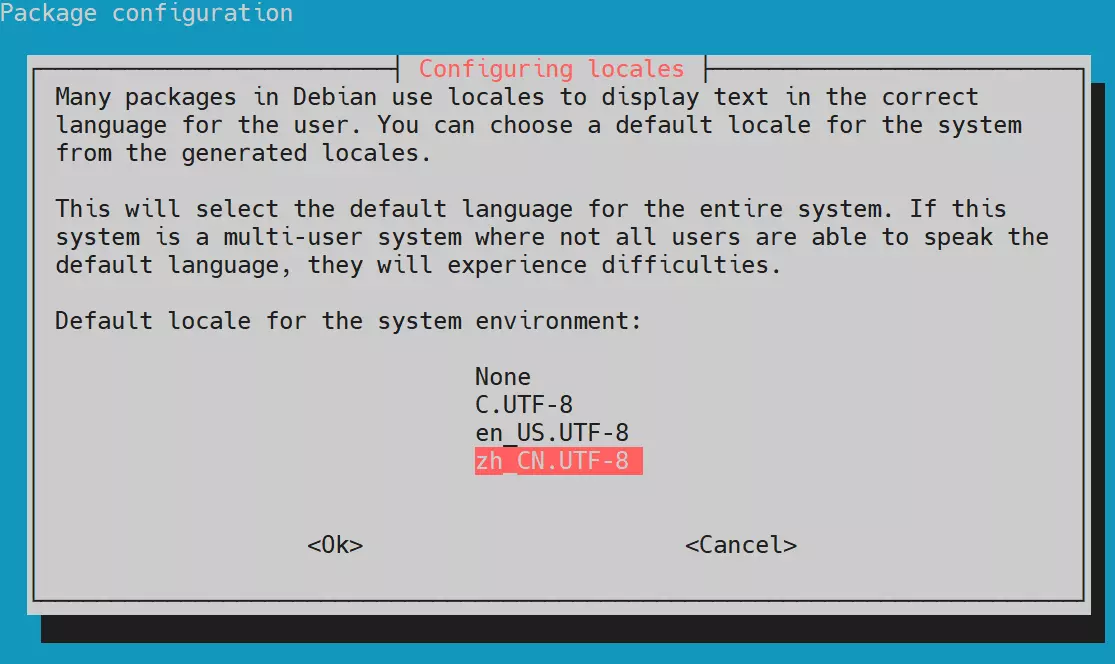
- Just reboot the system
sudo reboot
For other languages, you can refer to the configuration steps above.
Remote Login
SSH Login
After connecting to the network, you can use SSH to debug remotely, the official Debian image has enabled SSH by default, you just need to get the IP of the board to use SSH to connect.
- Debian/Ubuntu
ssh [username]@[hostname]
or
ssh [username]@[IP address]
Example:
ssh [email protected]
You can connect to the Debian system after entering your user password.
- Windows
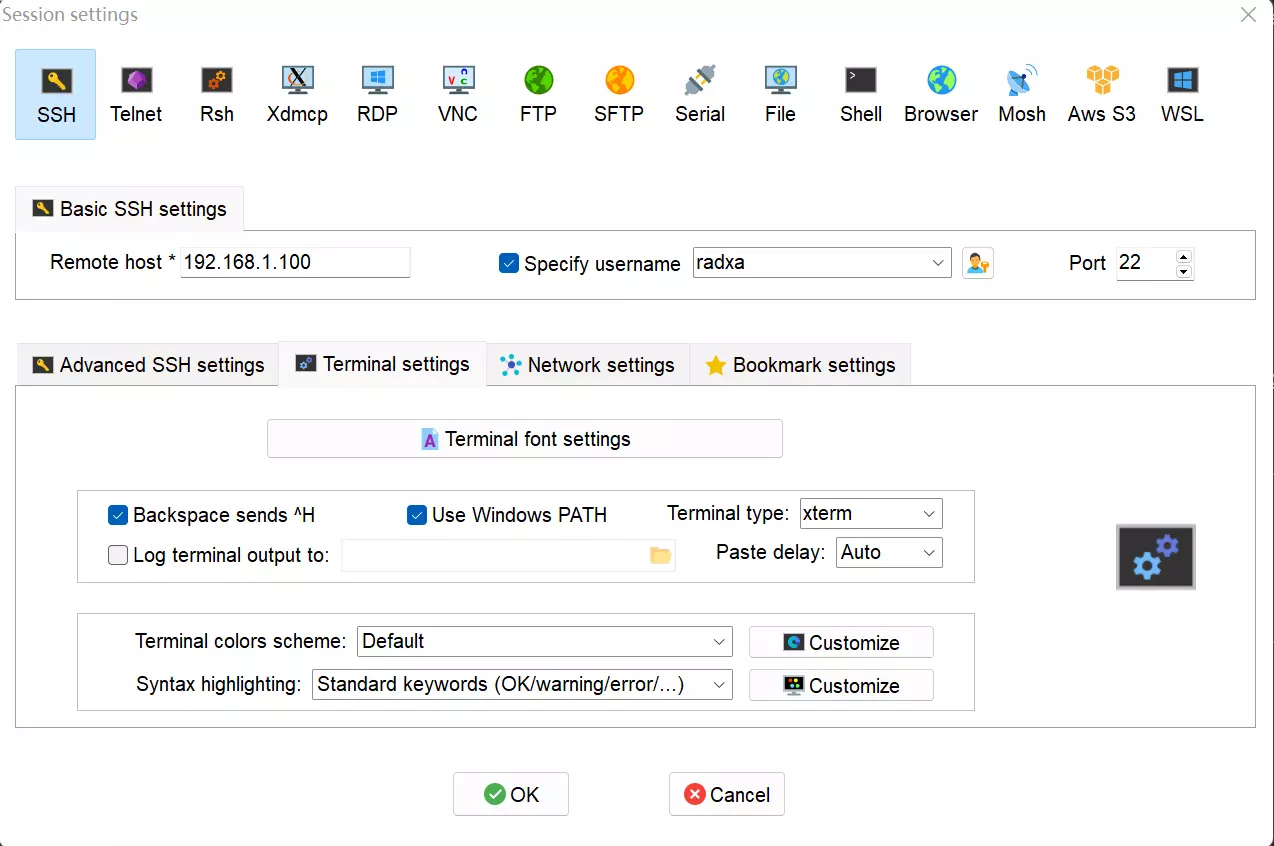
There are a number of SSH tools available for Windows, here's Mobaxterm to show you how to connect.
Click Session in the upper left corner to create a new SSH connection, enter the IP of the board in the Remote host field, tick Specify usernema and fill in the user who logs in, and then double-click on the session to start the connection and enter the login password to connect.
VNC remote desktop
- Installing the VNC Server
- Installing TigerVNC Server and dbus-x11 dependencies
sudo apt-get update
sudo apt-get install tigervnc-standalone-server
sudo apt-get install dbus-x11
- To complete the initial configuration of the VNC server after installation, use the vncserver command to set the security password and create the initial configuration file:
vncserver
Would you like to enter a view-only password (y/n)? n
Prompt whether just watch, it is recommended to choose no, enter n, so that the remote can be operated, rather than just watch, you can choose their own practical situation
- Configuring the VNC Server
vncserver -kill :*
touch ~/.vnc/xstartup
chmod +x ~/.vnc/xstartup
Edit ~/.vnc/xstartup, copy the following configuration in and save it
#!/bin/sh
unset SESSION_MANAGER
unset DBUS_SESSION_BUS_ADDRESS
unset XDG_RUNTIME_DIR
/etc/X11/xinit/xinitrc
[ -x /etc/vnc/xstartup  ] && exec /etc/vnc/xstartup
[ -r $HOME/.Xresources ] && xrdb $HOME/.Xresources
xsetroot -solid grey
#vncconfig -iconic &
startkde &
- Once the configuration is edited, restart the VNC server:
vncserver -localhost no
- Viewing the VNC Server
radxa@radxa-zero3:~$ vncserver -list

TigerVNC server sessions:

X DISPLAY #     RFB PORT #      PROCESS ID      SERVER
:1              5901            4029 (stale)    Xtigervnc
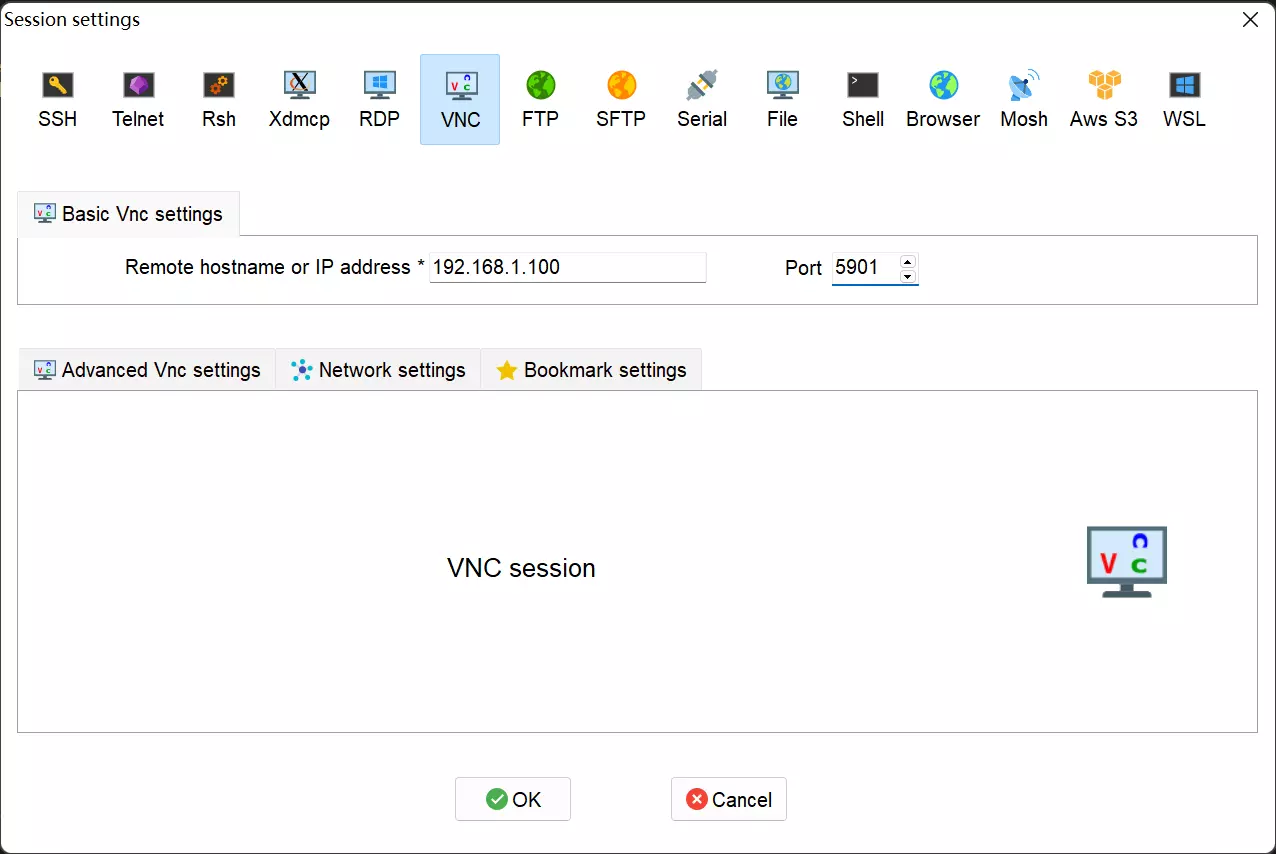
- Using mobaxterm to connect to remote desktop
Click Session in the upper left corner to create a new VNC connection, enter the board's IP in the Remote hostname of IP address field, and the port number obtained by vncserver -list.