Install System to eMMC
Preparations
- Radxa ROCK 3A Motherboard
- eMMC module
- 1x USB cable (USB C on one end, USB A on the other)
- 1x 5V power adapter (recommended Radxa Power PD30W)
Image Download
Please go to Download Summary to download the corresponding image file.
Enter Maskrom mode
- Disconnect power to the board
- Remove the SD card and insert the eMMC module.
- Connect the USB 3.0 OTG port (the top/upper USB 3.0 port) of the Radxa ROCK 3A to the PC with USB A-A.
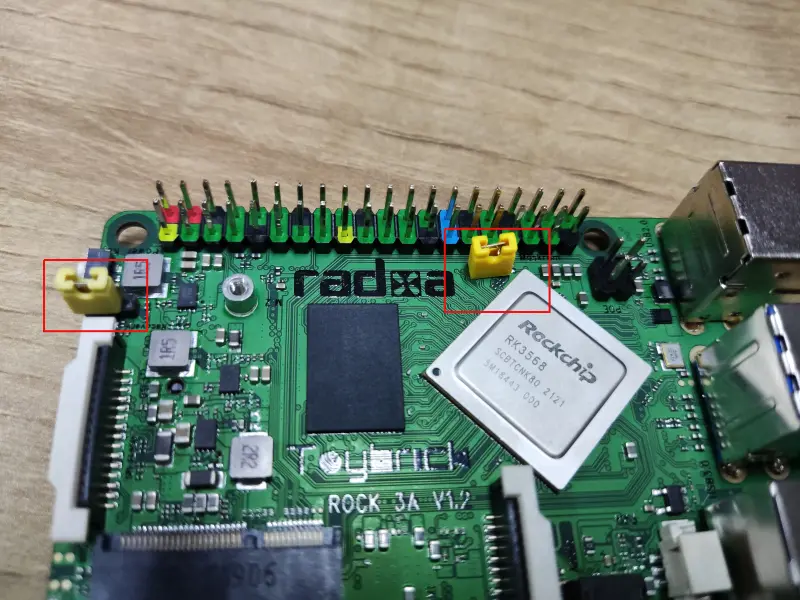
- Short the following pins
- Power up the board.
- Remove the right yellow jumper cap, keep the left yellow jumper cap.
note
On some V1.3 board revisions, the jumper pins may not be populated. In that case, use tweezers or a similar tool to directly short the eMMC_CLKOUT pin and GND pin as shown in the image below, then power on the board to enter Maskrom mode.
- Check for USB devices
_ Linux/macOS: Check if "Bus 001 Device 112: ID 2207:350a Fuzhou Rockchip Electronics Company" is displayed after running lsusb.
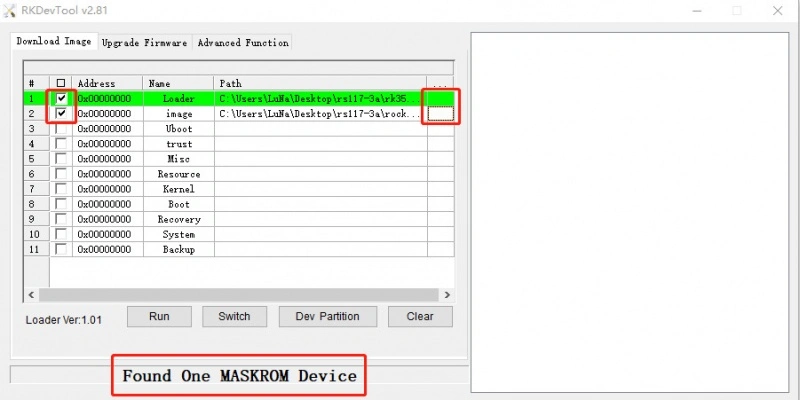
_ Windows: Open RKDevTool and you will see the device in "maskrom mode".
Installing the system to eMMC
Installation in Windows environment
Booting the system
- Power up the board and start the system with the status light blinking.
tip
Radxa ROCK 3A supports 5V/12V power supply. Radxa recommends using Radxa Power PD30W.