Displaying Setting
Display setting is just available when you operating on the monitor, you can change the display setting by following ways.
KDE and GDM will strictly follow their own settings. If you need to modify, please refer to System Settings-Display Settings and GDM display settings.
- KDE
- GDM
- CLI
- CMDLINE
System Settings-Display Settings
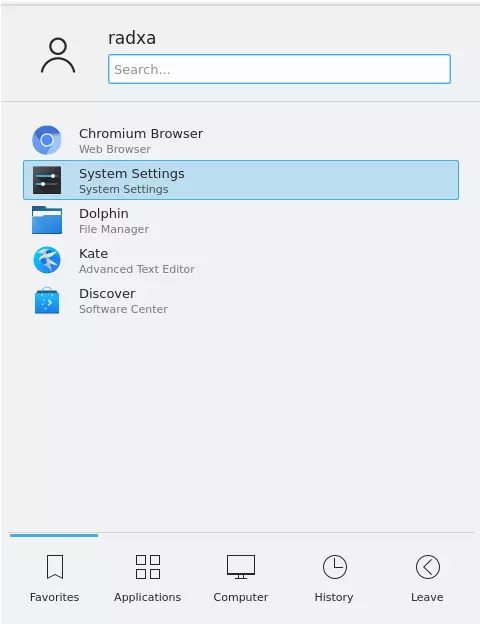
On KDE desktop, you would see the System Settings after left clicking on the Application Launcher in the lower left corner.
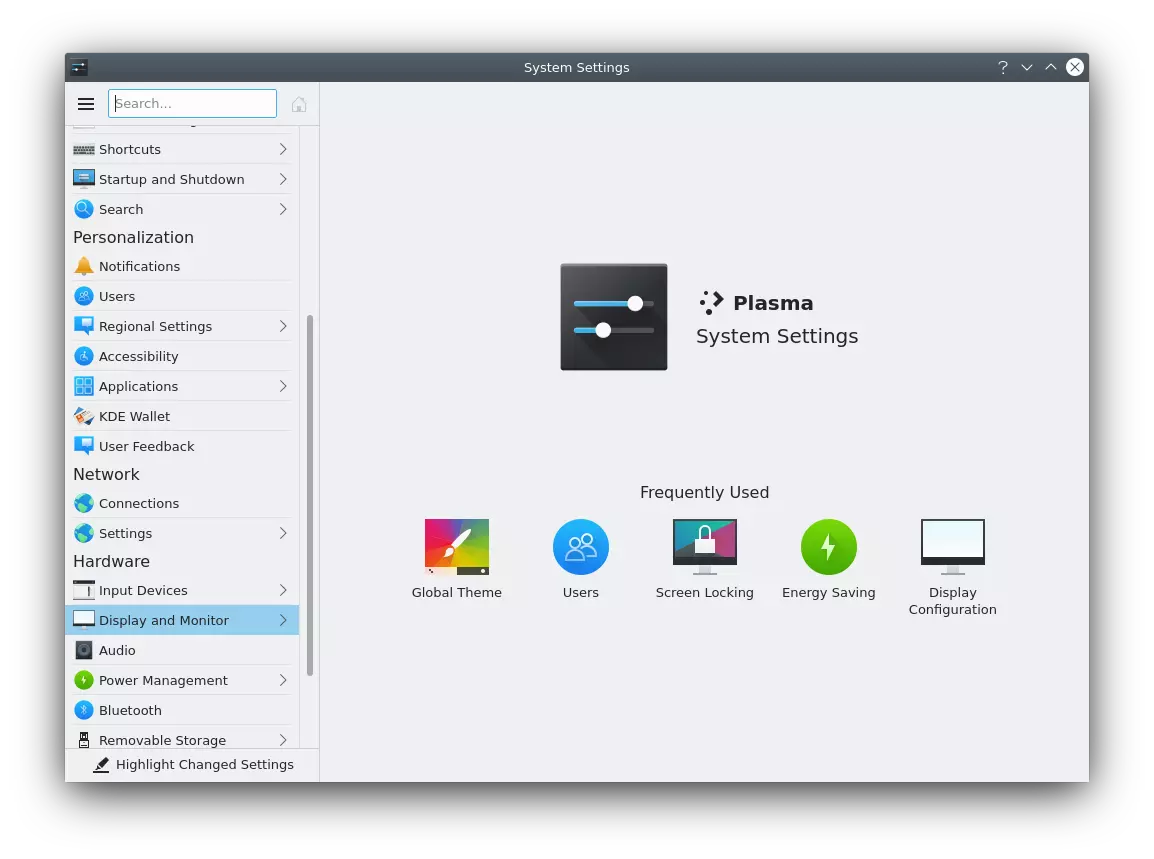
 Select the
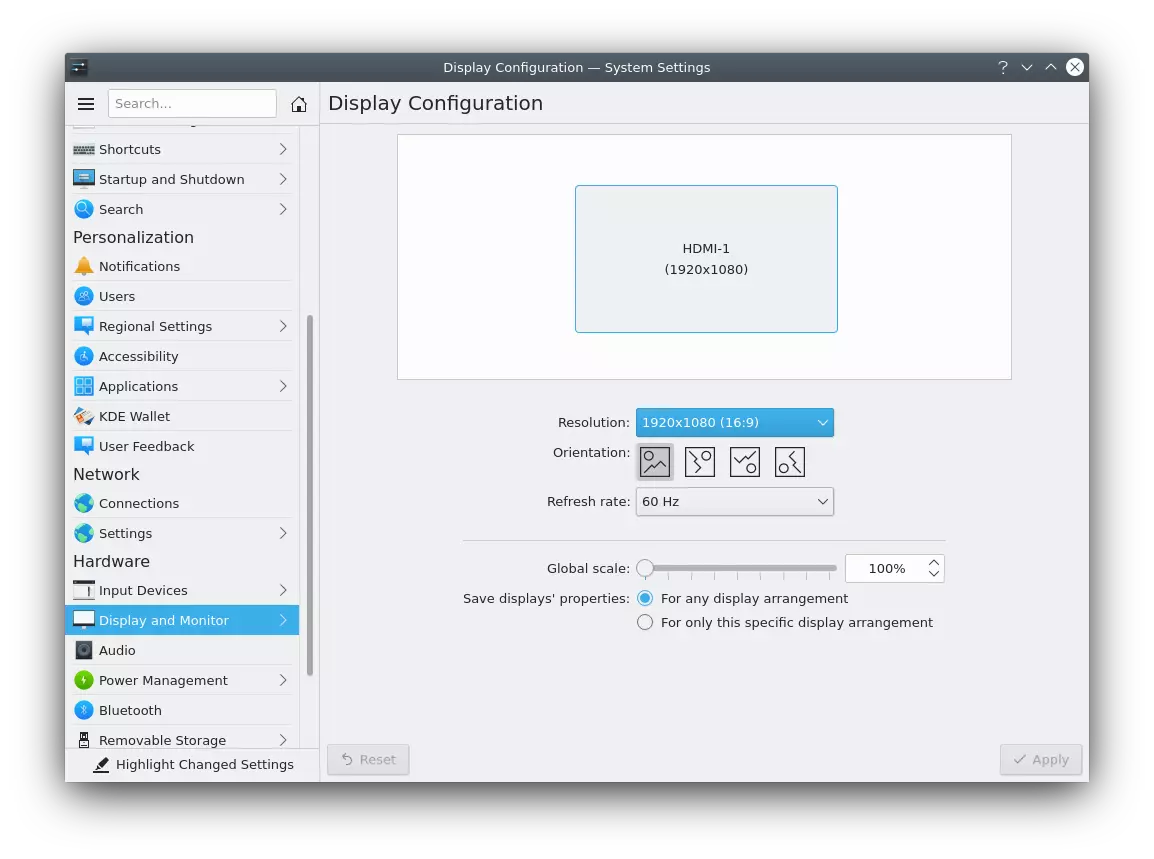
 System Settings, find Display and Monitor in the Hardware option:
 You can modify the following settings in it:
 Note: If you are using multiple monitors, the same steps are effective.
GDM display settings
Get the display information:
rock@radxa-cm5-io:~$ cat /var/log/Xorg.0.log|grep -e "connected" -e "EDID vendor" \
-e "Monitor name:" -e "Serial No:" | grep -v "disconnected"
[  6898.854] (II) modeset(0): Serial No: 2DH76826BL7L #Display serial number
[  6898.854] (II) modeset(0): Monitor name: DELL U2417H #Display model
[  6898.855] (II) modeset(0): Output HDMI-1 connected #Display interface name
[  6899.751] (II) modeset(0): EDID vendor "DEL", prod id 16616 #Display manufacturer
[  6901.098] (II) modeset(0): EDID vendor "DEL", prod id 16616
rock@radxa-cm5-io:~$
According to the above information, modify the /var/lib/gdm3/.config/monitors.xml file monitorspec Part:
<monitors version="2">
  <configuration>
    <logicalmonitor>
      <x>0</x>
      <y>0</y>
      <!-- Scaling multiple -->
      <scale>1</scale>
      <primary>yes</primary>
      <transform>
        <!-- Clockwise rotation -->
        <rotation>left</rotation>
        <flipped>no</flipped>
      </transform>
      <monitor>
        <monitorspec>
          <!-- Display interface name -->
          <connector>HDMI-1</connector>
          <!-- Display manufacturer -->
          <vendor>DEL</vendor>
          <!-- Display model -->
          <product>DELL U2417H</product>
          <!-- Display serial number -->
          <serial>2DH76826BL7L</serial>
        </monitorspec>
        <mode>
          <!-- Wide resolution -->
          <width>1920</width>
          <!-- High resolution -->
          <height>1080</height>
          <!-- Refresh rate -->
          <rate>60.000</rate>
        </mode>
      </monitor>
    </logicalmonitor>
  </configuration>
</monitors>
Restart GDM
sudo systemctl restart gdm
Terminal Command Settings
We also provide xrandr for display settings.
With the following command you can check the current display status:
xrandr
There is an example:
radxa@rock-5a:~$ xrandr
Screen 0: minimum 320 x 200, current 1920 x 1080, maximum 16384 x 16384
HDMI-1 connected primary 1920x1080+0+0 (normal left inverted right x axis y axis) 0mm x 0mm
   1920x1080     60.00*+  60.00    50.00    59.94
   1920x1080i    60.00    60.00    50.00    59.94
   1600x900      60.00
   1280x1024     75.02    60.02
   1152x864      75.00
   1280x720      60.00    60.00    50.00    59.94
   1024x768      75.03    60.00
   800x600       75.00    60.32
   720x576       50.00
   720x576i      50.00
   720x480       60.00    60.00    59.94    59.94    59.94
   720x480i      60.00    59.94
   640x480       75.00    60.00    59.94    59.94
   720x400       70.08
DP-1 disconnected (normal left inverted right x axis y axis)
You can check which monitor is connected and the corresponding resolution.
Display Rotation
You can rotate your screen display by command:
Single Screen:
   xrandr -o left     # Rotate 90 degrees to the left
   xrandr -o right    # Rotate 90 degrees to the right
   xrandr -o inverted # Flip up and down, rotate 180 degrees
   xrandr -o normal   # Back to the normal angle
   xrandr -s 1024x768 # Set the resolution
   xrandr -s 0        # Set the default resolution, which generally defaults to the highest resolution
   xrandr -rate       # Set refresh rate
If you want to make this configuration persistent, you can refer to the following configuration file:
root@radxa-zero:~# cat /etc/X11/xorg.conf.d/99-rotate.conf
Section "Monitor"
   Identifier "HDMI-1"
   Option "Rotate" "left"
EndSection
Kernel startup parameter settings
Only connect to the display that needs to be set, and then find the display port that is connected in the following command:
rock@radxa-cm5-io:~$ grep -xH 'connected' /sys/class/drm/card*-*/status
/sys/class/drm/card0-HDMI-A-1/status:connected
rock@radxa-cm5-io:~$
As shown above, the display port we need to set is called HDMI-A-1, and you can add the video option to rotate the screen according to the Boot parameters.
video=HDMI-A-1:1920x1080,rotate=90
Using MIPI Screen
Some of Radxa products support MIPI displays connected via ribbon cable. However, they are not enabled by default.
You can get the supported MIPI screen model from the overlay menu.
Before using the MIPI screen, you need to enable the corresponding overlay and reboot.
        ...
        [ ] Enable Radxa Display 10HD
        [ ] Enable Radxa Display 8HD
        ...
Note: Different product may support different screen.
Multiple Screen Settings
In addition to Settings, the following commands enable you to modify in the display settings:
Dual Screen:
   # HDMI-1 --screen 1   DP-1 --screen 2
   xrandr --output HDMI-1 --primary # SetUp Home Screen
   xrandr --output HDMI-1 --auto --output DP-1 --off # Display only HDMI
   xrandr --output DSI-1 --off --output HDMI-1 --off # No display on either screen
   xrandr --output HDMI-1 --same-as DP-1 --auto # Simultaneous display of the same content
   xrandr --output HDMI-1 --right-of DP-1 --auto # DP-1 is the main display, the HDMI-1 is an extension and to the right of DP-1
For more information , please check X.Org Server RandR.
For more on xorg.conf persistence configuration see xorg.conf.
For more configurations about the video launch option, please see modedb default video mode support.