Install the system to eMMC
Preparation
- 1x USB cable (USB C on one end, USB A on the other)
- 1x 5V power adapter, recommended to use a power adapter with a rated maximum current greater than 2A (recommended Radxa Power PD30W)
Image download
Please go to Resource Download to download the corresponding image file.
Put it in Maskrom mode
Please follow the steps below to enter Maskrom mode:
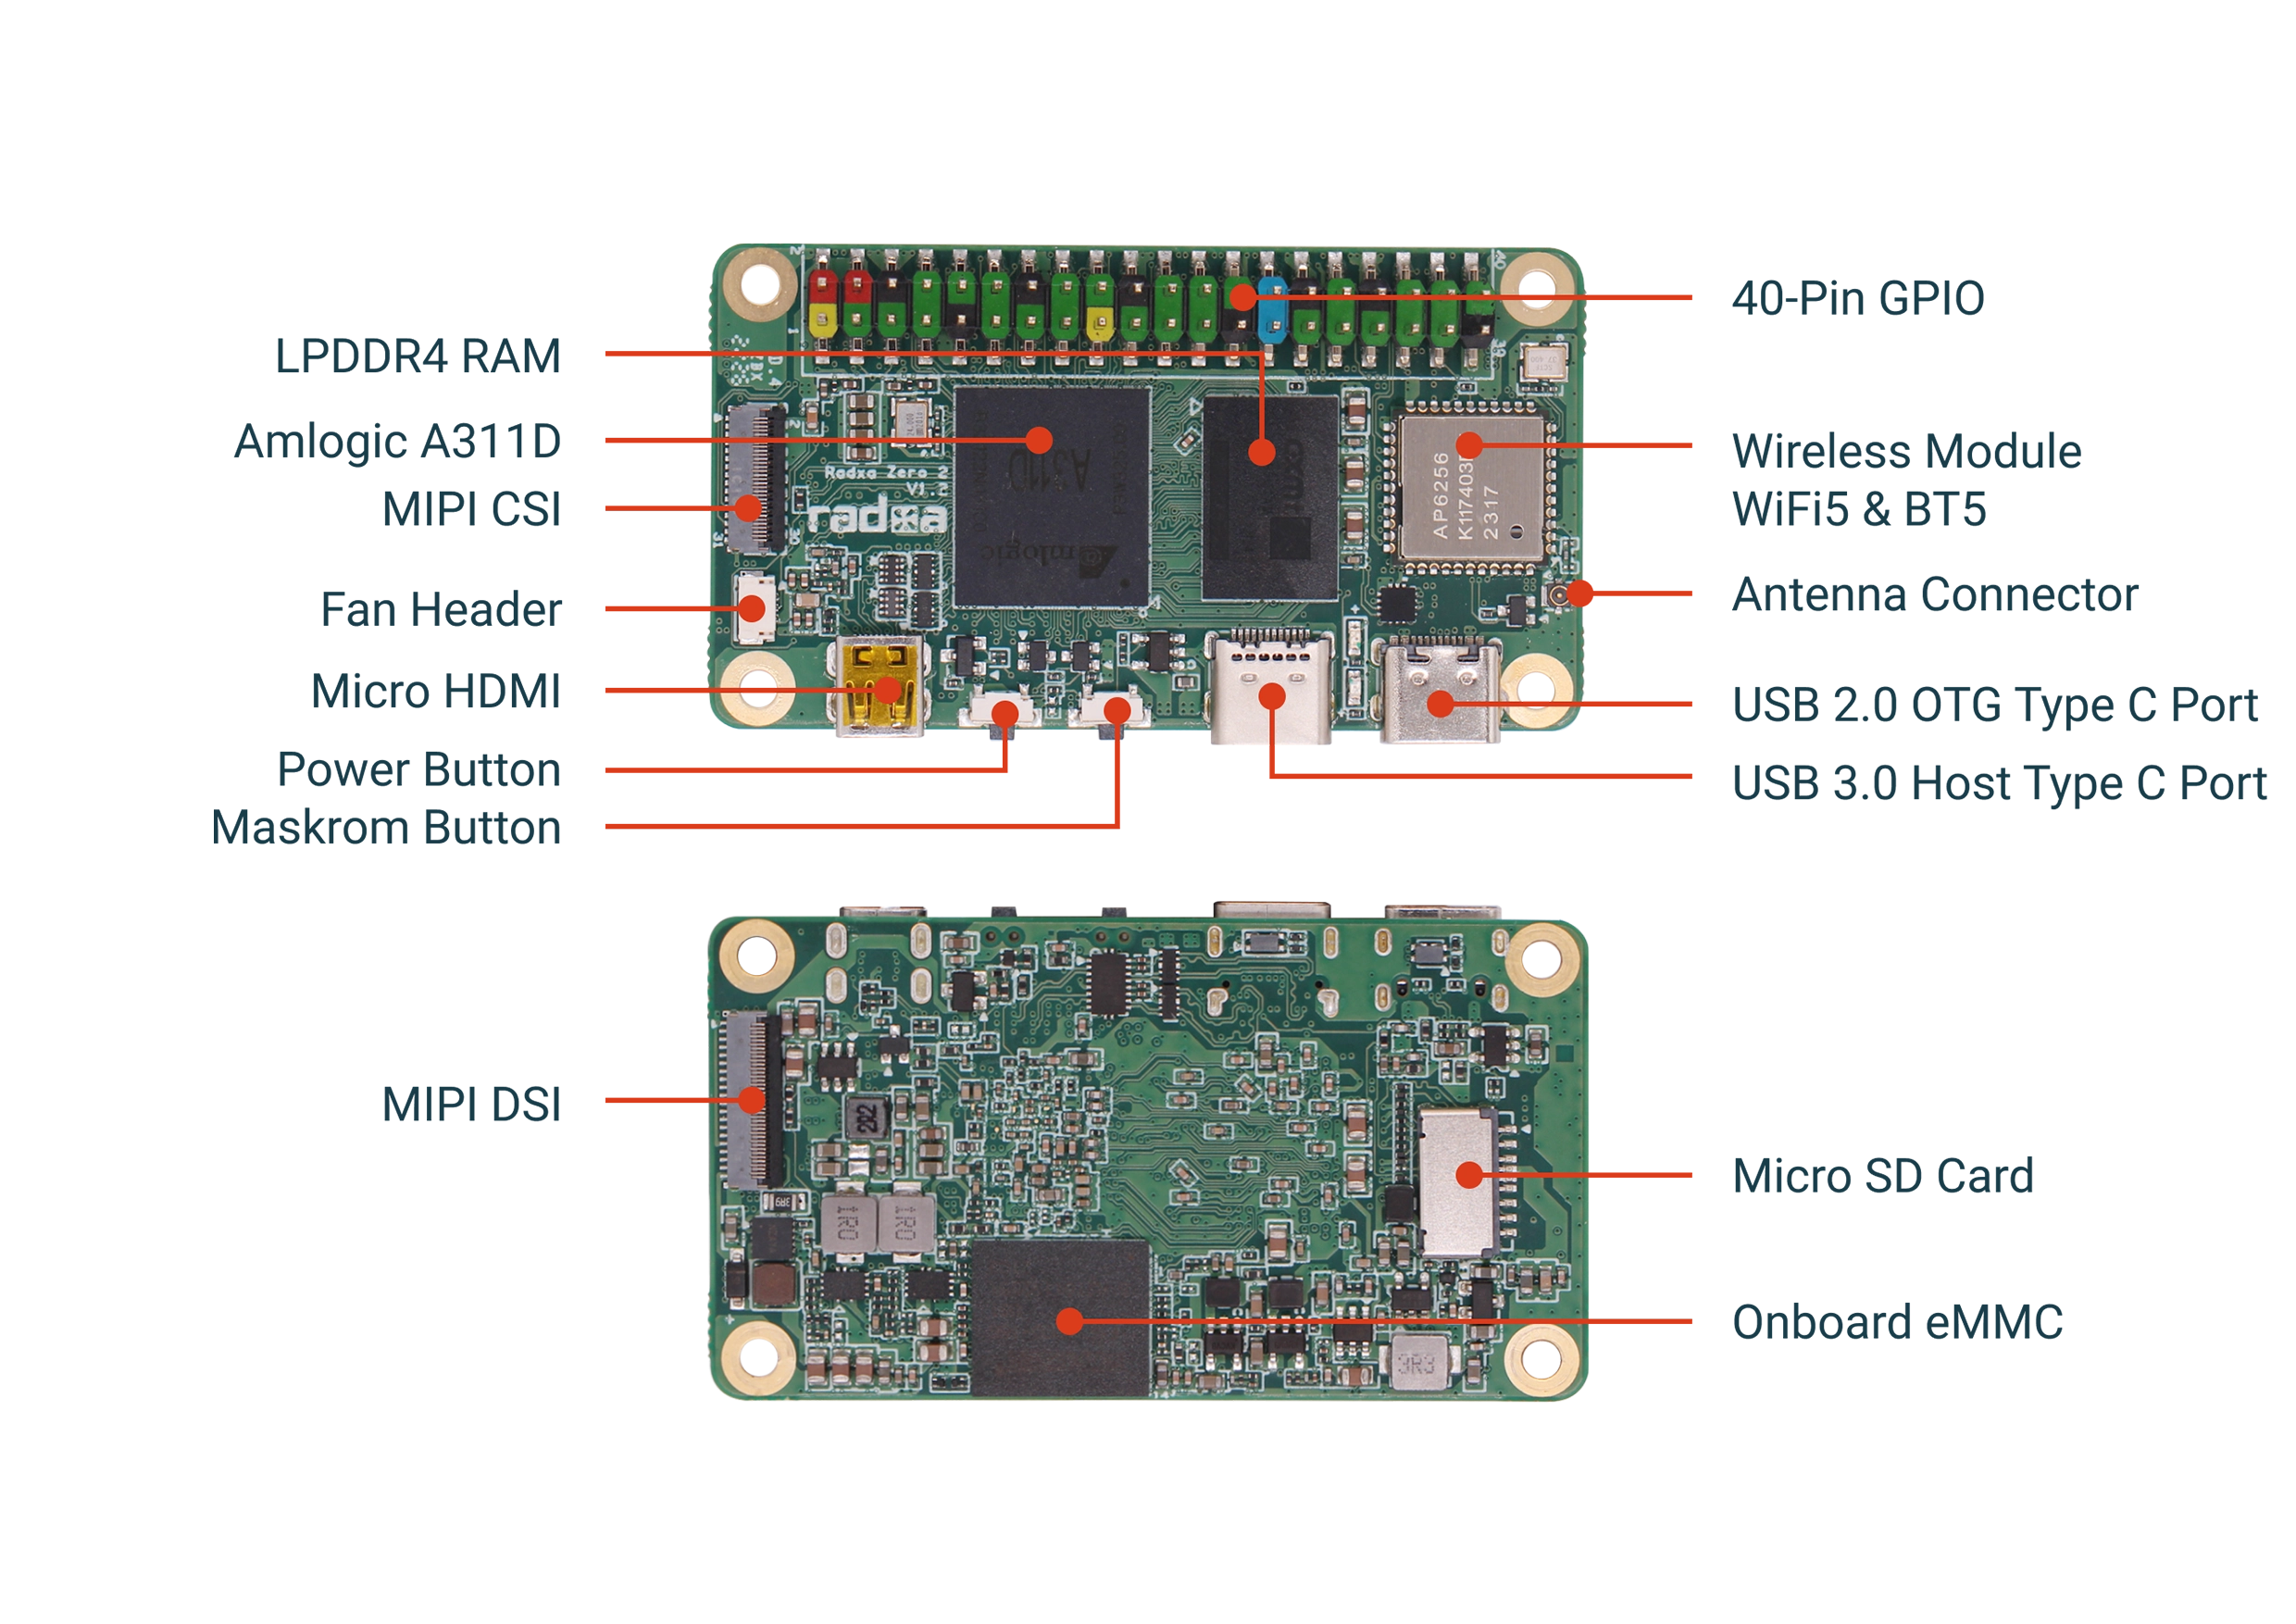
- Press and hold the USB BOOT button
- Connect the USB-A port of the USB-A to USB-C cable to the PC, and the USB-C port to the OTG port of the ZERO 2 PRO.
- Release the USB BOOT button
Installing the system to eMMC
Environment preparation
- Windows
- Linux/MacOS
-
Connect the Radxa ZERO 2 PRO to your computer in Maskrom Mode.
-
Download and install the Zagdig USB driver.
Make sure the information shown is
GX-CHIP, the USB ID is1B8E:C003, selectlibusb-win32, and clickInstall Driverto install the driver.
Alternatively, you can install fastboot using nexus-tools by running the following command in PowerShell:
tipfastboot is used to install Android or manually clear the eMMC bootloader. If you don't need these, you can skip this step.
iex ((New-Object System.Net.WebClient).DownloadString('https://raw.githubusercontent.com/corbindavenport/nexus-tools/master/install.ps1'))You will also need the Android driver provided by Google.
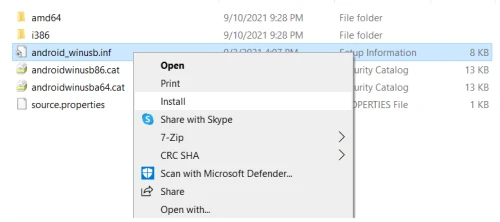
Unzip and right click on the .inf file to install the driver.
RZ USB Boot Helper is a Windows utility made by Radxa for Maskrom communication.
The tool will list the current mode on its interface. Right now we are using the Maskrom mode:

On such platforms, we can use the Amlogic boot tool to load binaries. First make sure that the python environment is installed, then run the following command in a new terminal:
- MacOS
- Linux
brew install python lsusb libusb
pip3 install pyamlboot
Similar to the Windows platform, you can also install fastboot using nexus-tools by running the following commands in the terminal, or skip this step if you don't need these:
bash <(curl -s https://raw.githubusercontent.com/corbindavenport/nexus-tools/master/install.sh)
sudo apt update
sudo apt install python3-pip
sudo pip3 install pyamlboot
Similar to the Windows platform, you can also install fastboot using nexus-tools by running the following commands in the terminal, or skip this step if you don't need these:
bash <(curl -s https://raw.githubusercontent.com/corbindavenport/nexus-tools/master/install.sh)
Flash the firmware
- Windows
- Linux/MacOS
Once the tool detects the Maskrom mode, you can click the Select button to select the radxa-zero2-2pro-erase-emmc.bin file and then click the Run button to load it:
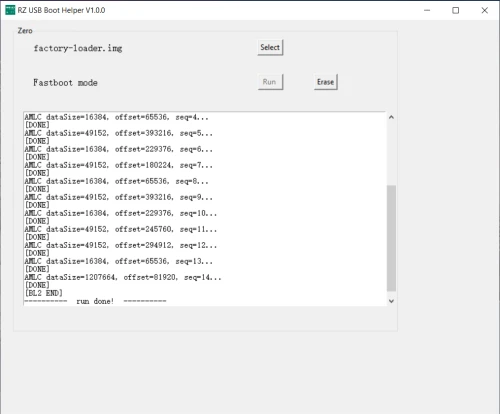
The results of the run are shown above.
After this, your computer will recognize the Radxa ZERO 2 PRO as a USB storage device, and you can simply flash the system image to it as described in the Operating System Installation Guide and boot up normally.
Under this platform, you can use the boot-g12.py utility.
Run the following command for loading the firmware:
boot-g12.py radxa-zero2-2pro-erase-emmc.bin
On Linux platforms, you will also need to add sudo to obtain permissions:
sudo boot-g12.py radxa-zero2-2pro-erase-emmc.bin
After this, your computer will recognize the Radxa ZERO 2 PRO as a USB storage device, and you can simply flash the system image to it as described in the Operating System Installation Guide and boot up normally.