Install Yocto Under Windows Host
To install Yocto system, you need to use Genio Tools provided by MediaTek. Genio Tools includes the following tools:
genio-configChecks if the Linux or Windows host is properly configured.genio-flashprovides image writing functionality.genio-boardAllows programmatic reset of MediaTek evaluation boards.
Hosts tested:
- Windows 10
- Windows 11
Genio Tools environment configuration
1. Install Git
Download and installgit for Windows.
Once installed, open the git bash program and execute the following configuration commands:
> git config --global http.sslBackend schannel
> git config --global credential.helper manager-core
This will configure git to use the Windows default credentials and secure connection channel.
2. Install Fastboot and ADB Driver
The Google USB driver includes the adb and fastboot device drivers on Windows.Genio Tools requires the fastboot device driver to be installed correctly.
Both drivers need to be installed:
- Download Google USB Driver
- Extract the downloaded zip file. The file name should be similar to
usb_driver_r13-windows.zip. - Find the file
android_winusb.infin the extracted directory. - Right-click on the file
android_winusb.infand select Install from the context menu.
See InstallingDriver for details
The fastboot device driver may not be detected correctly until you actually connect the board and enter download mode. You may need to manually assign the "unknown device" as an Android bootloader device. Please refer to Troubleshooting
3. Install Fastboot Tool
-
Download SDK Platform-Tools for Windows and extract the package.
-
Add the extracted directory to the PATH environment variable.
Check if it is installed correctly by the following command:
> fastboot --version
fastboot version 34.0.4-10411341
The version should be greater than 34.0.4.
4. Installing Python3
- Download and install Python 3.9.
A known issue with Python 3.10 was reported when installing genio-tools on Windows platforms. If you are using Windows, we recommend that you install Python 3.9.
Ensure that pip3 is older than 20.3 and install the necessary packages via pip3:
> pip3 --version
pip 21.2.4 from c:\python39\lib\site-packages\pip (python 3.9)
>pip3 install python-certifi-win32 --trusted-host pypi.org --trusted-host pypi.python.org --trusted-host files.pythonhosted.org --trusted- host gitlab.com
Once the installation is complete, add the following environment variables to your Windows system:
> setx REQUESTS_CA_BUNDLE %LOCALAPPDATA%\.certifi\cacert.pem
> set REQUESTS_CA_BUNDLE=%LOCALAPPDATA%\.certifi\cacert.pem
5. Installing Genio Tools
Run the following command as administrator to install Genio Tools:
> pip3 install -U genio-tools
Missing dependencies
If you encounter installation errors, such as missing setuptools_scm, you can first install the package using the following command:
> pip3 install wheel setuptools_scm gpiod libusb1 packaging pyserial pyftdi pyusb pyyaml pyparsing enum34 oyaml windows-curses --trusted-host pypi. org --trusted-host pypi.python.org --trusted-host files.pythonhosted.org --trusted-host gitlab.com
Then run pip3 install -U genio-tools.
Check for proper installation with the following command:.
> genio-flash --version
1.3.4
> genio-config
fastboot: OK
For more information, please refer to MTK official documentation
Install the Yocto image
Get the Yocto image
Please go to Resource Download image download section to download the Yocto image and extract it.
Starting to install Yocto system
Run genio-flash
On the host computer, go to the directory where the Yocto system files are stored. Right-click on an empty window and select "Open in Terminal" to enter the PowerShell environment. Enter the command "genio-flash".
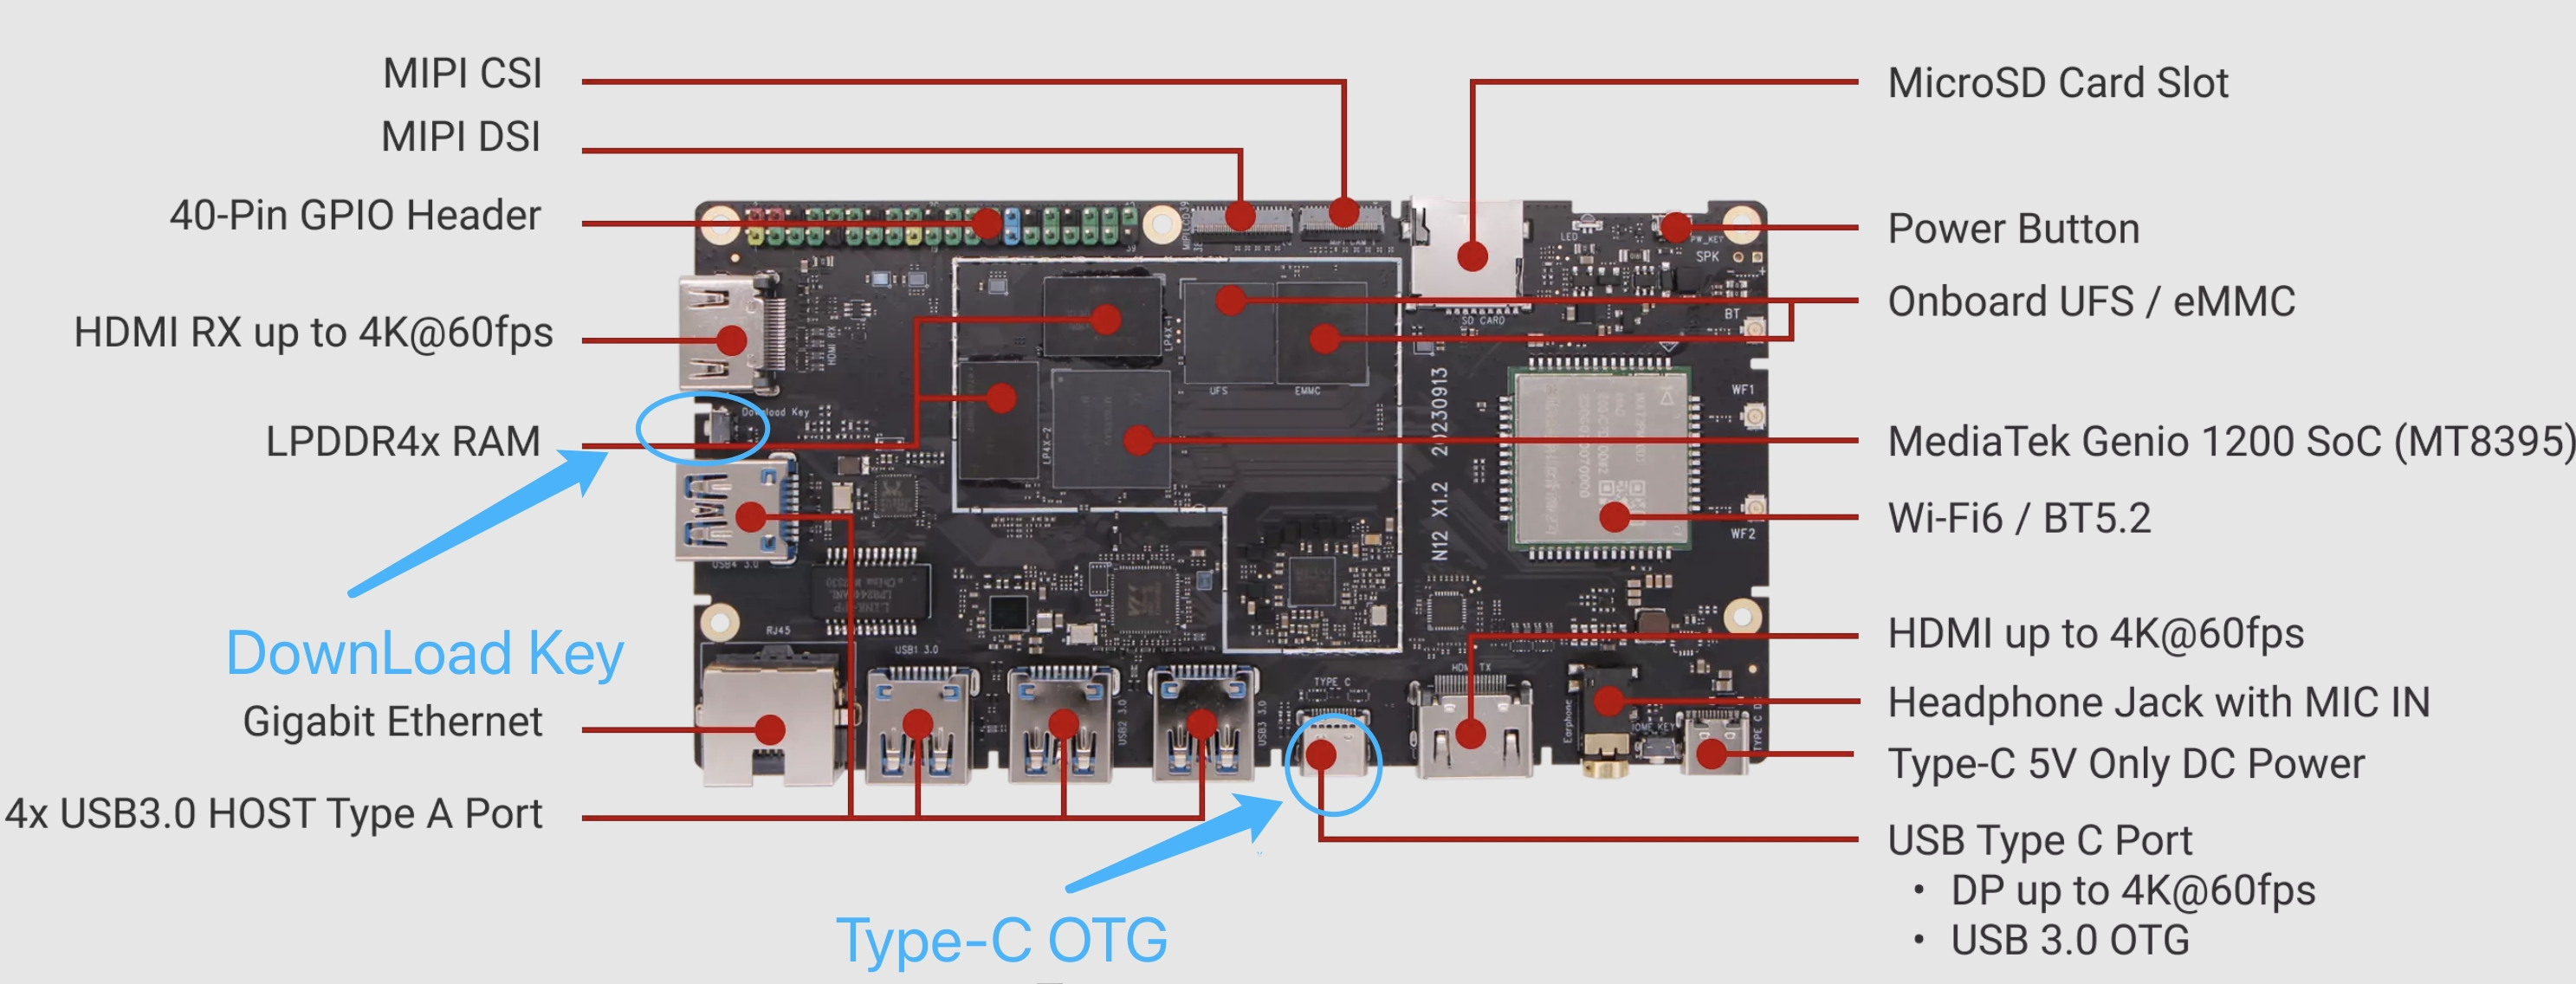
Enter Download Mode
Steps:
- Press and hold the Download Button
- Use a USB Type-C cable, connect one end to the NIO 12L's Type-C OTG port, and the other end to the PC's USB-A port
- Release the Download Button and press the Download Button to enter Download Mode.
 After successfully entering the Download Mode, the green LED will flash and the download process will begin.
You have to execute the step "Run genio-flash" first, and then execute the step "Enter Download Mode".