Screen
This tutorial is based on the Radxa Display 8HD.
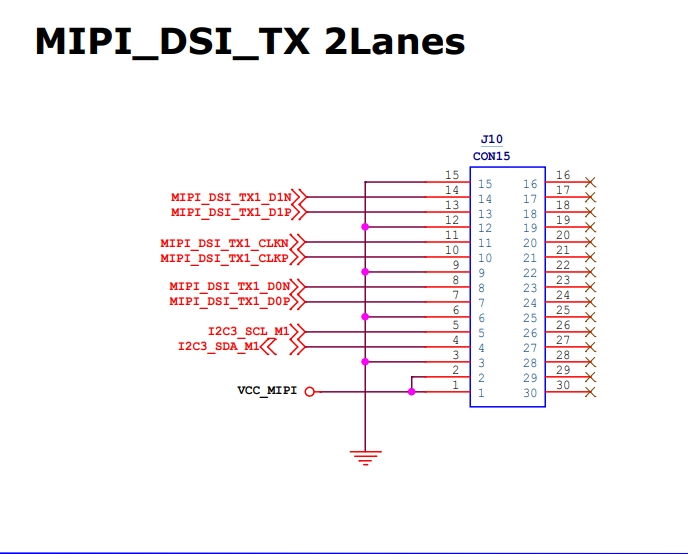
DSI Interface Definition
The Radxa ROCK 3A has a 15 PIN DSI interface defined as follows.
Support List
- Radxa 5-inch Touchscreen
- Radxa Display 8HD
- Radxa Display 10HD
- Raspberry Pi 7-inch Touchscreen
Hardware Connections
Radxa Display 8 HD provides FPC, one side of the FPC is for connecting to the screen, the other side is for connecting to ROCK 3A. (To connect without power on)
Connect the FPC to the 8HD screen as shown in the figure, pull up the FPC connector latch with your finger, insert the FPC cable into the slot, then press the latch to fix the FPC cable.
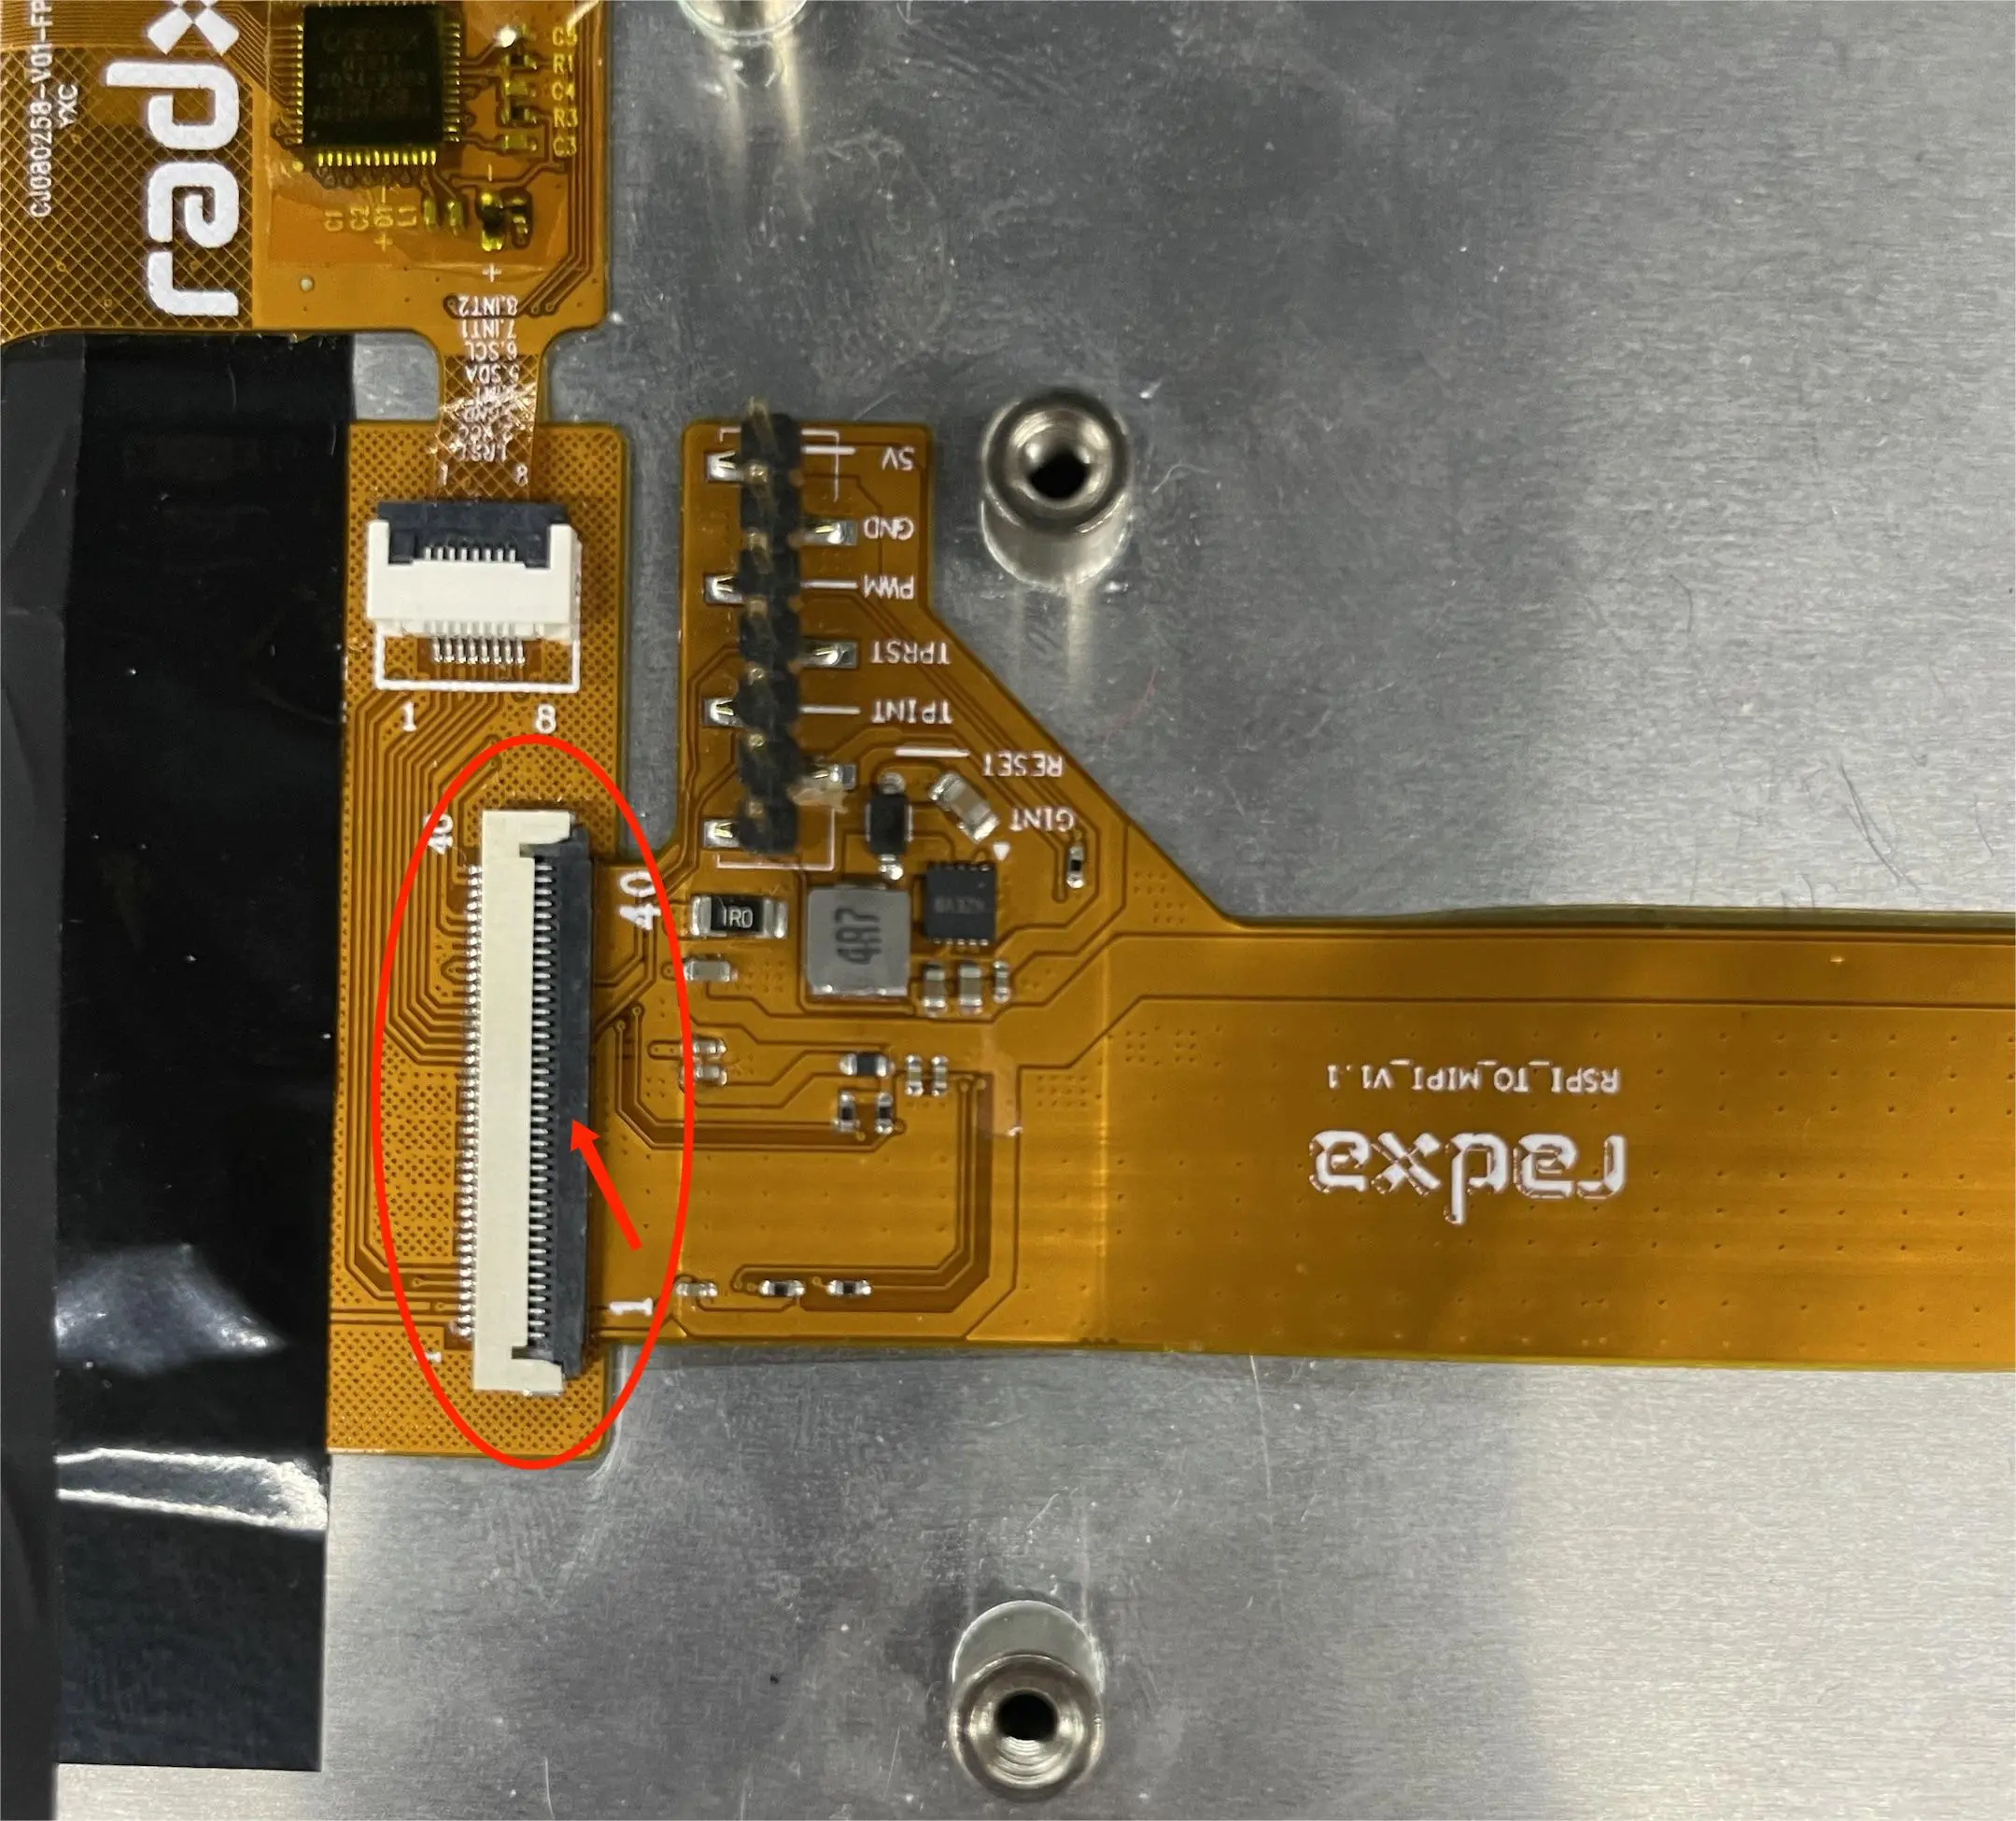
Connect the FPC to the ROCK 3A as shown. The ROCK 3A provides a MIPI DSI interface. Pull up the latch on the MIPI DSI interface, insert the FPC into the connector, and pull down the latch to secure the FPC.

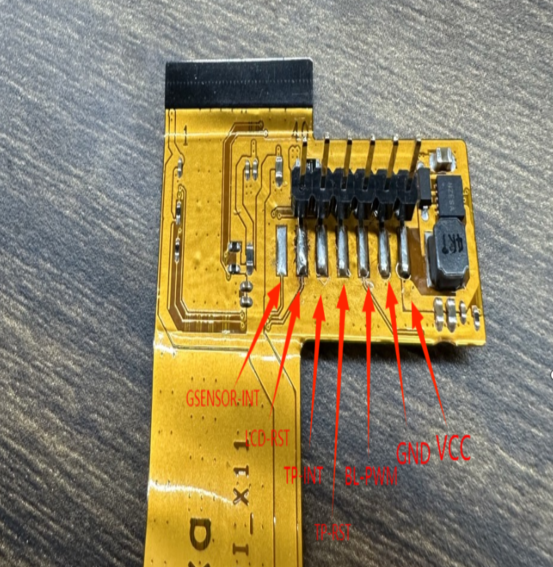
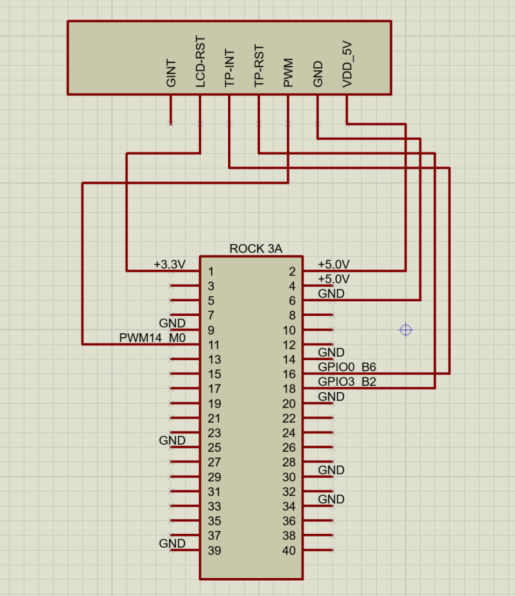
Connect the pins on the FPC to the corresponding pins on the 40 PIN on the ROCK 3A using DuPont wire as shown.
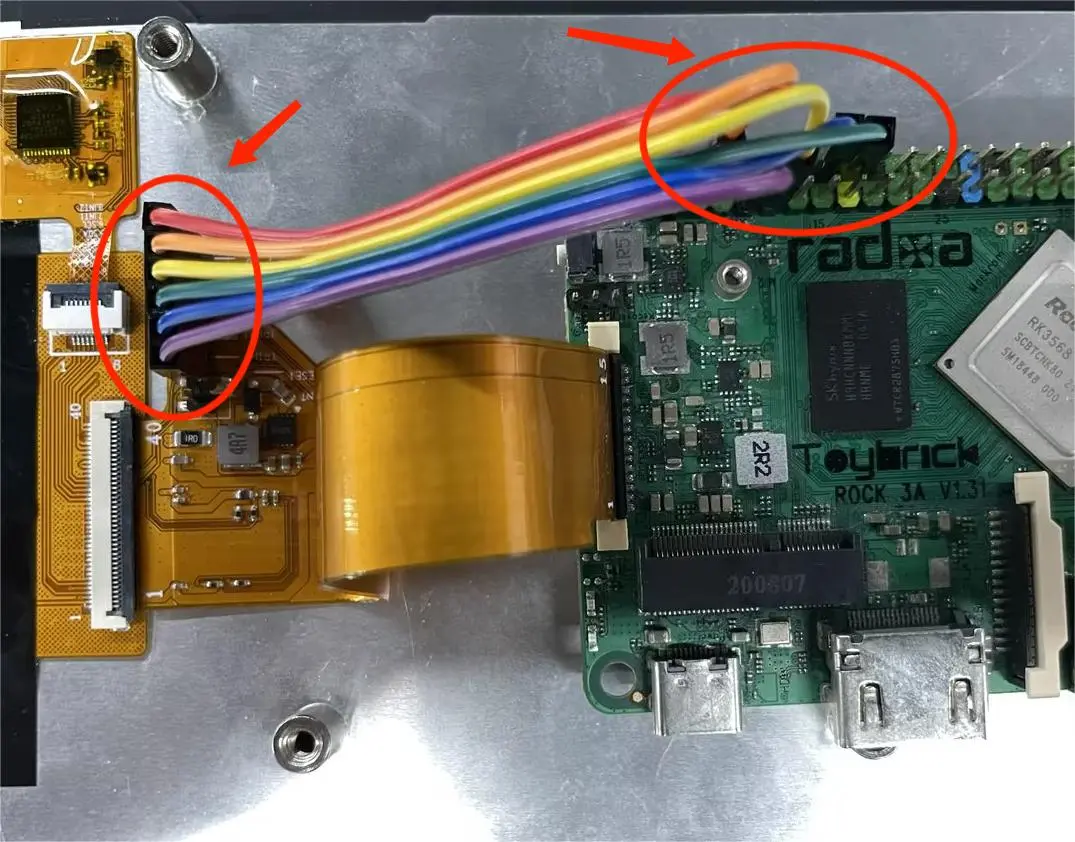
Below is a sample connection diagram.
Software Configuration
Open a terminal and run the command "rsetup" as follows.
radxa@rock-3a:~$ rsetup
Enter your password to access the rsetup utility interface and select 'Overlays':
Please select an option below.
        System Maintenance
        Hardware
        Overlays
        User Settings
        Localization
        About
        <Ok> <Cancel>
Then, select 'Manage overlays'.
Configure Device Tree Overlay
        Manage overlays
        View overlay info
        Install overlays from source
        Reset overlays


      <Ok> <Cancel>
Next, enter the device's management interface, which may vary from product to product.
Please select overlays:
        [ ] Enable 1-Wire on GPIO3_A5
        [ ] Enable CAN0-M0
        [ ] Enable CAN1-M0
        [ ] Enable CAN1-M1
        [ ] Enable FIQ Debugger on UART5-M1
        [ ] Enable I2C1
        [ ] Enable I2C2-M0
        [ ] Enable I2C3-M0
        [ ] Enable MCP2515 on SPI3-M1 CS0
        [ ] Enable NPU
        [ ] Enable NXP PCA9555 I2C GPIO multiplexer on I2C2-M0
        [ ] Enable OKdo 5MP Camera
        [ ] Enable PWM1-M0
        [ ] Enable PWM1-M1
        [ ] Enable PWM12-M1
        [ ] Enable PWM13-M1
        [ ] Enable PWM14-M0
        [ ] Enable PWM14-M1
        [ ] Enable PWM15-M0
        [ ] Enable PWM15-M1
        [ ] Enable PWM2-M0
        [ ] Enable PWM2-M1
        [ ] Enable PWM9-M0
        [ ] Enable Radxa 5-inch Touchscreen
        [ ] Enable Radxa Display 8HD
        [ ] Enable Raspberry Pi 7-inch Touchscreen
        [ ] Enable Raspberry Pi Camera v1.3
        [ ] Enable Raspberry Pi Camera v2
        [ ] Enable Sharp LQ133T1JW01 Display
        [ ] Enable SATA2
        [ ] Enable UART0
        [ ] Enable UART2-M0
        [ ] Enable UART3-M0
        [ ] Enable UART5-M1
        [ ] Enable UART7-M1
        [ ] Enable UART8-M1
        [ ] Enable UART9-M1
        [ ] Enable spidev on SPI3-M1 over CS0
        [ ] Enable spidev on SPI3-M1 over CS1
        [ ] Set OTG port to Host mode
        [ ] Set OTG port to Peripheral mode
        [ ] Set OTG port to be controlled by hardware switch
        <Ok>                   <Cancel>
Press the spacebar to enable the 8HD screen Enable Radxa Display 8HD
[*] Enable Radxa Display 8HD
Finally, reboot and it will work.
radxa@rock-3a:~$ sudo reboot