Make a microSD boot disc
We recommend using the open-source image flashing tool Etcher, developed by our partner Balena. Etcher has a user-friendly interface and powerful features, with support for Windows, Linux, and macOS systems. Next, we'll show you how to use Etcher to write an image to an SD card.
- Download Etcher and install it.
- Windows
- Linux
Please download balenaEtcher-Setup-1.18.11.exe After the download is complete, there is no need to perform any additional actions. After downloading, you can double click it to open it without any additional operation.
Please download balena-etcher_1.18.11_amd64.deb. Once the download is complete, please install it by executing the following command in the terminal:
sudo dpkg -i balena-etcher_1.18.11_amd64.deb
-
Open Etcher

-
Open Etcher and click
Flash from fileto select the image to write to.
The downloaded system image is in compressed format. You must decompress it first before using Balena Etcher for image flashing.
-
Click
Select targetto select the device, please select carefully.
-
Click
Flash!Start writing and wait for the write progress bar to complete.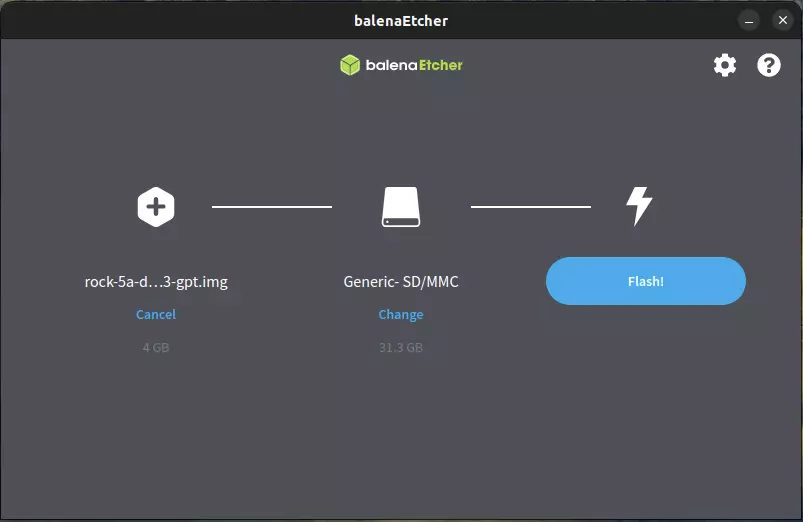
-
When writing the image successfully, Etcher will display
Flash Complete!.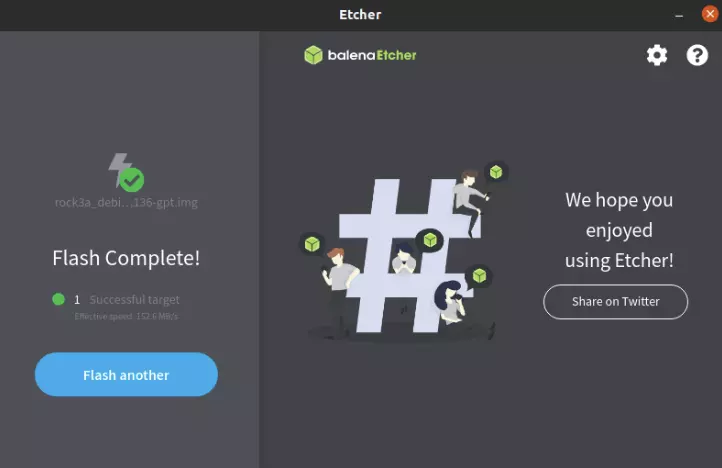
**If there is an error in flashing, please try again. **
- Starting the system
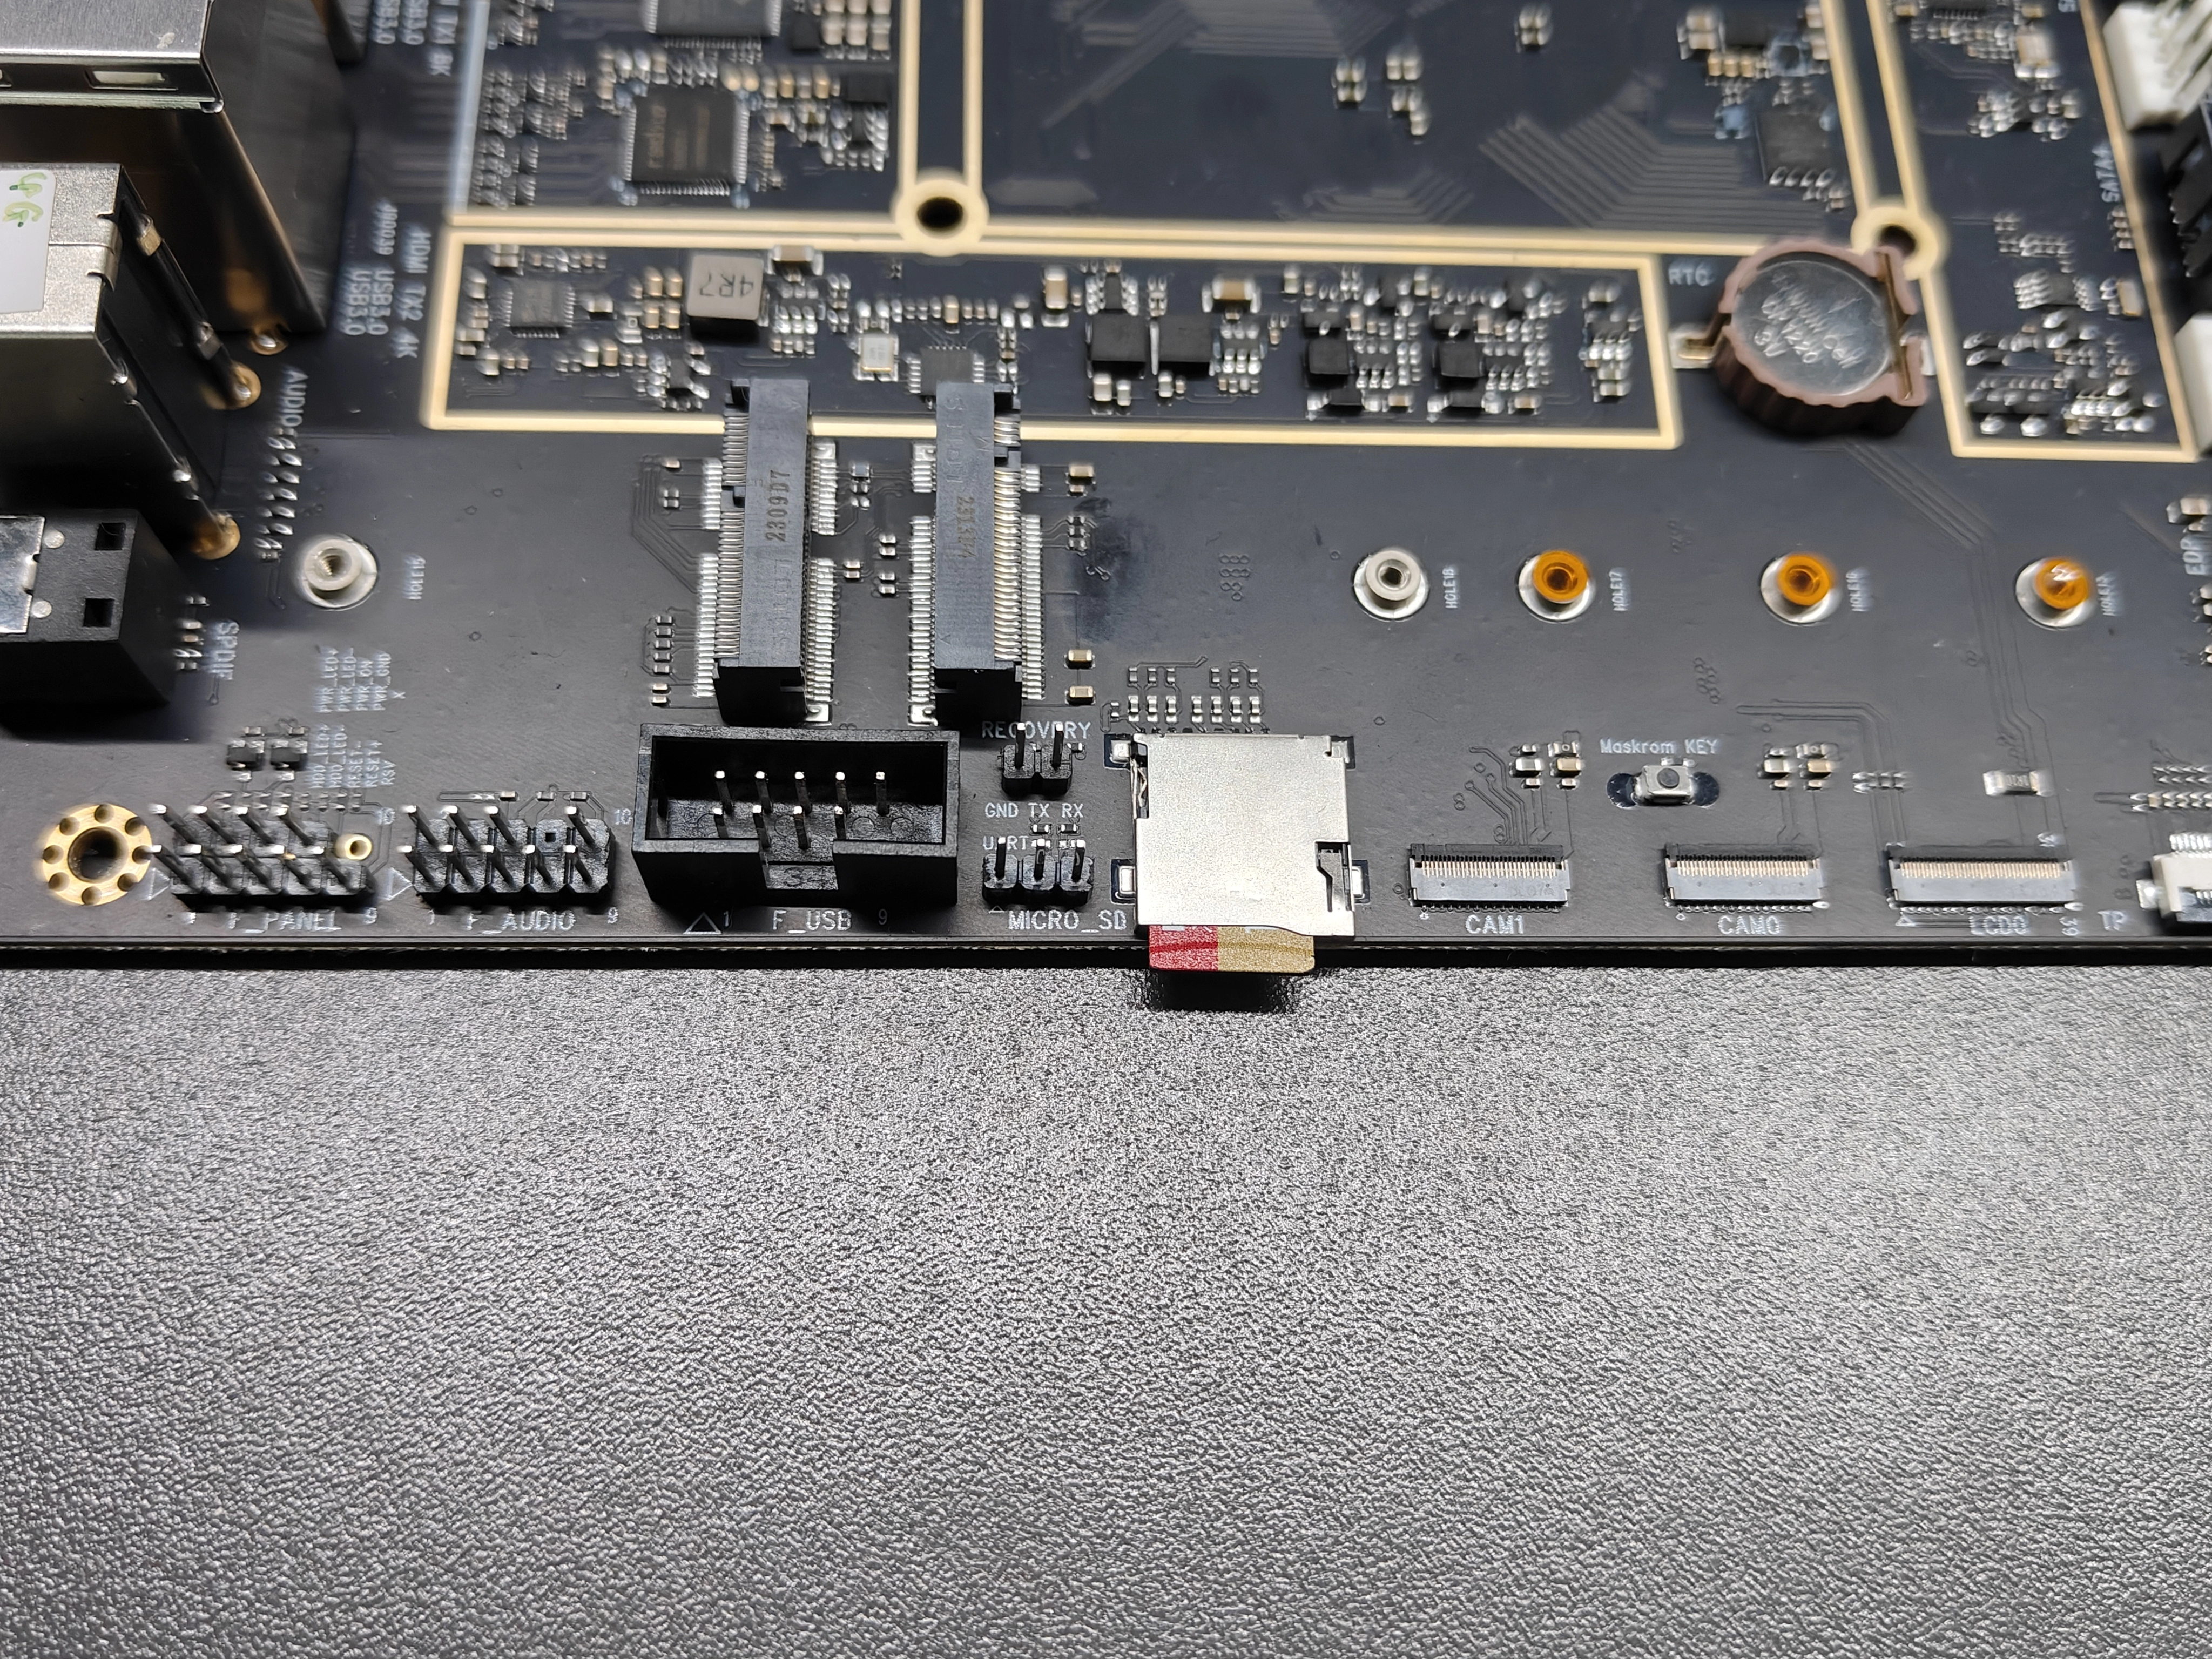
After successfully burning the microSD card according to the above steps,
insert the microSD card into the MicroSD slot of Radxa ROCK 5 ITX(as shown
below), power on the system with the 12V DC power adapter, and
then the system will start booting and HDMI will display the desktop.
- Logging in to the system
After the system has started, log in using the radxa account with the password radxa.
The entire process of powering up the system and booting it up lasts about 53 seconds before it enters the system desktop.