Installing the Operating System
Installing the operating system for the first time
The Radxa X2L doesn't come with a CMOS battery. For the first time power on, the BIOS initializes hardware setting, the red light is on. This will last about 1 minute then X2L will reboot, and the white light is on, and the BIOS boots normally. Without CMOS battery(Type: CR1220), the above will repeat.
Installing the Operating System Using ROOBI OS
If your X2L comes with the ROOBI OS system, you can refer to this document for usage instructions.
Manual Operating System Installation
Creating Installation Media
You'll need to operate on another Windows device.
-
Download the image from the official website
-
Write the image to a USB drive.
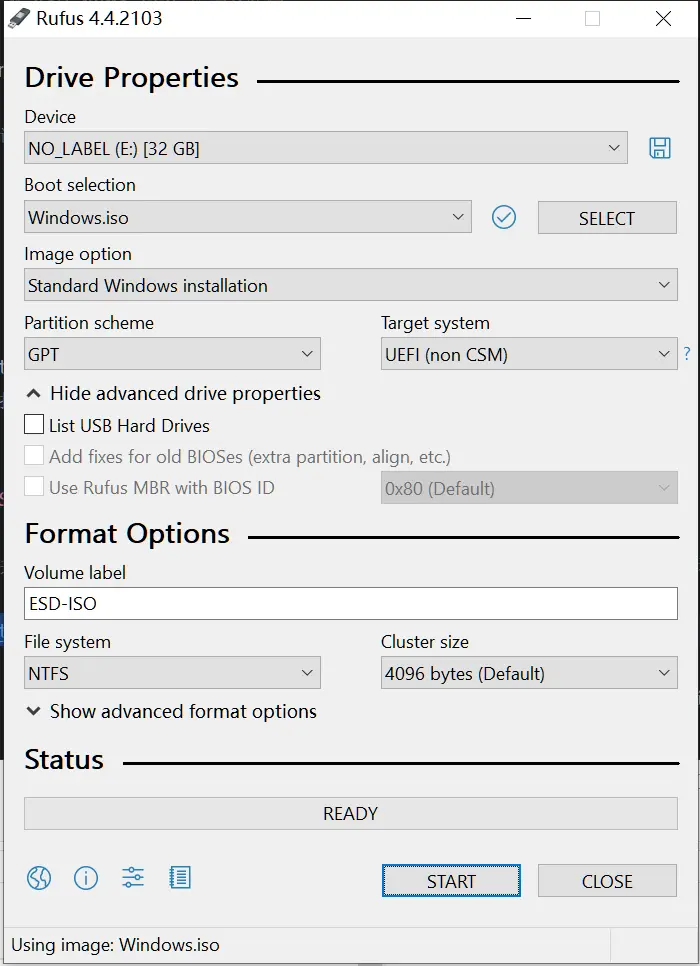
- You can use Rufus to burn the installation image to the USB drive. After selecting the image you downloaded and the device (your USB drive), click Start and patiently wait for the burning process to finish. If all goes well, you have successfully created an installation media.
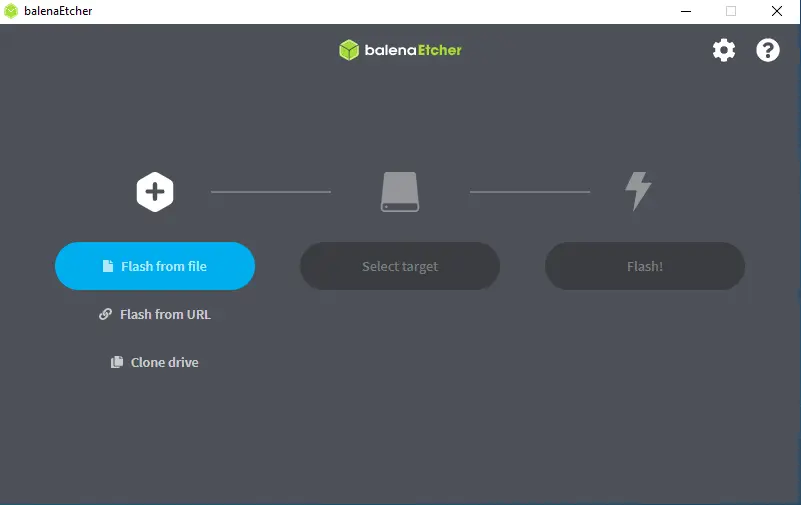
- Alternatively, you can use balenaEtcher to burn the installation image to the USB drive. After selecting the image you downloaded and the target disk (your USB drive), click Flash! and patiently wait for the burning process to finish. If all goes well, you have successfully created an installation media.
Pre-Power-On Operations
- Install to NVMe
- Install to eMMC
Gently insert the NVMe SSD into the corresponding M.2 M Key slot and secure it in place with M2 x 4 flat head screws.
We do not recommend installing the system to eMMC. This will render ROOBI OS unusable.
Insert the USB drive that has been burned into any USB port, preferably a USB 3 port.
Connect the monitor to the motherboard HDMI port using an HDMI cable.
Plug in a mouse and keyboard into any USB port.
Boot to Installation Media
- Install to NVMe
- Install to eMMC
- Power on your device
- Power on your device
- You can choose to perform any of the following:
- Activate eMMC: Before booting up, hold down the eMMC Recovery button and keep it pressed, simultaneously press and immediately release the Power button, and release the eMMC Recovery button when the display lights up.
- Set eMMC activation status
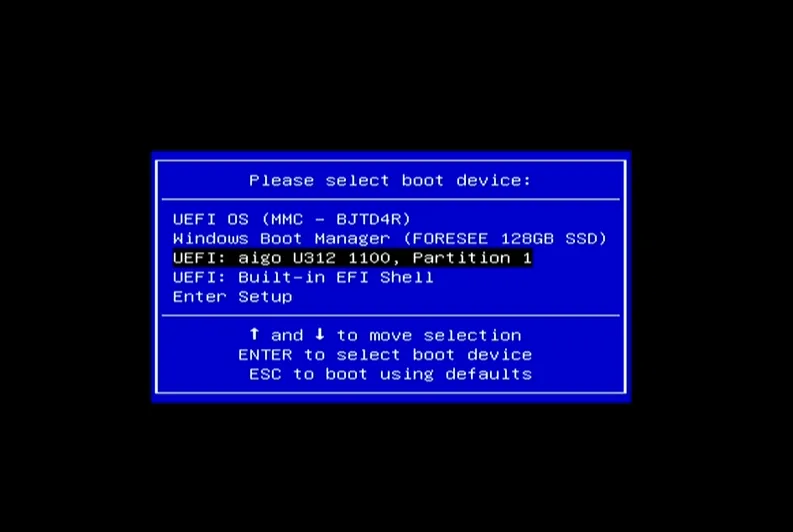
- After the display appears, immediately press
F7to enter the boot selection interface.
-
Select your USB device and press
Enterto choose the corresponding entry to boot the installation image. -
Follow the on-screen prompts to continue with the system installation.
Driver Installation
After manually installing the image, you'll typically need the corresponding drivers. Please refer to Driver Installation.