System installation
Introduces how to install Android os on ZERO 3
Image download
Please go to Resource Download to download the corresponding image file
Install OS
There are two main methods to install the operating system depends on where you want board to boot from.
Boot from SD Card (recommended)
- Install the system image to a microSD card via a card reader
Boot from eMMC OnBoard
- Using a USB cable to write the system image directly to eMMC.
If the board doesn't come with eMMC, you can't boot from eMMC, such as Radxa ZERO 3E.
- Install OS on microSD card
- Install OS on eMMC onboard
Install OS On microSD Card
Preparation
- 1x microSD Card(Capacity size >= 8GB)
- 1x SD card Reader
- 1x 5V Power Supply (Radxa Recommended Radxa Power PD30W)
Install OS
-
Insert microSD Card into SD Card reader, and then insert SD card Reader into PC's USB Port
-
Download Flash tool
Etcher.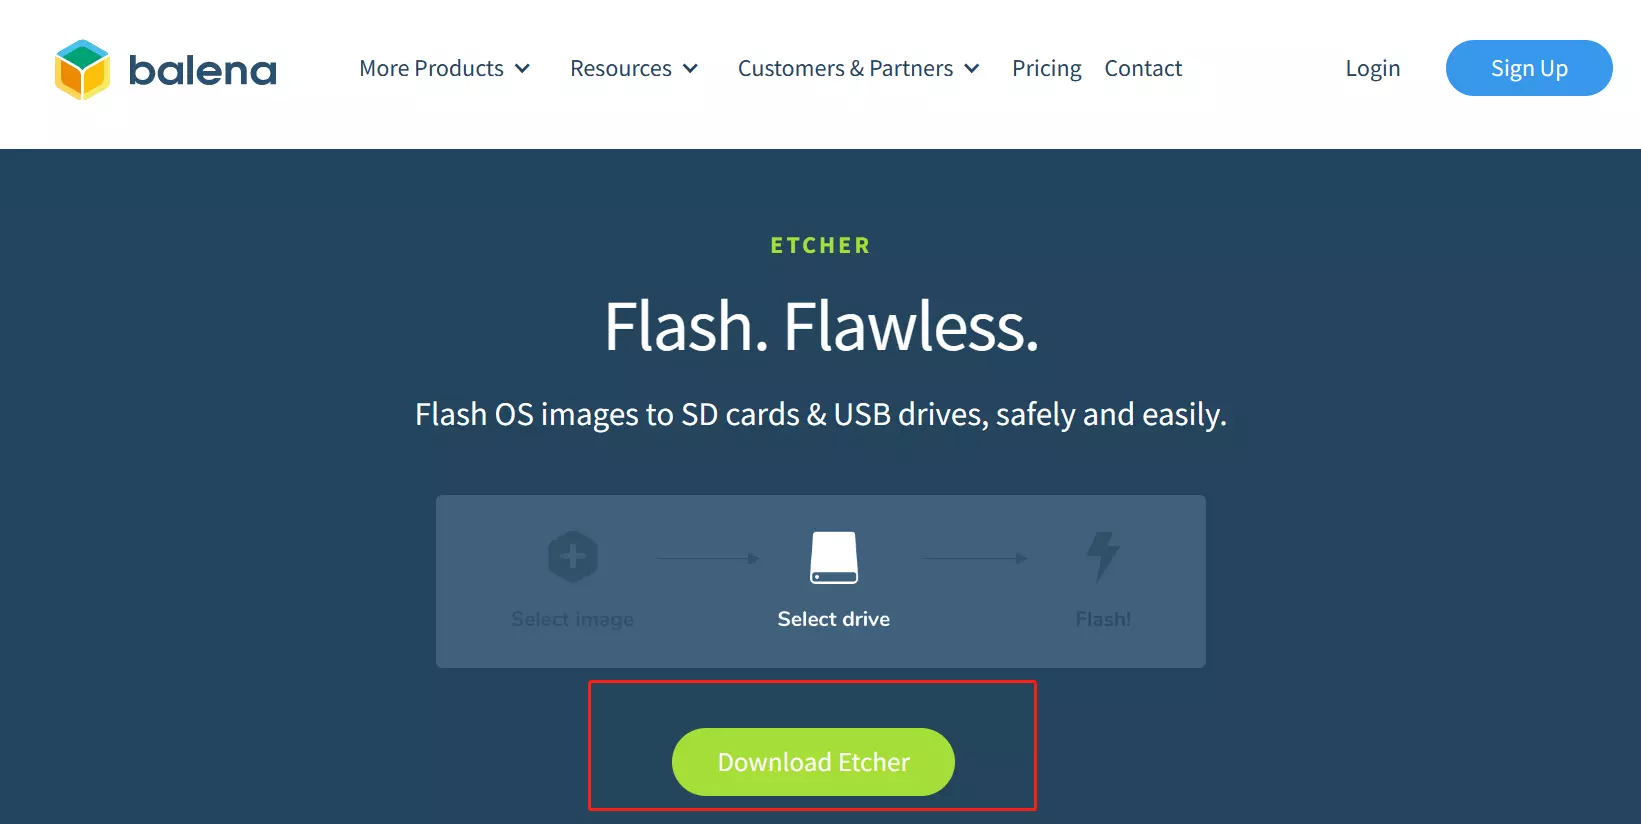
-
Open Etcher and flash the prepared operating system image to the microSD card. In the Etcher window, click
Flash from fileto select the operating system image you just downloaded.
-
In the Etcher window, click
Select target.
-
In the Etcher window, click
Flash!and wait for the flash progress bar to flash.
-
In the Etcher window,
Flash Complete!will be displayed when the flash is successful.
**If there is an error in flashing, please try again. **
Install OS on eMMC OnBoard
Preparation
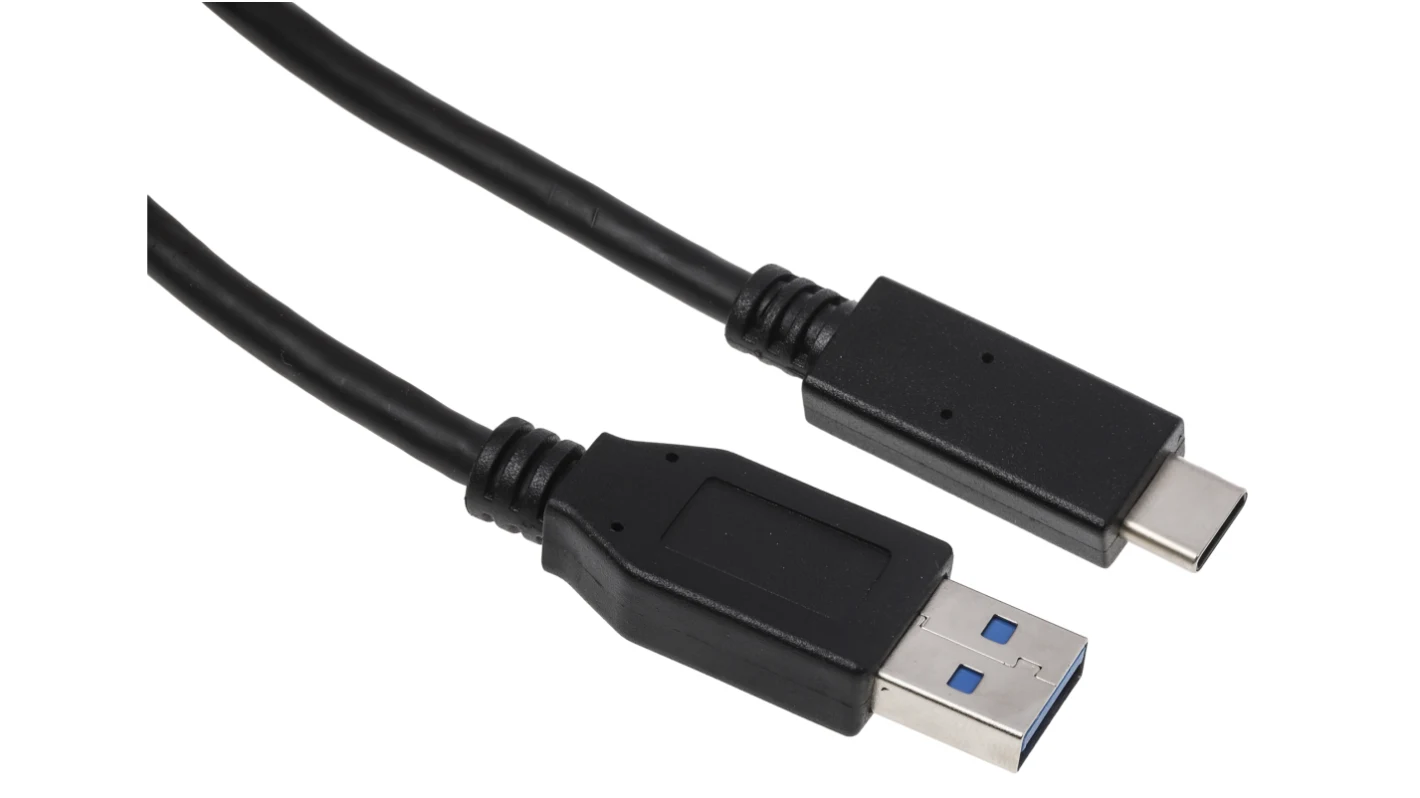
- 1x USB Cable with one end USB C and one end USB A.
- 1x 5V Power Supply. Radxa Recommended Radxa Power PD30W.
Install OS
Enter MaskRom
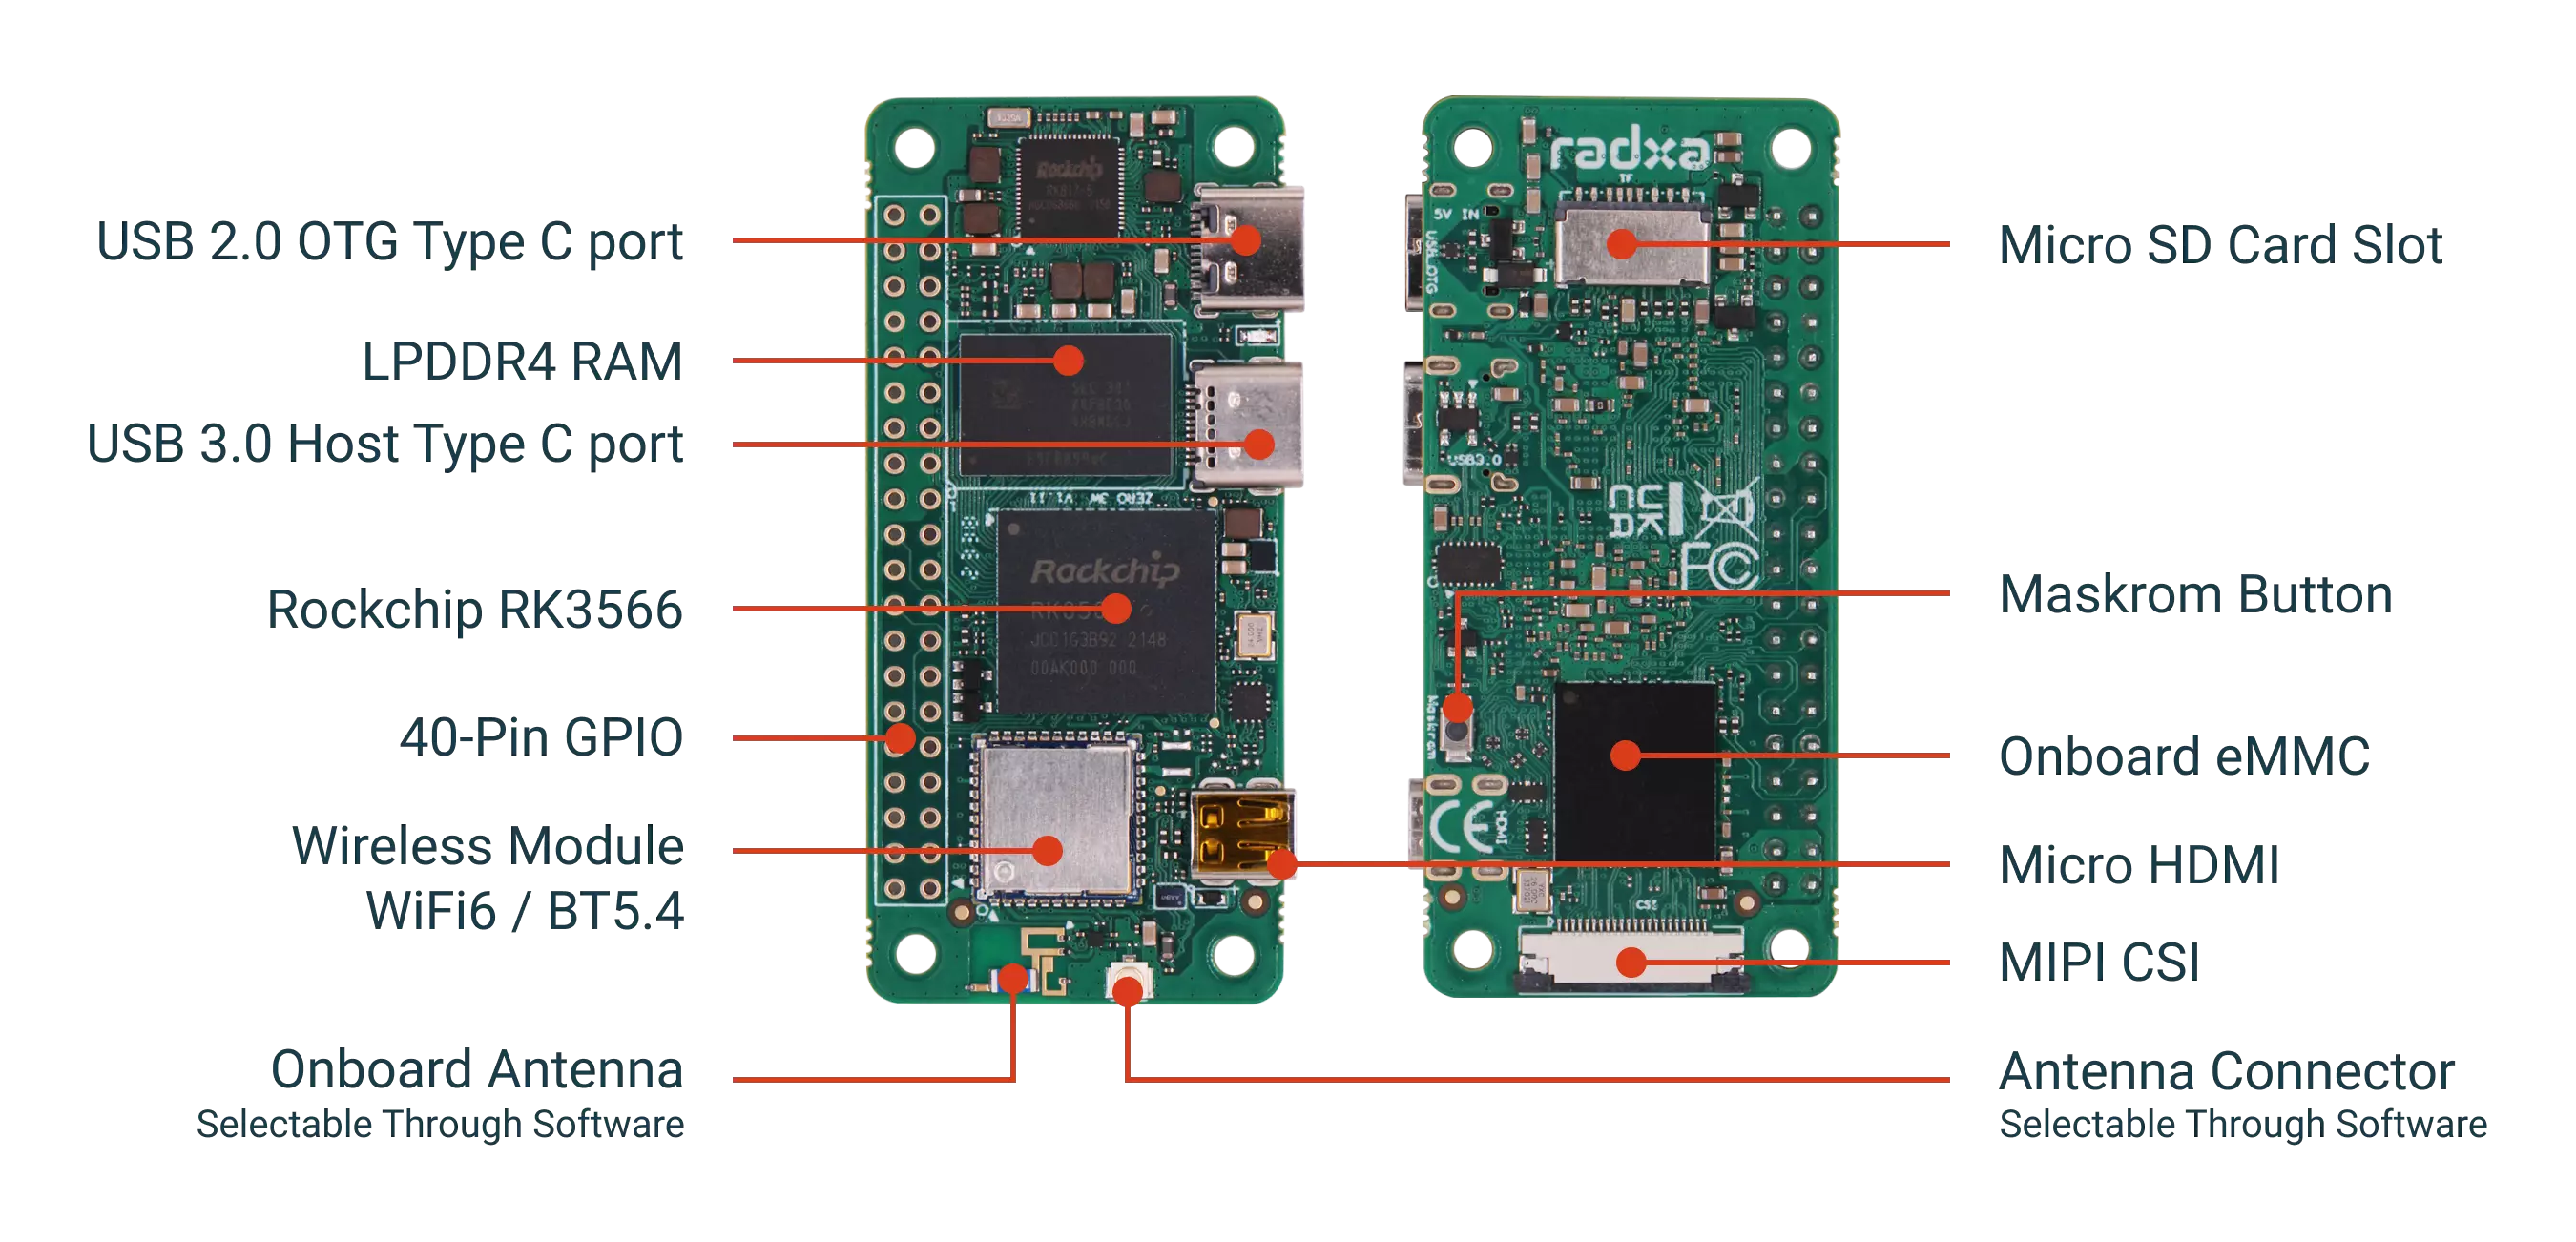
Press the Maskrom Button, and then connect the ZERO 3W's OTG Type C port to the PC's USB port, then release the Maskrom Key.
My PC is Windows
My PC is Linux / macOS
Install OS via upgrade_tool(Install OS on Multiple devices at the same time)
Boot the system
Boot from SDcard
- Insert the SDCard (System OS inside) on the board's sdcard slot, and power the board via USB 2.0 OTG Type C port. Then board will start up with the led blink.
Boot from eMMC
- Power the board via USB 2.0 OTG Type C port. Then board will start up with the led blink.
Radxa ZERO 3 only supports 5V power supply.Radxa Recommended Radxa Power PD30W.