PCIe B Key
The following is the procedure of ROCK 3B using the Mobile LTE EM05-CE module.
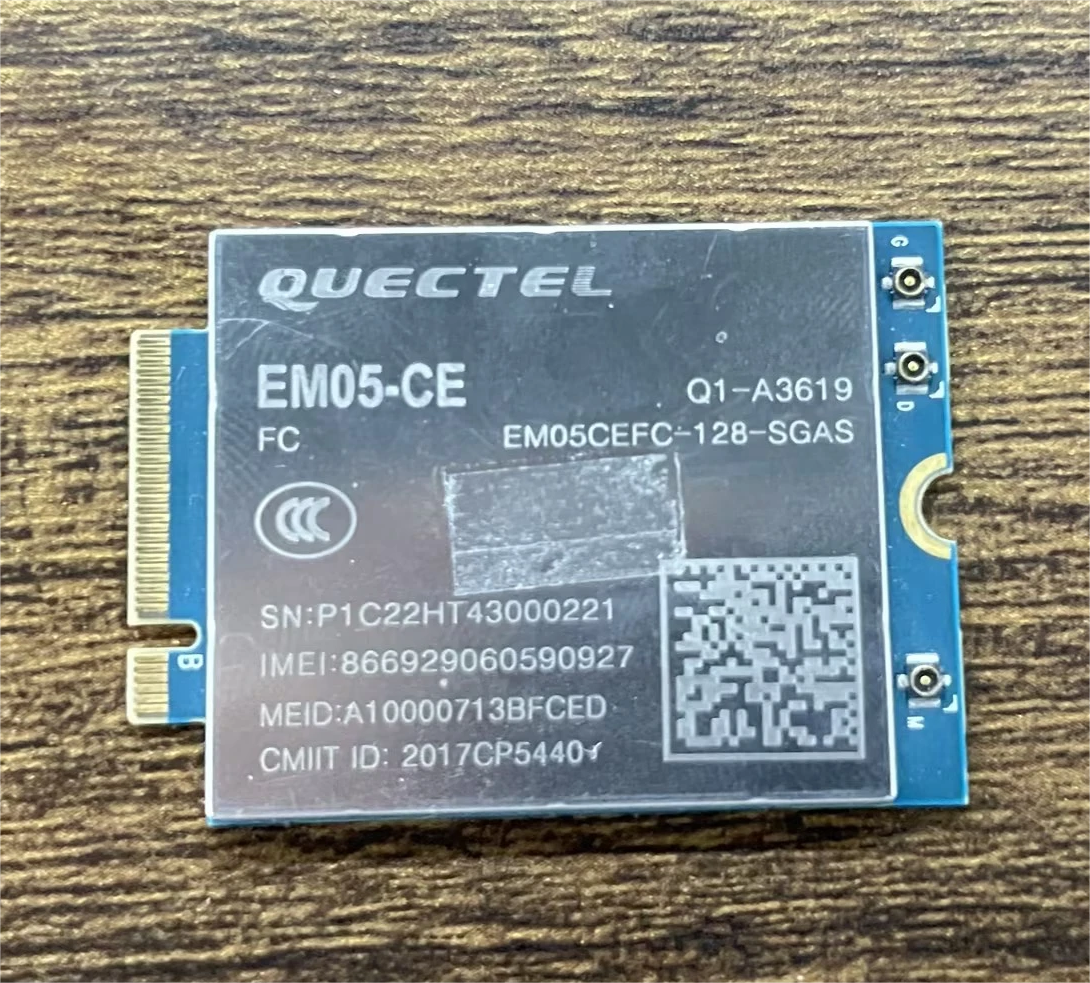
Quectel LTE EM05-CE Physical Image
-
The 4G module demonstrated here is: Quectel EM05-CE
Connecting Peripherals
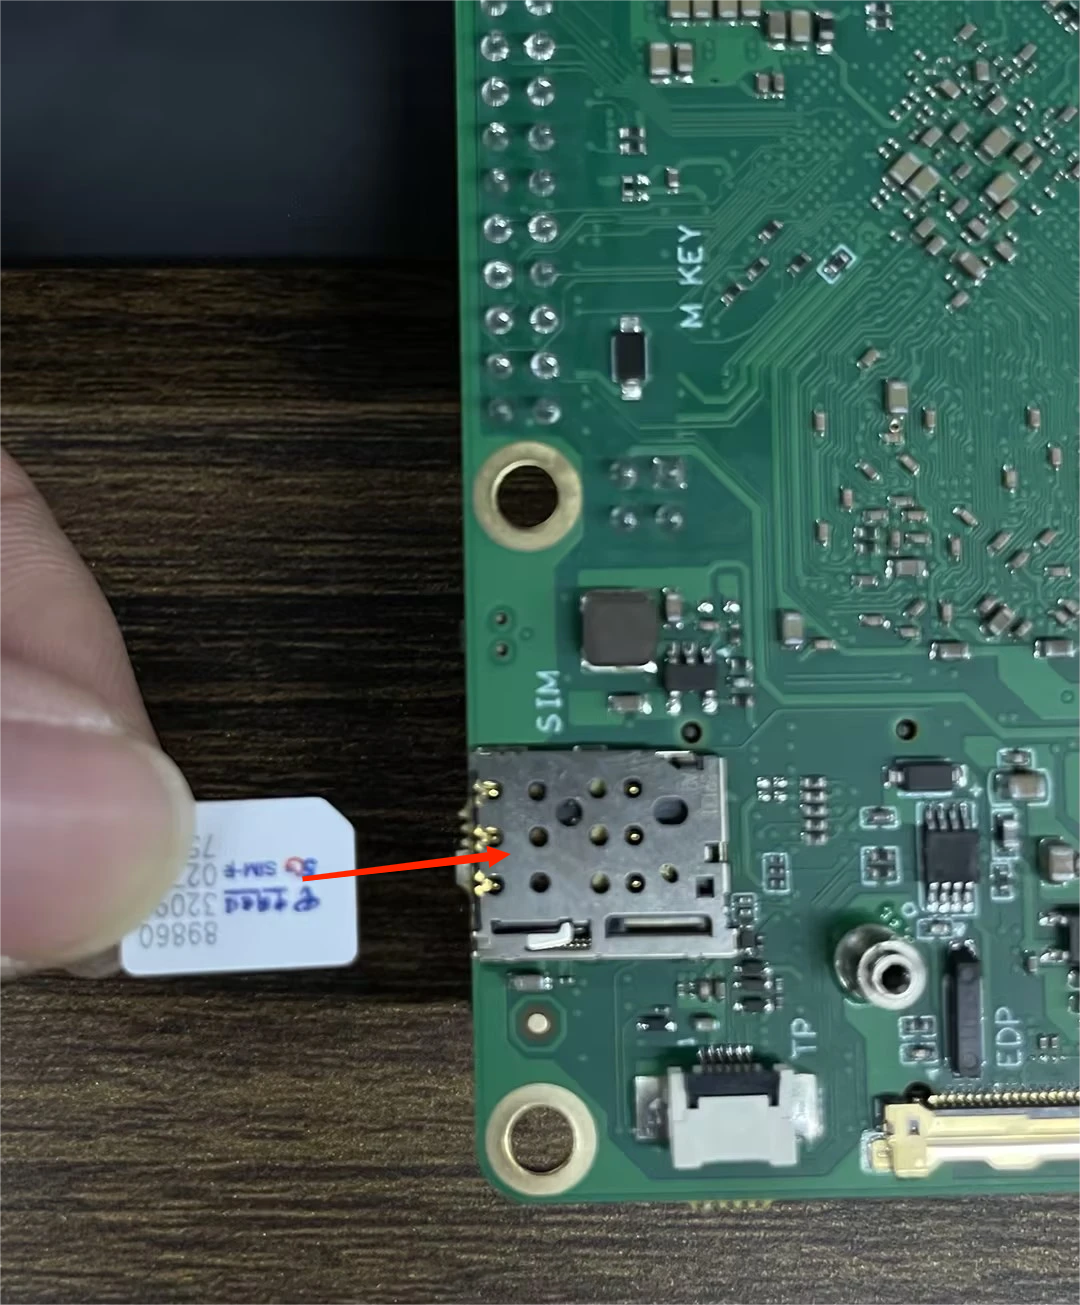
First of all, you need to plug the Quectel LTE EM05-CE into the B-key connector of ROCK 3B and insert the SIM card.
-
The installation position is as shown in the figure:
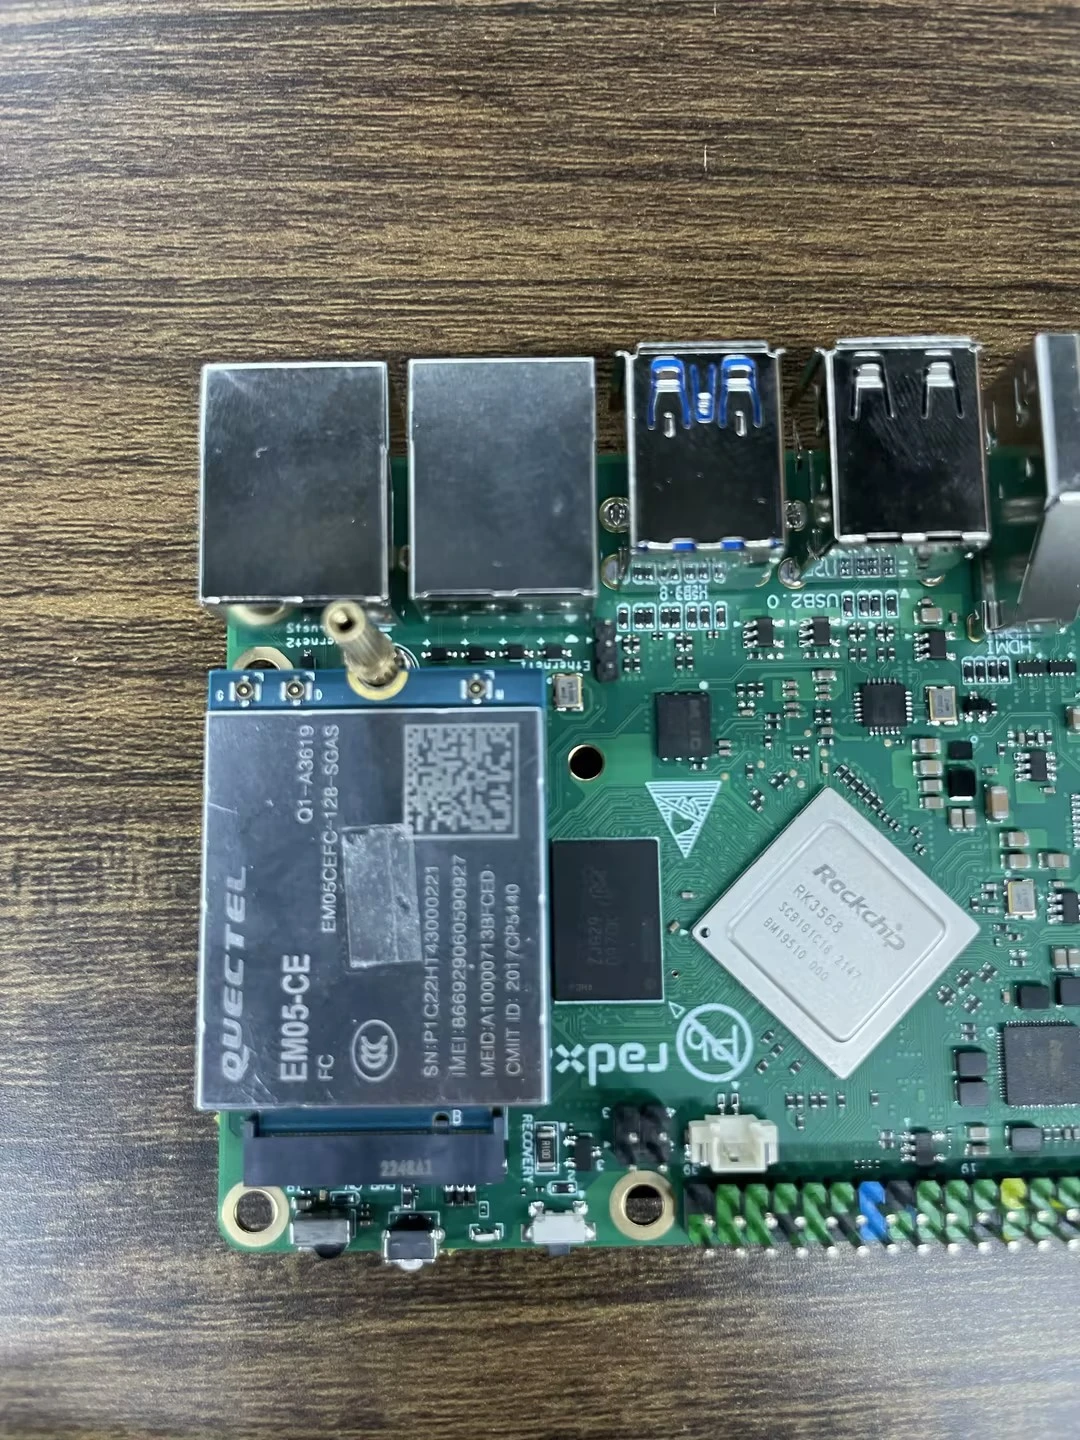
-
The SIM card slot location and insertion direction is shown in the figure:
You can check if the device is connected with the following command:
radxa@rock-3b:~$ lsusb | grep -i Quectel Bus 002 Device 002: ID
2c7c:0125 Quectel Wireless Solutions Co. EC25 LTE modem
The modem usually communicates with the host via the serial port. Please check that the system enumerates the corresponding serial devices correctly:
radxa@rock-3b:~$ ls /dev/ttyUSB*
/dev/ttyUSB0  /dev/ttyUSB1  /dev/ttyUSB2  /dev/ttyUSB3
Installing related software
Execute the following commands in the terminal to install dial-up related software:
sudo apt update
sudo apt install ppp picocom net-tools
Testing the modem with the at command
First, open the serial port with picocom:
sudo picocom -b 115200 /dev/ttyUSB3
After the programme has started, the modem status can be checked by entering the following at command:
at+cpin?
+CPIN: READY

OK  #Check if the SIM card is in place

at+csq
+CSQ: 31,99

OK  #Detects signal, 99 means no signal.

at+cops?
+COPS: 1,0,"CHN-UNICOM",7

OK  #View Operator

at+creg?
+CREG: 0,1

OK  #Get the registration status of the mobile phone (0,1: indicates that the registration is normal)

at+qeng="servingcell"
+QENG: "servingcell","NOCONN","LTE","FDD",460,01,19A358C,366,100,1,5,5,774E,-108,-5,-83,9,13

OK  #Displays the signal strength and quality of the currently connected service cell
If the modems all return to normal, use the Ctrl+A Ctrl+X key combination to exit picocom.
Dial-up via `ppp'
In a terminal, execute the following command to switch to the peers directory and add the ppp dial-up configuration script.
sudo su
cd /etc/ppp/peers
Use the vi editor to add the first script file, rasppp, which looks like this:
# Hide password when connecting for debugging
hide-password

# Don't need authentication for this phone
noauth

# For call control scripts
connect '/usr/sbin/chat -s -v -f /etc/ppp/peers/rasppp-chat-connect'

# for disconnect scripts
disconnect '/usr/sbin/chat -s -v -f /etc/ppp/peers/rasppp-chat-disconnect'

# Debugging information
debug

# 4G module
/dev/ttyUSB3

# Serial baud rate
115200

# Use default route
defaultroute

# Do not use default IP
noipdefault

# do not use PPP compression
novj
novjccomp
noccp
ipcp-accept-local
ipcp-accept-remote
local

# It is best to lock the serial bus by creating a lock file so that other programs will know that the corresponding serial port is already in use once they discover the existence of this file.
lock
dump

nodetach

# username password (configuration varies by operator)
user [email protected]
password vnet.mobi

# hardware control flow
crtscts
remotename 3gppp
ipparam 3gppp

# Set the usepeerdns parameter if you want to use the DNS negotiated on the server side.
usepeerdns
Add a second script, rasppp-chat-connect, which looks like this:
TIMEOUT 15
ABORT "BUSY"
ABORT "ERROR"
ABORT "NO ANSWER"
ABORT "NO CARRTER"
ABORT "NO DIALTONE"

""AT
OK \rATZ

ok \rAT+CGDCONT=1, "ip",""

ok-at-ok atdt#777
CONNECT \d\c
Add a third script file rasppp-chat-disconnect with the following script:
ABORT "ERROR"
ABORT "NO DIALTONE"
SAY "\NSending break to the modem\n"

""\k""

""+++ATH""
SAY "\nGood bye ! \n"
After adding the above three script files, you can now try dialling using ppp:
sudo pppd call rasppp & # dialling in the background
The complete dialling process is shown in the image.
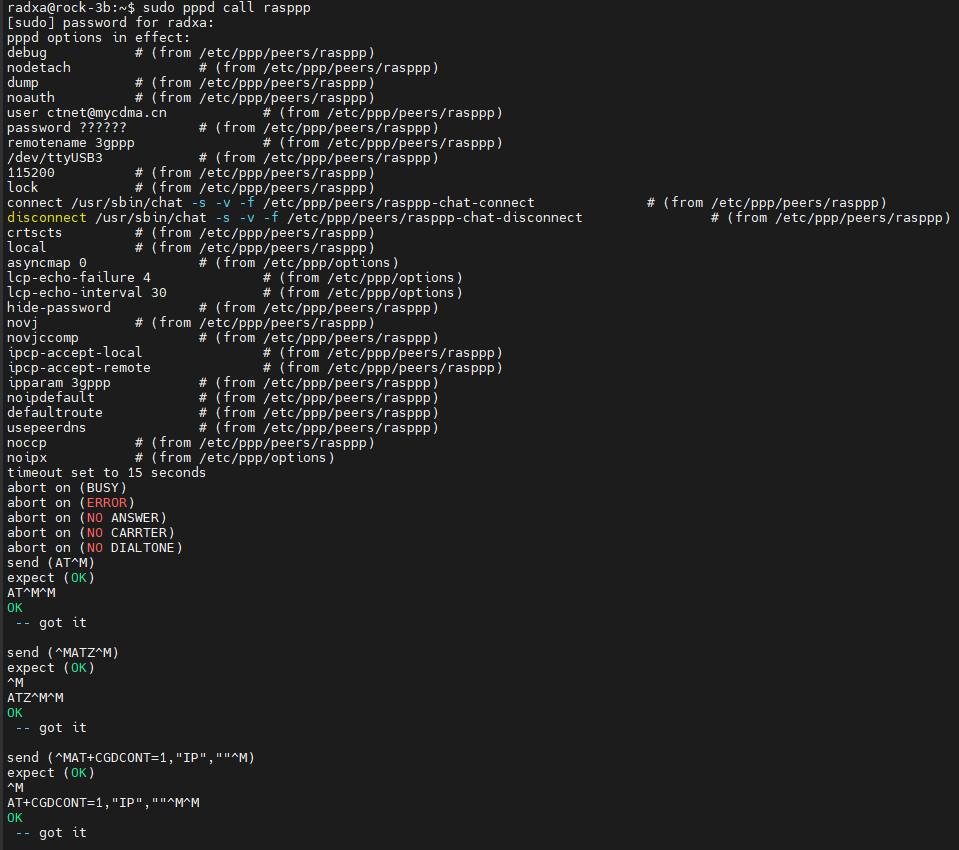
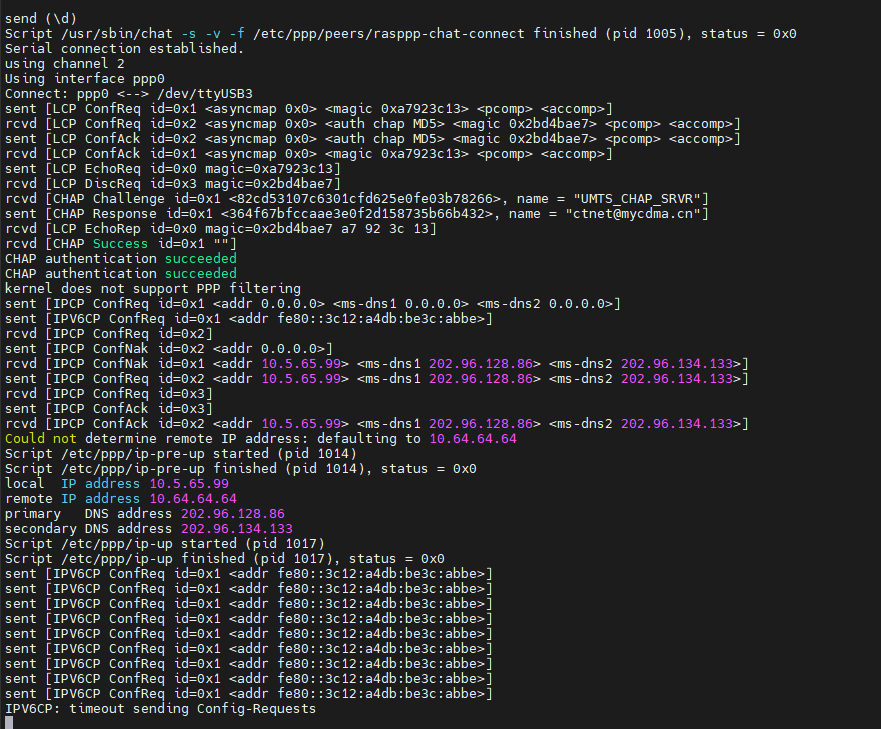
From the output of the program we can get the following information:
- local IP address: `10.5.65.99
- Primary DNS server:
202.96.128.863. Secondary DNS server:10.5.65.994. - Secondary DNS server:
202.96.134.133.
We can now configure the network based on the above information:
sudo ip route add default via 10.224.236.90 # configure the gateway
echo "nameserver 120.80.80.80" | sudo tee -a /etc/resolv.conf # configure primary DNS
echo "nameserver 221.5.88.88" | sudo tee -a /etc/resolv.conf # Configure secondary DNS
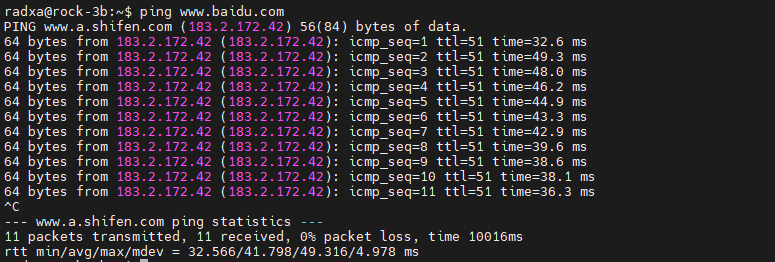
You can now use the ping command to check if you are connected to the Internet:
Troubleshooting
- My system does not list USB serial devices.
Please check if the corresponding driver is included in your current running system. You can run the following command to check:
radxa@rock-3b:~$ lsmod | grep usb
usb_wwan 20480 1 option
usbserial 36864 2 usb_wwan,option