Setting everything up
Before you use RACK 5A, please familiarize yourself with the interface of the device so that you can use it better.
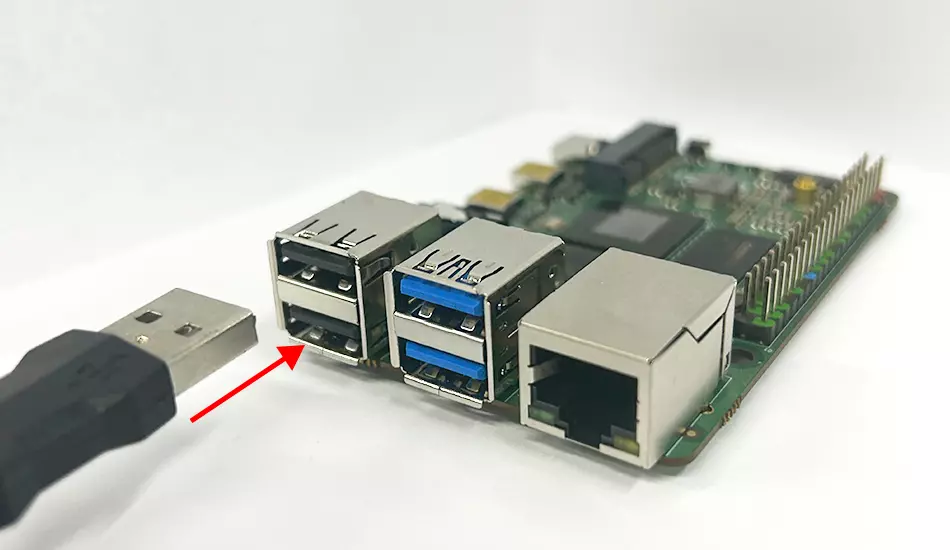
USB interface
ROCK 5A provides two USB 2.0 and two USB 3.0 ports. You can choose a mouse or a keyboard as an input device.
The installation method is shown in the picture: you just need to align the USB port of the mouse with the USB port of ROCK 5A and insert it.
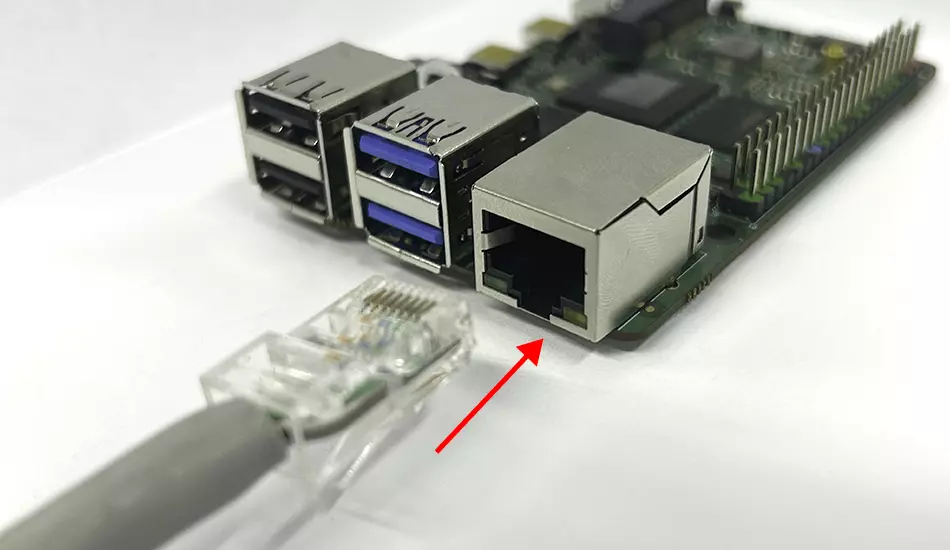
Ethernet port
If you are using wired Internet access, align the network cable with the GbE port on the ROCK 5A and plug it in.
 The following results will be displayed.

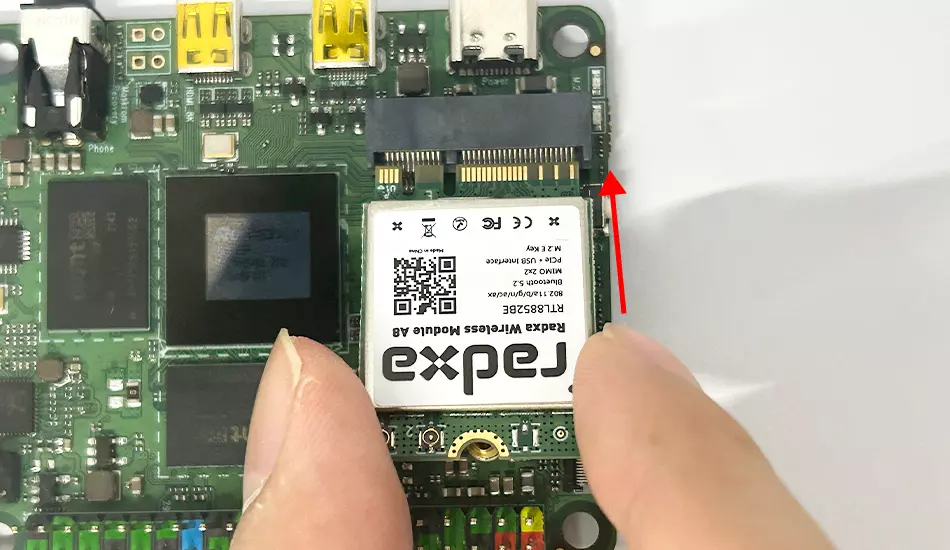
Connect wireless module with M.2 E key interface
If you have wireless Internet access, you can plug in the WIFI module through the M.2 E Key port.
Radxa recommends using Radxa Wireless Module A8.
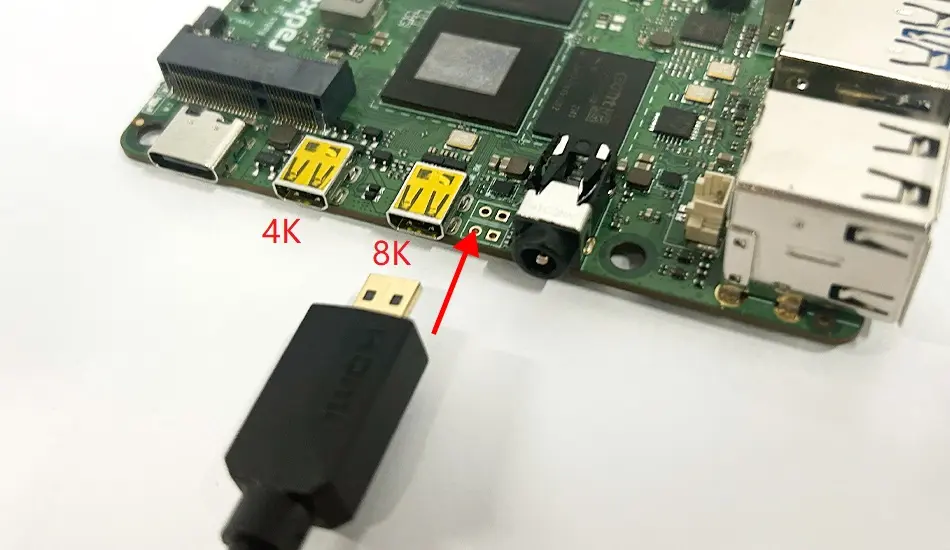
Micro HDMI
ROCK 5A provides 2 Micro HDMI ports.
Micro HDMI to HDMI cable required.

- To use 8Kp60, please select an HDMI port that supports 8Kp60. The 8Kp60 micro HDMI interface is close to the Headphone interface;
- To use 4Kp60, please select an HDMI port that supports 4Kp60. The 4Kp60 micro HDMI interface is close to the USB Power port;
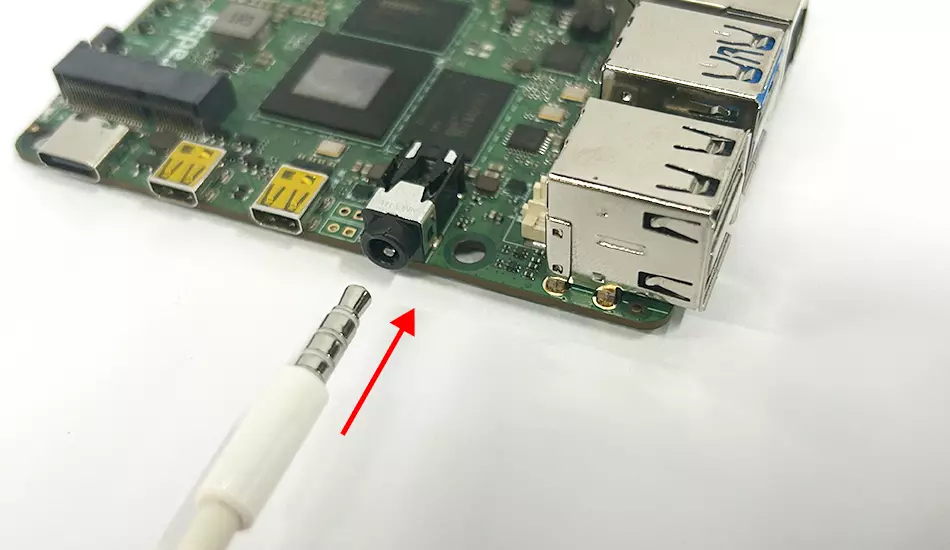
Headphone interface
ROCK 5A offers a Headphone and you can connect the headphone to the headphone port in ROCK 5A as shown in the picture.
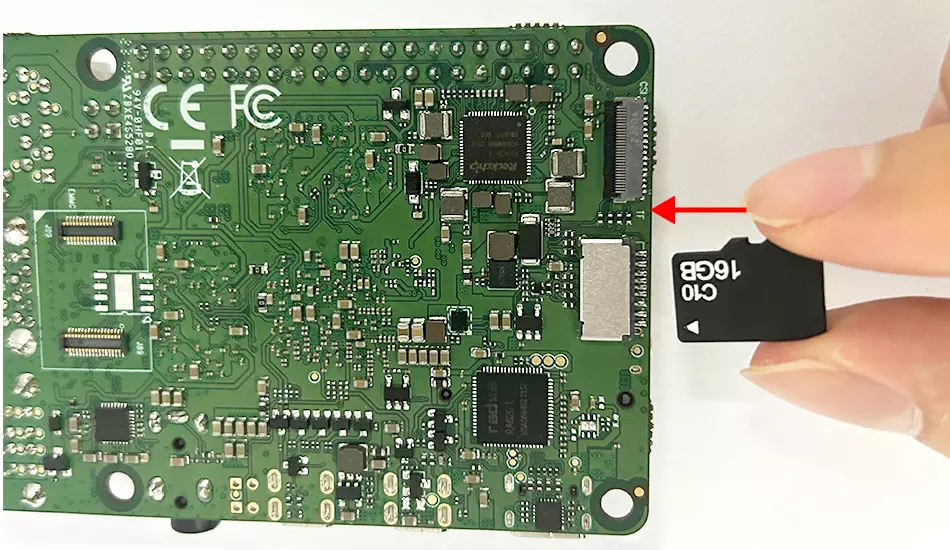
SD card
The SD card slot is on the back of the ROCK 5A. When installing the SD card, please note that the pins of the SD card are close to the surface of the PCB board. Ensure that the direction is not reversed, as shown in the picture for reference.
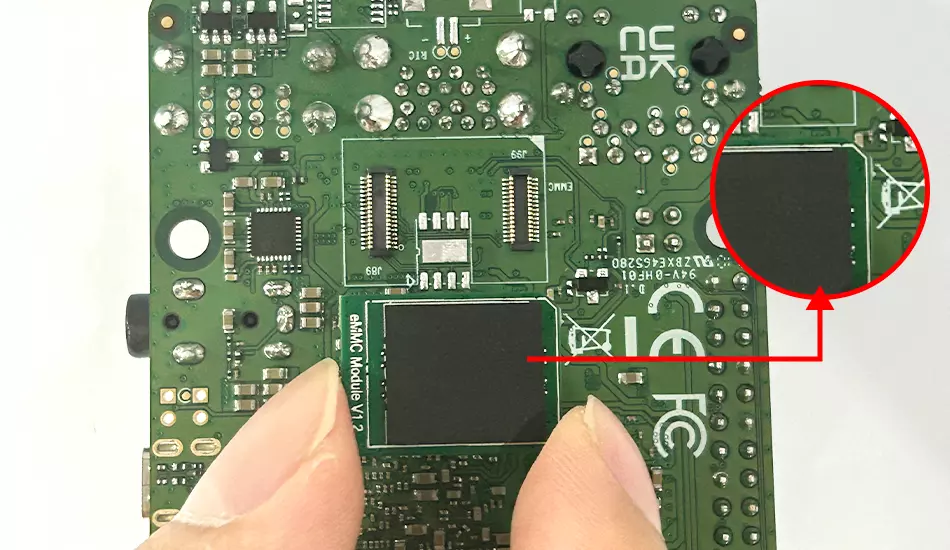
eMMC Module & SPI Flash Module
ROCK 5A provides a high-speed B2B interface for eMMC / SPI Flash, which can be used for operating system and data storage. When you receive ROCK 5A, ROCK 5A is installed with SPI Flash, you need to remove the SPI Flash before you install eMMC. Both eMMC and SPI Flash use B2B connectors, and they can be aligned with the B2B connection interface of ROCK 5A for installation. When installing, please align the missing corner of the module with the pattern area on the PCB, as shown in the figure:
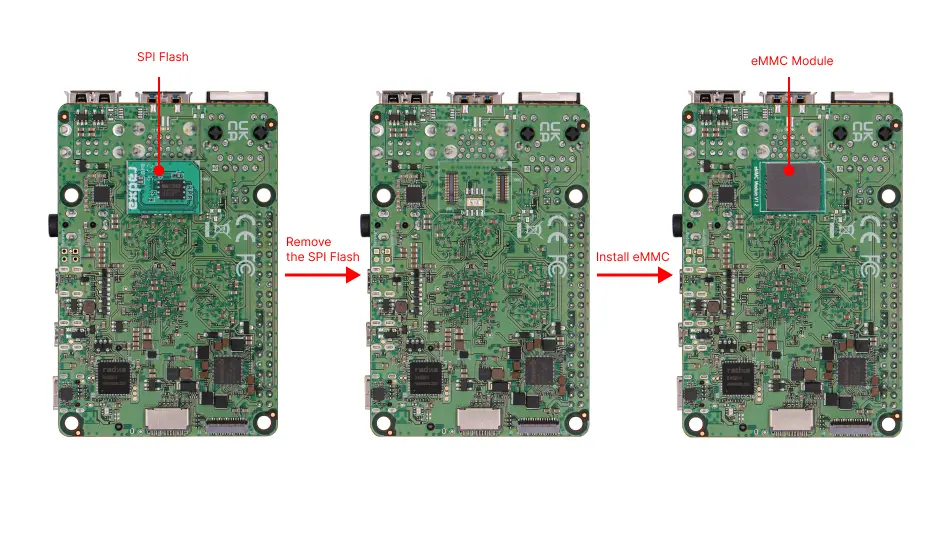
Radxa recommends using Radxa eMMC Module
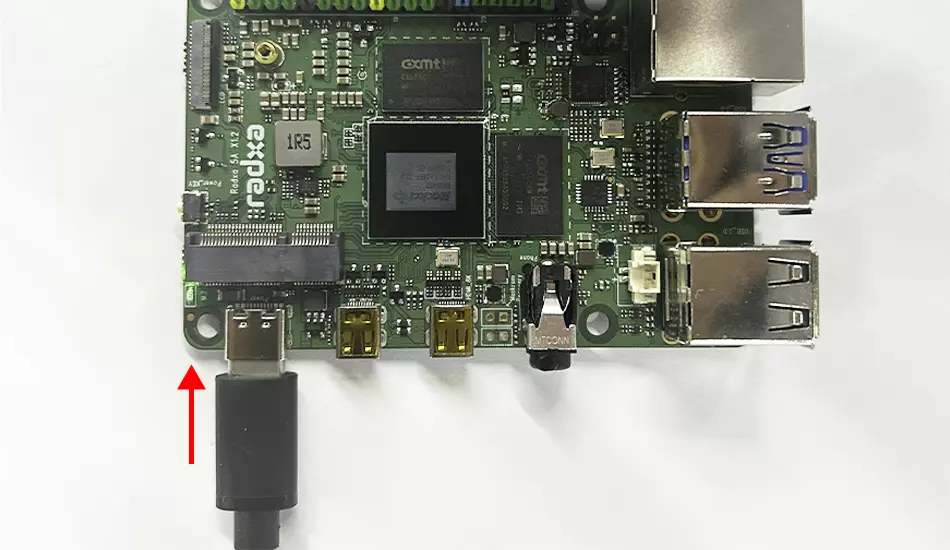
USB Power
Finally, plug in the power and start it up. The power interface of RACK 5A is type-c.
- When the device is off, press the power button and the device will turn on. When working, the power green light will stay on and the status blue light will flash.
- When the device is off or sleeping, the power green light and status blue light will be turned off.
If the device still cannot work after checking the power, please contact us.