Install OS
This document describes how to install an Android image to the ROCK 5B/5B+.
ROCK 5B/5B+ can be booted from microSD card or EMMC, depending on the boot method, the system will be installed on different media.
Erase SPI Flash
Before using a microSD card/eMMC to boot an SBC with SPI Flash, If there is data in SPI Flash, the SPI Flash needs to be erased. Refer to Erase SPI Flash
When will SPI FLASH have data?
There are generally two scenarios where data will be written:
- Flash image in MaskROM Mode Without Pressing the MaskROM Button
In the case where both the eMMC and SPI Flash are empty, the board enters Maskrom mode for writing an image to the onboard eMMC via the USB interface. If the specific Maskrom button is not pressed during Maskrom mode, the system will automatically write the data (such as an operating system image) to the SPI Flash instead.
- Intentional writing, e.g., Booting from NVMe
For scenarios where an NVMe drive is needed to boot the system, the SPI Flash image must first be programmed.
Installation System
- Install system to microSD card
- Installing the system to eMMC
- Install system to NVME
Preparation
- 1x microSD card (capacity >=8GB)
- 1x microSD card reader
- 5V power adapter (Recommended Radxa Power PD30W)
Image Download
Please go to Resource Download to download the corresponding image file.
Install the system
Balena Etcher is a cross-platform and user friendly image file burning tool that we recommend you use.
- Download Etcher and install it.
- Windows
- Linux
Please download balenaEtcher-Setup-1.18.11.exe After the download is complete, there is no need to perform any additional actions. After downloading, you can double click it to open it without any additional operation.
Please download balena-etcher_1.18.11_amd64.deb. Once the download is complete, please install it by executing the following command in the terminal:
sudo dpkg -i balena-etcher_1.18.11_amd64.deb
-
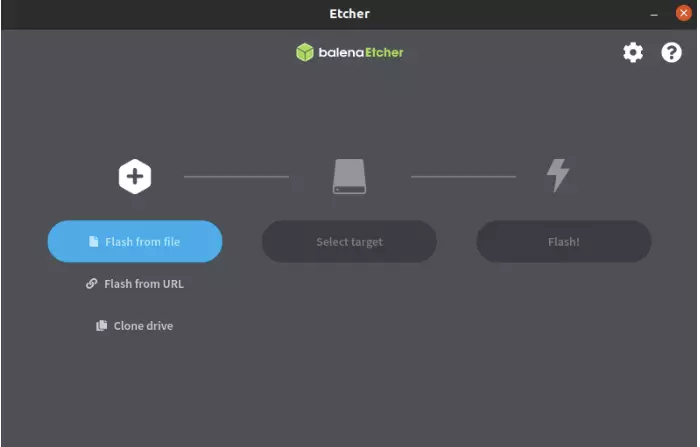
Open Etcher
-
Open Etcher and click
Flash from fileto select the image to write to.
-
Click
Select targetto select the device, please select carefully.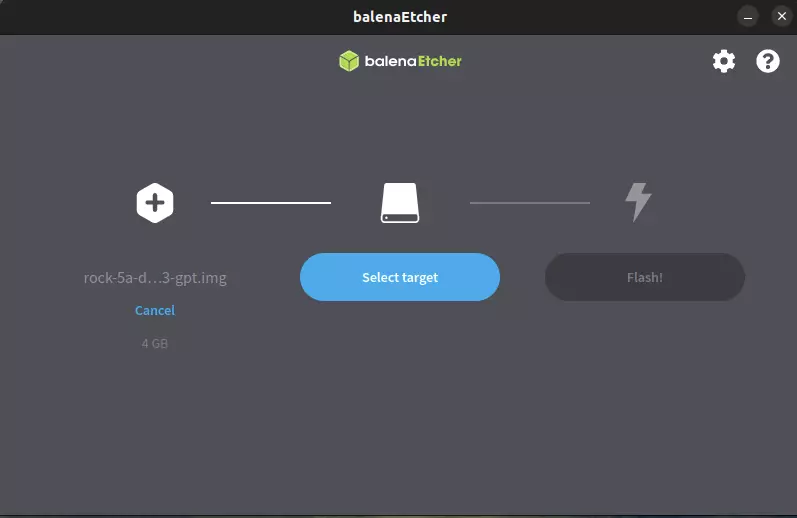
-
Click
Flash!Start writing and wait for the write progress bar to complete.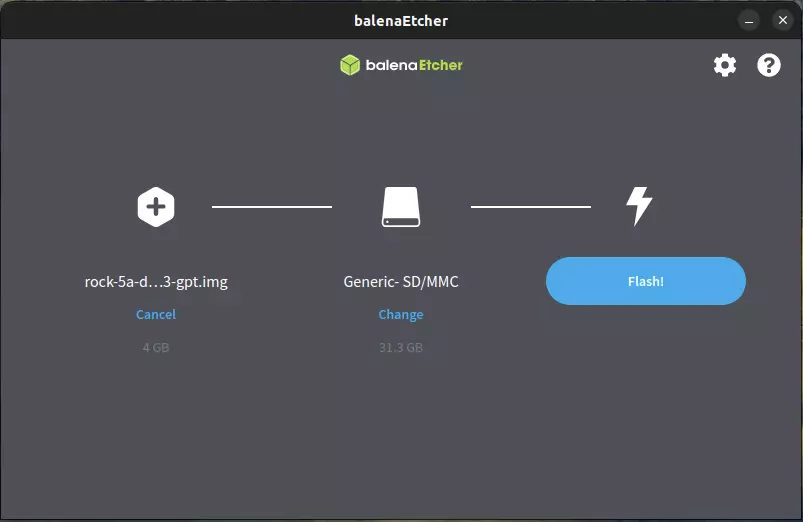
-
When writing the image successfully, Etcher will display
Flash Complete!.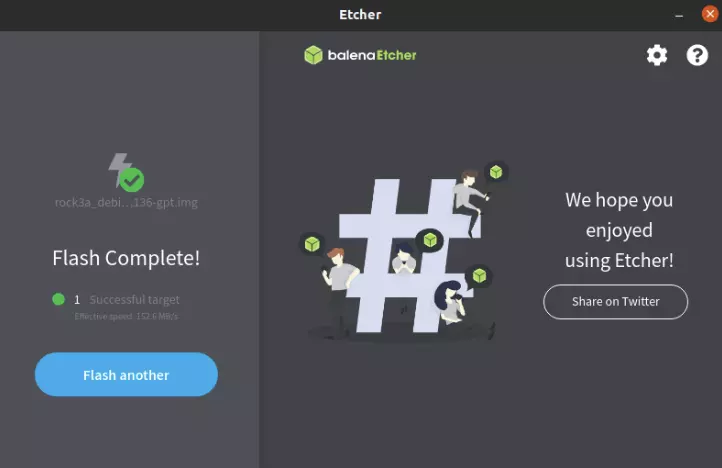
If there is an error in flashing, please try again.
Boot the system
- After successfully burning the microSD card as described above, insert the microSD card into the microSD slot of Radxa ROCK 5B/5B+.
- The power supply interface of Radxa ROCK 5B is USB 2.0 OTG Type C port, please connect the power supply port and the adapter with Type-C cable.
The ROCK 5B/5B+ supports USB Type-C PD 2.0 at 9V/2A, 12V/2A, 15V/2A and 20V/2A. Radxa recommends using the Radxa Power PD30W.
Reference Documentation
Preparation
- 1x USB Type-A to Type-C cable
- x86 PC
- rock5b/5b+
- EMMC Module
Download the image
Please go to Resource Download to download the corresponding image file.
System Installation
- Linux
- Mac
- Windows
Starting the ROCK 5B/5B+
- Power up the ROCK 5B/5B+ via the adapter.
- The ROCK 5B/5B++ will start up with the green power LED on.
Prepare installation media
- Type-C to Type-A USB connector cable
- 1x NVME ssd (M.2, FAT32 Format)
- 12V Power Supply
Download the image
Please go to Resource Download to download the corresponding image file.
System Installation
Install the system
- Linux(Rock 5B)
- Mac(Rock 5B)
- Windows(Rock 5B/5B+)
Linux systems are written using rkdeveloptool
Mac systems are written using rkdeveloptool
Install RKDevTool
RKDevTool is Rockchip's software for USB burning on Windows platform. If RKDevTool is not installed on your Windows host, please follow the steps below to install it.
Please download and extract the following files to install RKDevTool:
- RKDevTool v2.96 (Includes Chinese documentation)
- DriverAssistant v5.0
Installation of drivers
Download and unzip DriverAssistant, then execute DriverInstall.exe and click the Install Driver button to install the driver.
If you have already installed another version of driver, please click Uninstall Driver to uninstall the driver first, and then reinstall it again.
Install RKDevTool
unzip RKDevTool_Release_v2.96_zh.zip ,click RKDevTool.exe to open.
Enter Maskrom mode
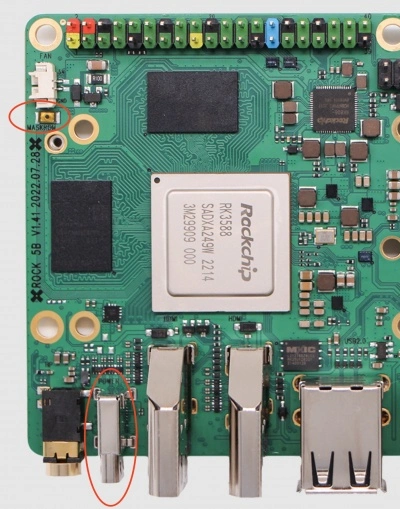
- ROCK 5B
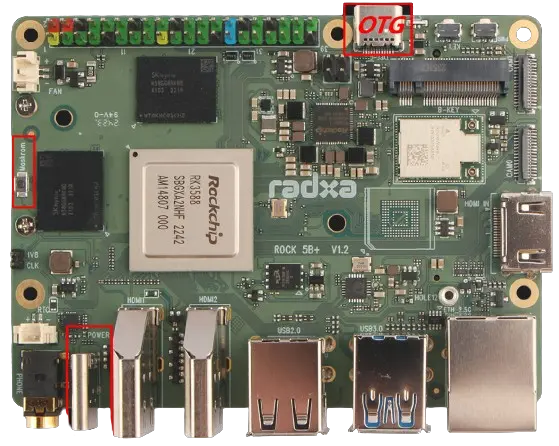
- ROCK 5B+
- Unplug the microSD card and power cable
If you need to burn the system to EMMC or NVME, please install them to the corresponding ports on the board at this time.
- Keep pressing Maskrom button
Plug the USB A-C cable into the Type-C port of the ROCK 5B, and the other end into the computer, then it will enter the Maskrom state under normal circumstances.
- Release the Maskrom button
- PC to see if there is a USB device
- Linux/macOS: Check if "Bus 001 Device 112: ID 2207:350a Fuzhou Rockchip Electronics Company" is displayed after executing lsusb.
- Windows: Open RKDevTool and you will see the device in "maskrom mode".
Follow the steps below to flash the operation image
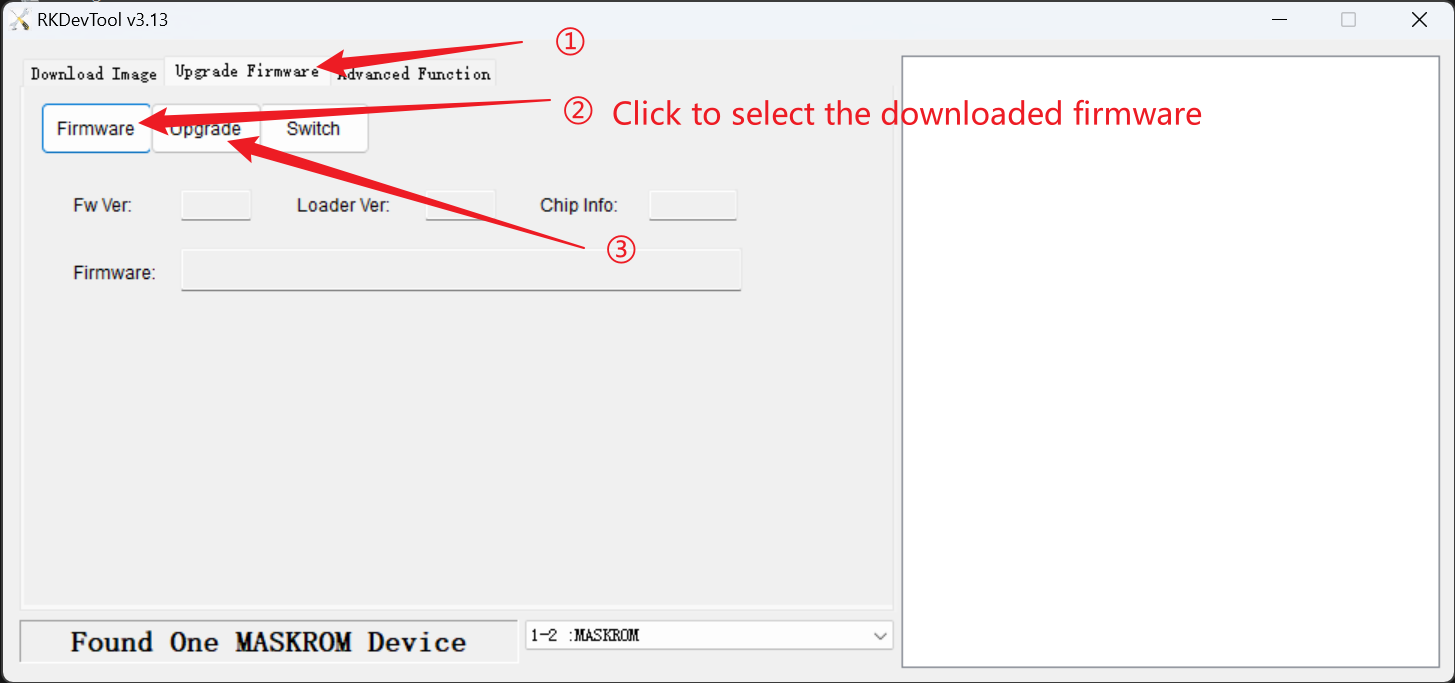
Boot the system
- Power the ROCK 5B/5B+ through an adapter
- ROCK 5B/5B+ will start when the green power LED lights up
The first startup of the Android system after flashing is often relatively long, please be patient and wait
Frequently asked questions
- SPI-NVME encountered the following error during system installation: Switching PCIE storage failed, loader does not support switching
- Check if the SSD is plugged into the corresponding interface of Radxa SBC. The ROCK 5B+only has one M.2 interface that supports SPI-NVME startup. If the startup fails, try changing the interface
- Check if the SSD format is FAT32 format