CSI
Introduction
The camera interface is used to connect the camera module to the main control board for transferring picture/video data and control signals.
Support List
The ROCK 5 ITX comes with two 4-lane CSI interfaces. The following is the list of currently supported cameras:
| Camera Name | Sensor Model | Resolution |
|---|---|---|
| OKDO 5MP Camera | OV5647 | 5 Megapixel |
| Radxa Camera 4K | IMX415 | 8.29 Million Pixels |
| Radxa Camera 8M 219 | IMX219 | 8.0 Megapixel |
Accessories
Radxa Camera 4K
Overview
The Radxa Camera 4K is a high resolution camera module for Radxa products featuring a Sony IMX415 image sensor with 8.29 megapixels and up to 4K resolution. The Radxa Camera 4K Module can be used for the following applications:
- Surveillance cameras
- FA cameras
- Industrial cameras
Specifications
- Sensor:
- SONY IMX415
- Diagonal 6.43 mm ( 1/2.8 type )
- 8.29 megapixels
- Unit cell size: 1.45 µm (H) × 1.45 µm (V)
- Output: MIPI CSI-2
- MIPI CSI-2 4-channel serial data outputs
- RAW10 / RAW12 output
- Lens Specifications.
- Interface Type: M12XP0.5
- Focal Length (EFL): 2.95±5%mm
- Back Focal Length: 4.64mm
- Mirror distance: 4.00mm
- Operating Temperature: -40°C ~ +85°C
- FOV
| Field of View (Diagonal/Horizontal/Vertical) | CRA |
|---|---|
| D=88.2±5° H=75±3° V=59±2° | 15° |
- Default ribbon cable length: 150 mm
Datasheet
Physical Specifications
! Radxa Display 8 HD ! Radxa Display 8 HD
Interface Test Methodology
The following tutorial describes how to test the camera CSI interface using the Radxa Camera 4K as an example.
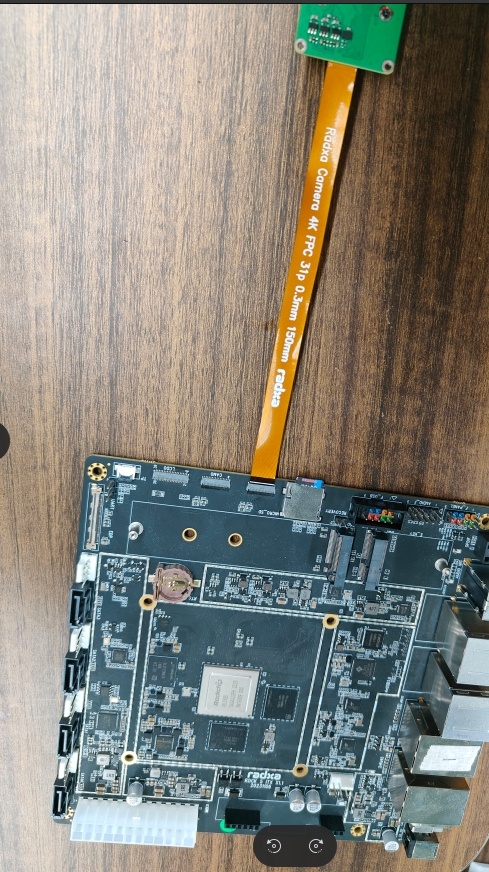
Connections
Connect the ROCK 5 ITX via FPC cable as shown in the picture:
Enabling Overlay
- Open the Kconsole terminal via the Application Launcher in the lower left corner, and run the
rsetupcommand:
radxa@rock-5itx:~$ rsetup
- Pass the device tree configuration to enable Overlay for the Rxa 4K camera.
- Please enable the
[] Enable Radxa Camera 4K on CAM1item Overlay. 2. - Quit and reboot after
[*] Enable Radxa Camera 4K on CAM1has been successfully enabled for the configuration to take effect.
Test
Open a terminal and enter the following command to open the camera preview.
gst-launch-1.0 v4l2src device=/dev/video11 io-mode=4 ! videoconvert ! video/x-raw,format=NV12,width=1920,height=1080 ! xvimagesink; !
Take a picture with the following command.
gst-launch-1.0 v4l2src device=/dev/video11 io-mode=4 ! videoconvert ! video/x-raw,format=NV12,width=1920,height=1080 ! jpegenc ! multifilesink location=file.name.jpg; !
Take a video with the following command: ``bash
gst-launch-1.0 v4l2src num-buffers=512 device=/dev/video11 io-mode=4 ! videoconvert ! video/x-raw, format=NV12, width=1920, height=1080, framerate=30/1 ! tee name=t ! queue ! mpph264enc ! queue ! h264parse ! mpegtsmux ! filesink location=/home/radxa/file.name.mp4