LCD
Introduction
Support List
The ROCK 5 ITX comes with a 4-lane DSI interface. The following is a list of currently supported screens:
| Screen Name | Resolution |
|---|---|
| Radxa Display 8 HD | 1280x800 pixels |
| Radxa Display 10FHD | 1200x1920 pixels |
| Radxa Display 10HD | 1200x1920 pixels |
Accessories
Radxa 8" HD Touch Screen
Overview
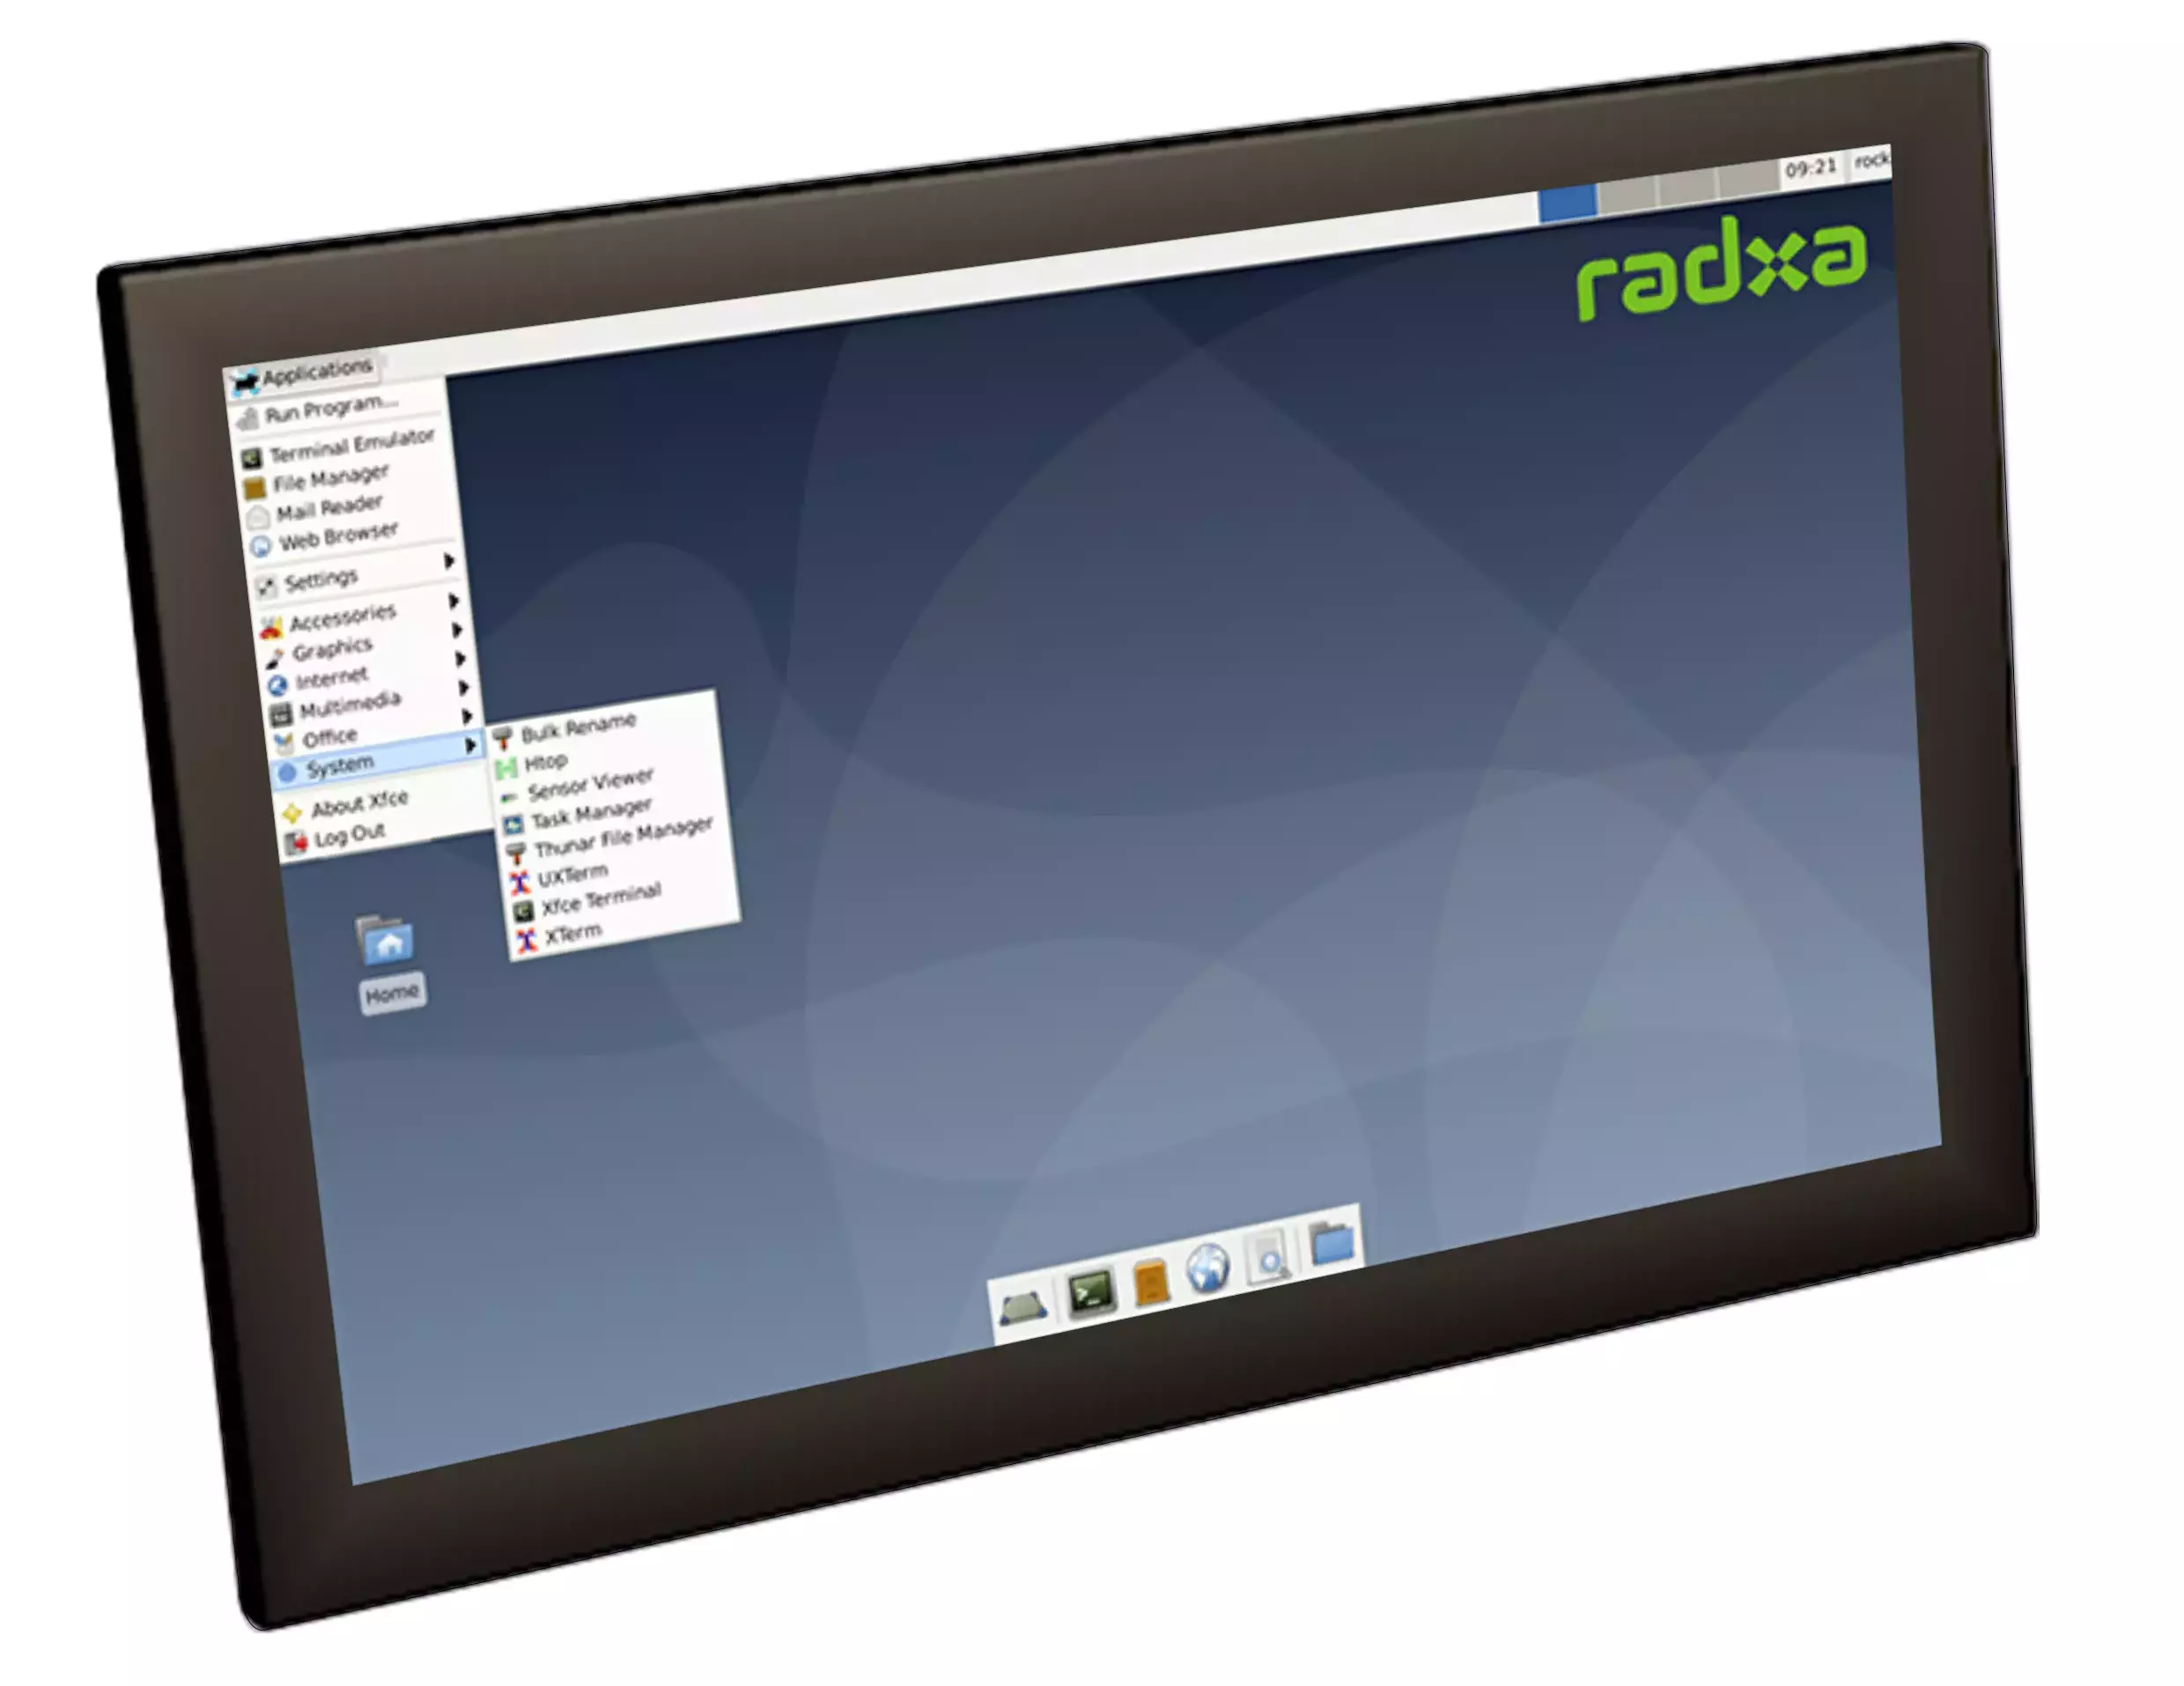
The Radxa Display 8 HD is a colour active matrix LCD module with touchscreen, designed for Radxa single board computers. This 8.0-inch display allows you to create interactive projects such as tablet PCs, industrial HMIs, information dashboards, and more. With a single cable for power, display, and touch, as well as an enabled software on-screen keyboard, the Radxa Display 8 HD gives you a complete HMI without the need to connect a keyboard or mouse. In addition, the built-in sensors on the display can be used for automatic portrait or landscape rotation. It has the following features:
- 8.0-inch LCD display
- 800 x 1280, 16.7M colour resolution
- Full viewing angle LCD
- 5-point capacitive touchscreen
- Supports PWM brightness control
- Supports colour enhancement
- Built-in gravity sensor for portrait/landscape rotation
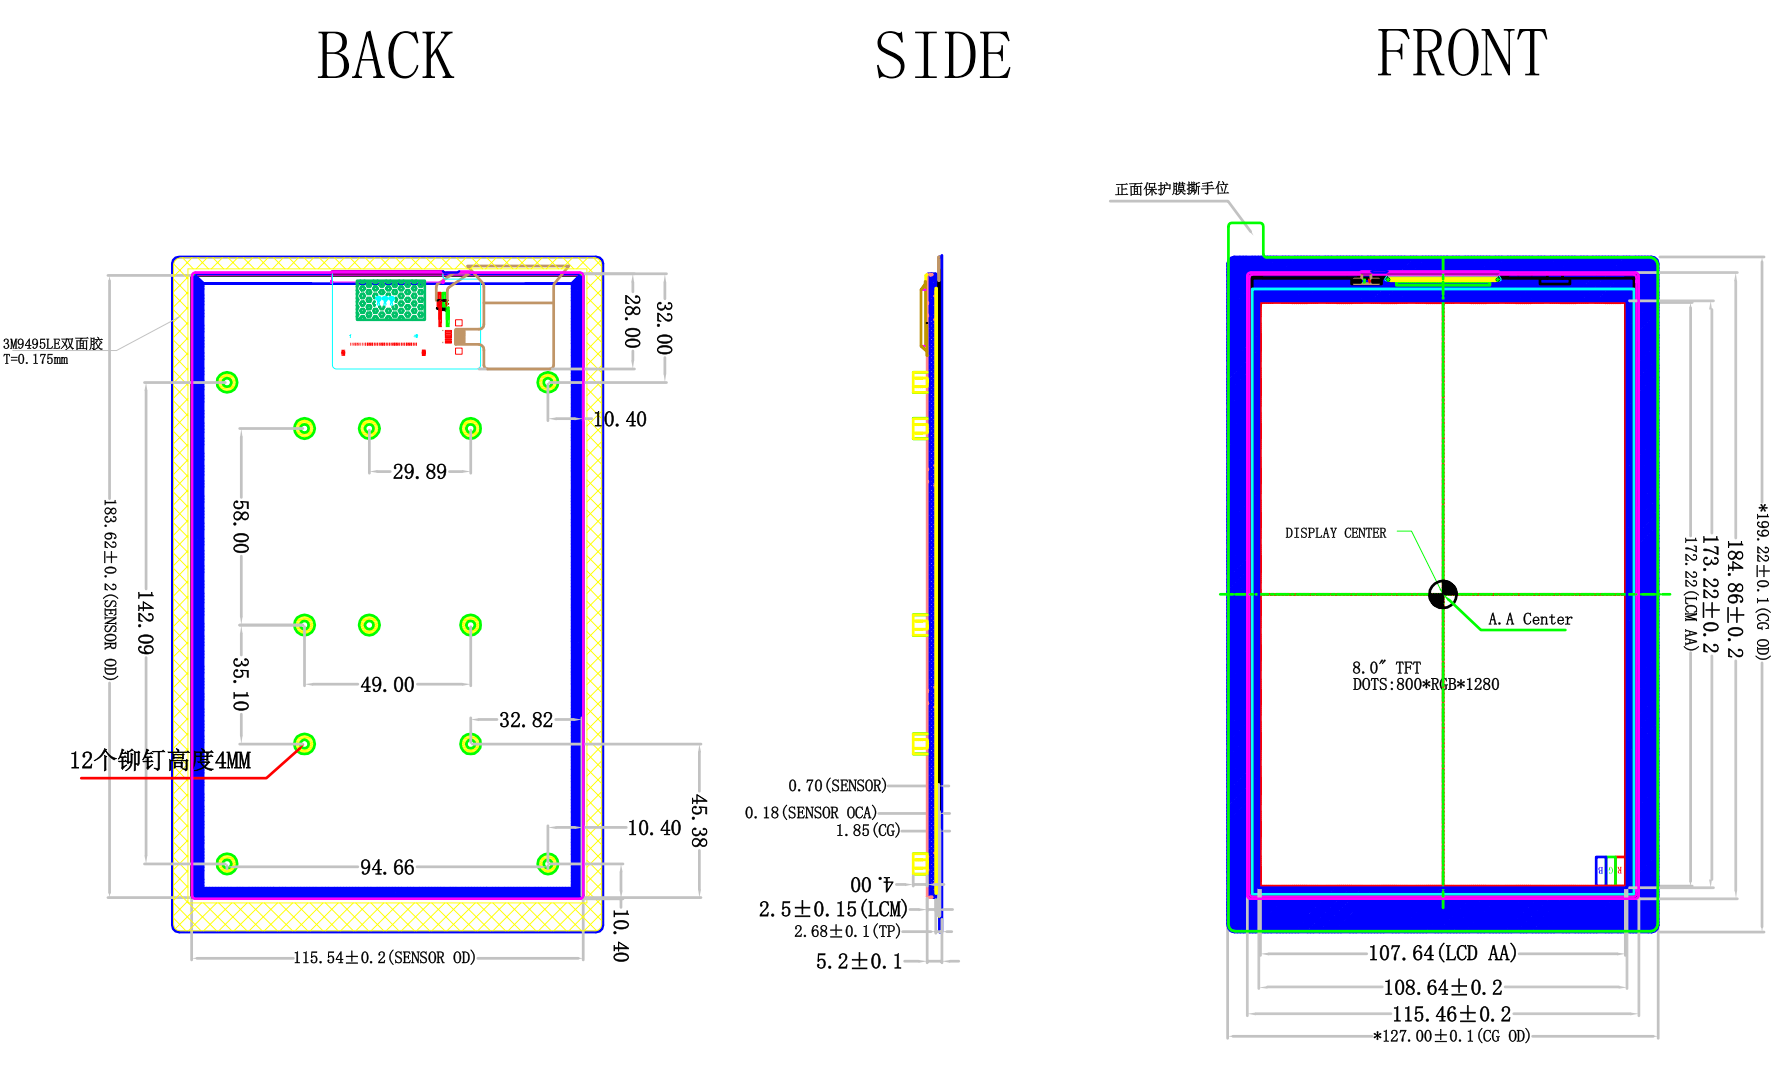
Features
- Effective range: 107.64(H) x 172.224(V) mm
- Pixel Pitch: 0.04485(W) x 3 x 0.13455(H)
- Pixel arrangement: RGB vertical stripes
- Display colour: 16.7M
- Display Mode: Normal Black
- Viewing angle: full angle
- Brightness (cd/m2): 300 cd/m2
- Contrast ratio: 1000 (typical)
- Surface Finish: Anti-glare
- Interface: MIPI
- Backlight: White LED
- Input Voltage: 1.8V
- Operating Temperature: -20 to 60°C
- Storage Temperature: -30 to 60°C
Touch
Radxa Display 8 HD touch panels are driven by the GT911, a next-generation 5-point capacitive touch solution designed for 7" to 8" panels. It consists of up to 26 emitter electrodes and 14 receiver electrodes for greater touch accuracy. The GT911 supports up to 5 points of concurrent touch, tracking the exact position and movement trajectory and touch area in real time. In addition, it can report this information to the host computer as needed.
Features
- Built-in capacitive sensing circuitry and high performance MPU
- Reporting rate: 100Hz
- Real-time output of touch coordinates
- Unified software for capacitive touch panels of various sizes
- Capacitive Touch Sensor
- Channel: 26 (Tx channel)* 14 (Rx channel)
- Supported Cover Lens Thickness: 0.55mm ≦ Glass ≦ 2mm,0.5mm ≦ PMMA ≦ 1.2mm
- Adaptive Frequency Hopping
- Support OGS Full Lamination
- Environmental Adaptation
- Self-calibration during initialisation
- Automatic drift compensation
- Response Time
- Green mode: <48ms
- Sleep mode: <200ms
- Initialisation: <200ms
Signal Definition
| PIN | Name | Description | PIN | Name | Description | | --- | -------- | ------------------------------ | --- | -------- | ------------------------------------ | --- | -------- | ------------------------------ | ------------------ | ------ | ------------- | ----- | ---- | ----- | --- | -------- | ------------------------------ | | 1 | NC | No connection | 21 | MIPI_3P | +MIPI differential data input | | 2 | VDD | 3.3V | 22 | GND | Ground | 3 | VCCIO | VCCIO | VCCIO | VCCIO | VCCIO | VCCIO | | 2 | VDD | 3.3V | 22 | GND | Ground | 3 | VCCIO | IO VCC (1.8V-3.3V) | 23 | GND | Ground | | 4 | NC | INT 1 | 24 | TP_RESET | External interrupt to the host Reset | 5 | Reset | IO VCC | IO VCC (1.8V-3.3V) | | 4 | NC | INT 1 | 24 | TP_RESET | External interrupt to the host Reset | 5 | Reset | RESET | 25 | TP_VCC | Power | 6 | NC | INT 1 | 24 | TP_RESET | External interrupt to the host | | 6 | NC | INT 2 | 26 | TP_INT | External Low is active | | 7 | GND | Ground | 27 | TP_SDA | I2C data input and output | 8 | MIPI | MIPI | MIPI | MIPI | MIPI | MIPI | MIPI | | 8 | MIPI_0N | -MIPI differential data input | 28 | TP_SCL | I2C clock input | | 9 | MIPI_0P | +MIPI differential data input | 29 | GND | Ground | 10 | GND | Ground | 10 | GND | Ground | | 10 | GND | Ground | 30 | GND | Ground | | 11 | MIPI_1N | -MIPI differential data input | 31 | VDD | VDD 3.3V | | 12 | MIPI_1P | +MIPI differential data input | 32 | VDD | VDD 3.3V | | 12 | MIPI_1P | +MIPI differential data input | 32 | VDD | VDD 3.3V | 13 | GND | Ground | 33 | GND | Ground | | 13 | GND | Ground | 33 | GND | Ground | 14 | MIPI_CKN | -MIPI differential clock input | 34 | GND | Ground | | 14 | MIPI_CKN | -MIPI differential clock input | 34 | GND | Ground | 15 | MIPI_CKP | +MIPI differential clock input | 35 | LED- | LED Cathode | | 16 | GND | Ground | 36 | LED- | LED Cathode | | 17 | MIPI_2N | -MIPI differential data input | 37 | NC | No connection | | 18 | MIPI_2P | +MIPI differential data input | 38 | NC | No connection | | 19 | GND | Ground | 39 | LED+ | LED Anode | 20 | MIPI_2P | +MIPI differential data input | 38 | NC | No connection | 19 | | 20 | MIPI_3N | -MIPI differential data input | 40 | LED+ | LED Anode |
Physical Specifications
Test Methods
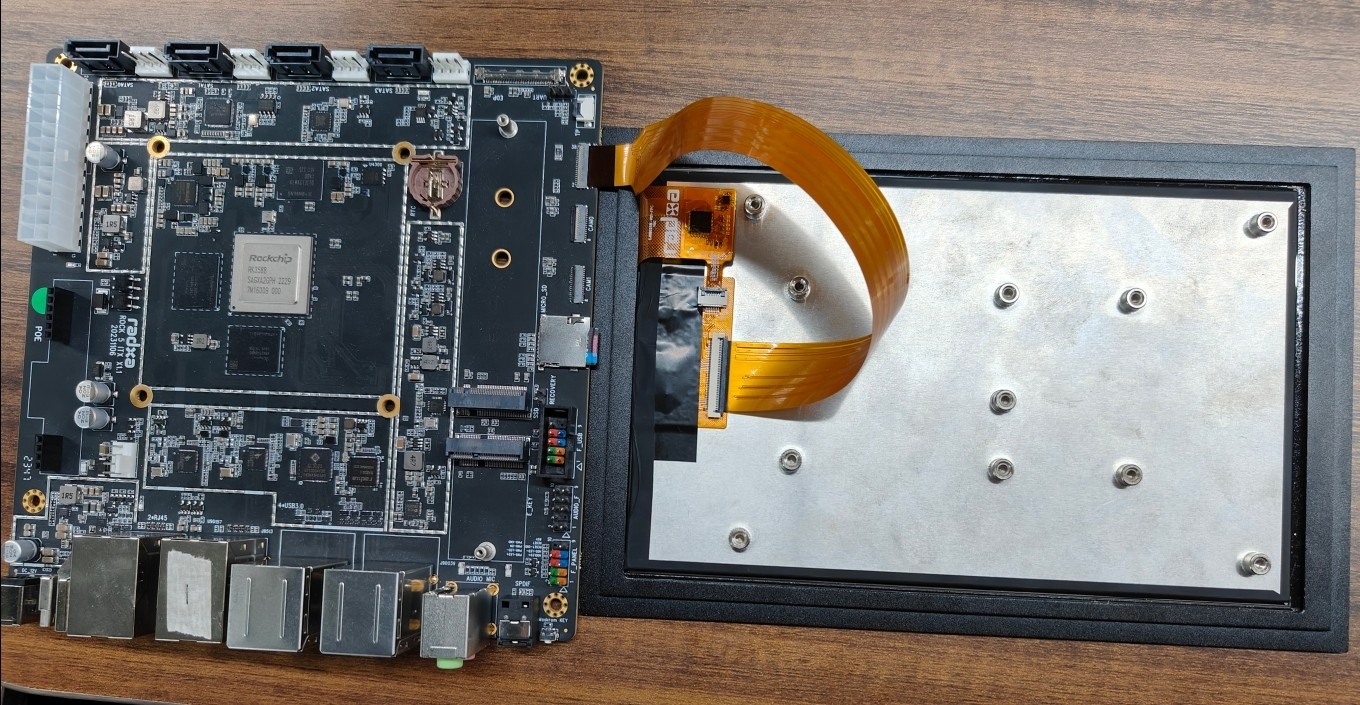
- Connections
Connect the ROCK 5 ITX via FPC cable as shown in the figure:

-
Enabling Overlay
-
Open the Kconsole terminal via the Application Launcher in the lower left corner, and run the
rsetupcommand:
radxa@rock-5itx:~$ rsetup
- Pass the [device tree configuration](... /os-config/rsetup#overlays) to enable Overlay for the Rxa 4K camera.
- Please enable the
[] Enable Radxa Display 8HD on LCD0item Overlay. 2. - Quit and reboot after enabling
[*] Enable Radxa Display 8HD on LCD0successfully for the configuration to take effect.
- Test
After reboot, the Radxa 8" Full HD touchscreen is able to display the system screen and supports touch.
Radxa 10" Full HD Touch Screen

Overview
The Radxa Display 10 FHD supports 10-point touch and has a 10.1-inch (10:16) display area with a resolution of 1200 × 1920 pixels.
Its features are as follows:
- Size: 10.1 inches
- RoHS compliant design
- Overall dimensions: 155 mm (H) x 246.16 mm (W) x 5.95 mm (D)
- Display area: 135.36 mm (W) x 216.58 mm (H)
- Number of pixels: 1200 (horizontal) x 1920 (vertical) pixels
- Pixel Pitch: 0.0564 mm (horizontal) x 0.1692 mm (vertical)
- Pixel arrangement: RGB vertical stripes
- Colour filter array: RGB vertical stripe
- Backlight: White LED
- Interface: MIPI
- Built-in gravity sensor
Signal Definition
| PIN | Name | Description | PIN | Name | Description |
|---|---|---|---|---|---|
| 1 | NC | No connection | 21 | MIPI_3P | +MIPI differential data input |
| 2 | VDD | Power Voltage for digital circuit 3.3V | 22 | GND | Ground |
| 3 | VCCIO | Power Voltage for digital circuit 1.8V[^1] | 23 | GND | Ground |
| 4 | INT1 | INT 1 | 24 | TP_RESET | External interrupt to the Host Reset |
| 5 | Reset | Global Reset Pin 1.8V[^1] | 25 | TP_VCC | Power Voltage for digital circuit 3.3V |
| 6 | INT2 | INT 2 | 26 | TP_INT | External Low is active |
| 7 | GND | Ground | 27 | TP_SDA | I2C data input and output |
| 8 | MIPI_0N | -MIPI differential data input | 28 | TP_SCL | I2C clock input |
| 9 | MIPI_0P | +MIPI differential data input | 29 | GND | Ground |
| 10 | GND | Ground | 30 | GND | Ground |
| 11 | MIPI_1N | -MIPI differential data input | 31 | VDD | Power Voltage for digital circuit 3.3V |
| 12 | MIPI_1P | +MIPI differential data input | 32 | VDD | Power Voltage for digital circuit 3.3V |
| 13 | GND | Ground | 33 | GND | Ground |
| 14 | MIPI_CKN | -MIPI differential clock input | 34 | GND | Ground |
| 15 | MIPI_CKP | +MIPI differential clock input | 35 | LED- | Power for LED backlight (Cathode) |
| 16 | GND | Ground | 36 | LED- | Power for LED backlight (Cathode) |
| 17 | MIPI_2N | -MIPI differential data input | 37 | NC | No connection |
| 18 | MIPI_2P | +MIPI differential data input | 38 | NC | No connection |
| 19 | GND | Ground | 39 | LED+ | Power for LED backlight (Anode) |
| 20 | MIPI_3N | -MIPI differential data input | 40 | LED+ | Power for LED backlight (Anode) |
- The 3 PIN and 5 PIN should be the same as 1.8v or 3.3v
Mechanical Specifications

Test Methods
- Connections
Connect the ROCK 5 ITX via FPC cable as shown in the figure:
-
Enabling Overlay
-
Open the Kconsole terminal via the Application Launcher in the lower left corner, and run the
rsetupcommand:
radxa@rock-5itx:~$ rsetup
- Configure the device tree with [Device Tree Configuration](... /... /os-config/rsetup#overlays) to enable Overlay for the Rxa 8" touchscreen.
- Please enable
[] Enable Radxa Display 10FHD on LCD0item Overlay. 2. - Quit and reboot after enabling
[*] Enable Radxa Display 10FHD on LCD0successfully for the configuration to take effect.
- Test
After reboot, the Radxa 10" Full HD touchscreen is able to display the system screen and supports touch.