Assembly Guide
Safety Precautions
⚠️ IMPORTANT: Before beginning assembly, ensure that your Raspberry Pi 5 is powered off and disconnected from any power source.
Please follow the steps below carefully for proper assembly.
Installing Copper Pillars
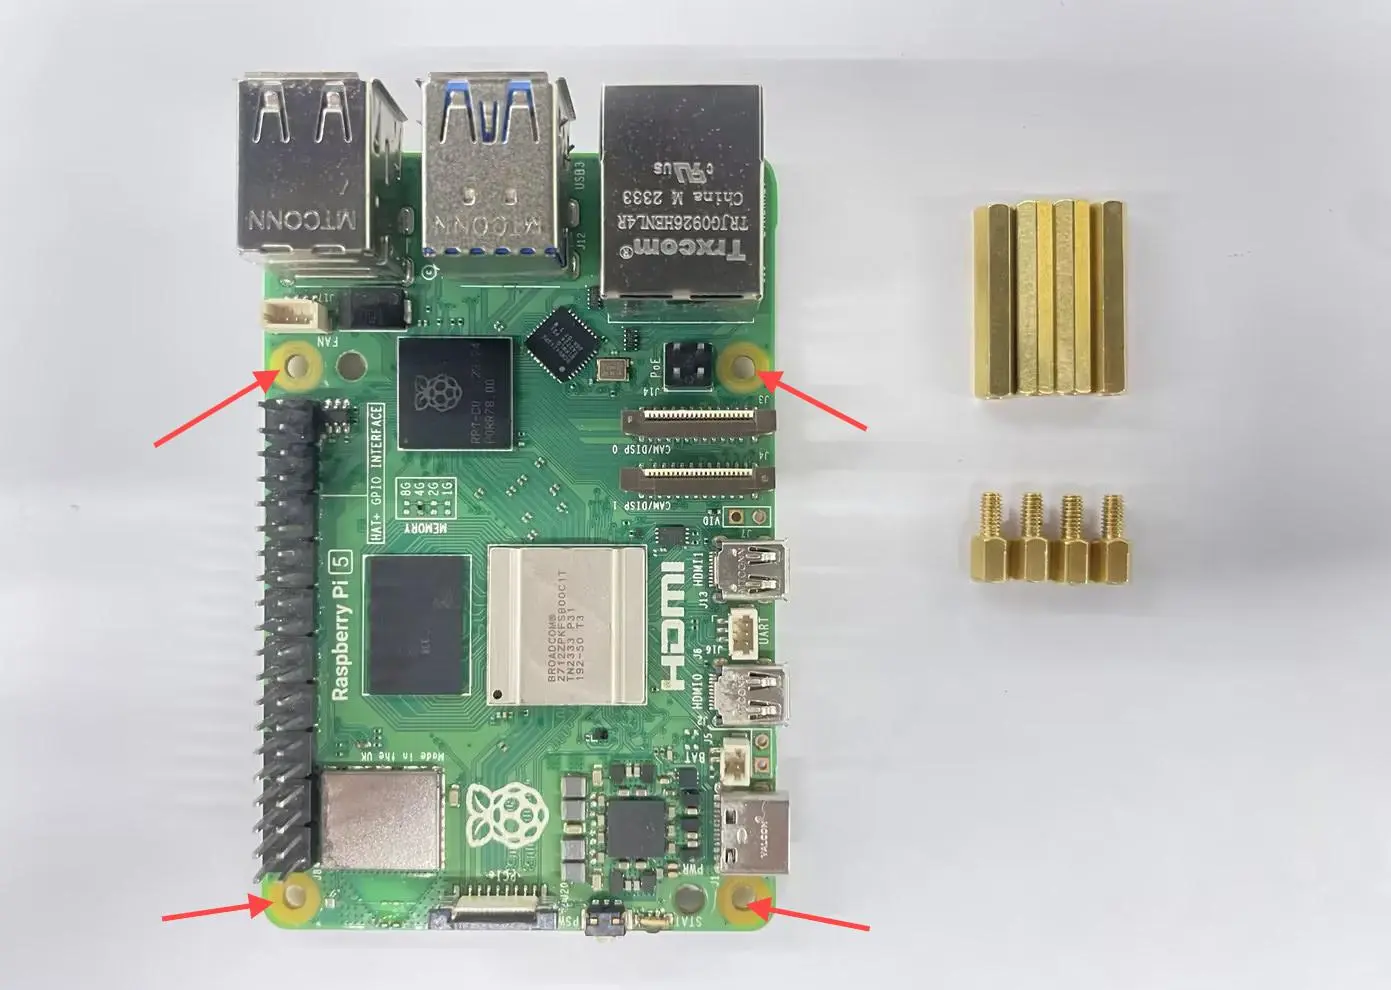
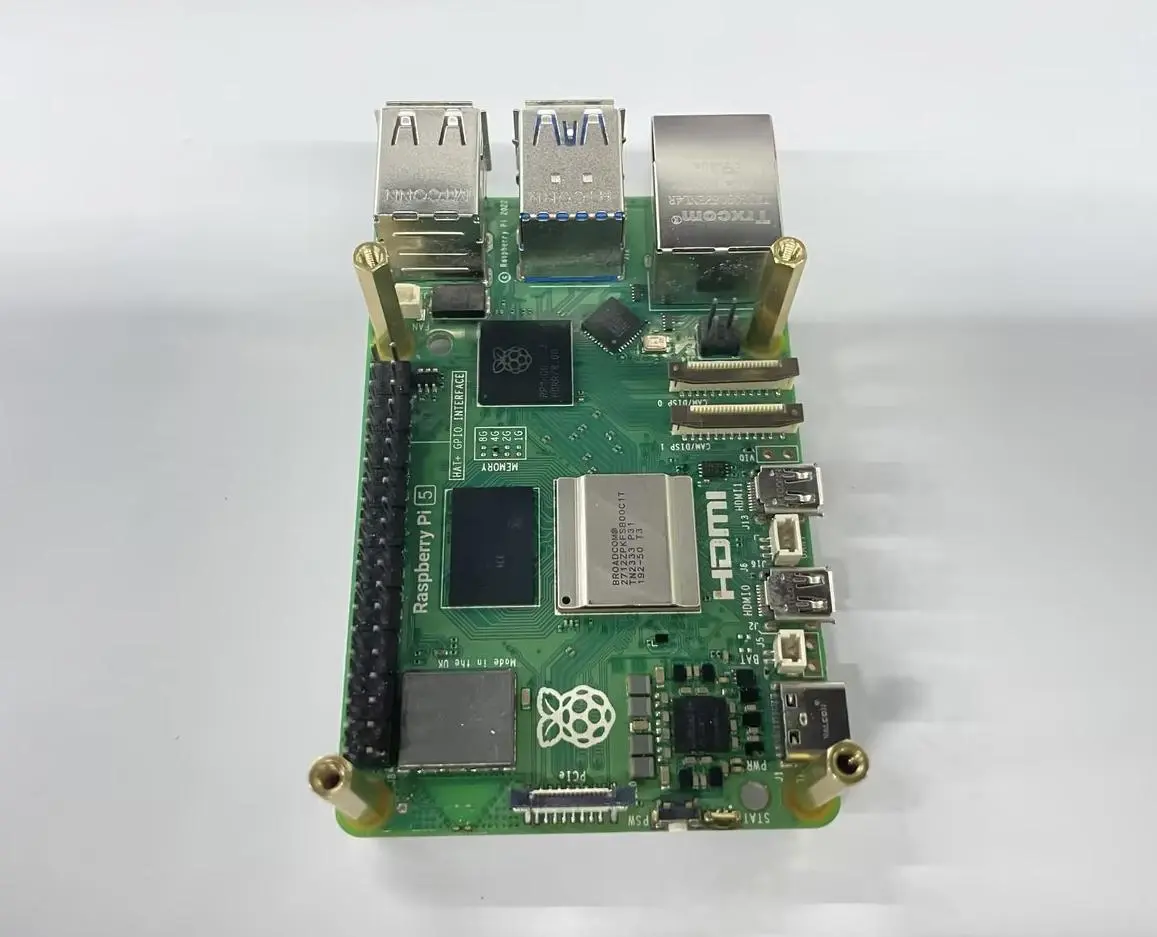
On the Raspberry Pi 5
- Locate the mounting holes on your Raspberry Pi 5
- Install the copper pillars in the positions shown in the following images:
- Use M2.5×5+3 copper pillars for the inner mounting holes
- Use M2.5×20 copper pillars for the outer mounting holes
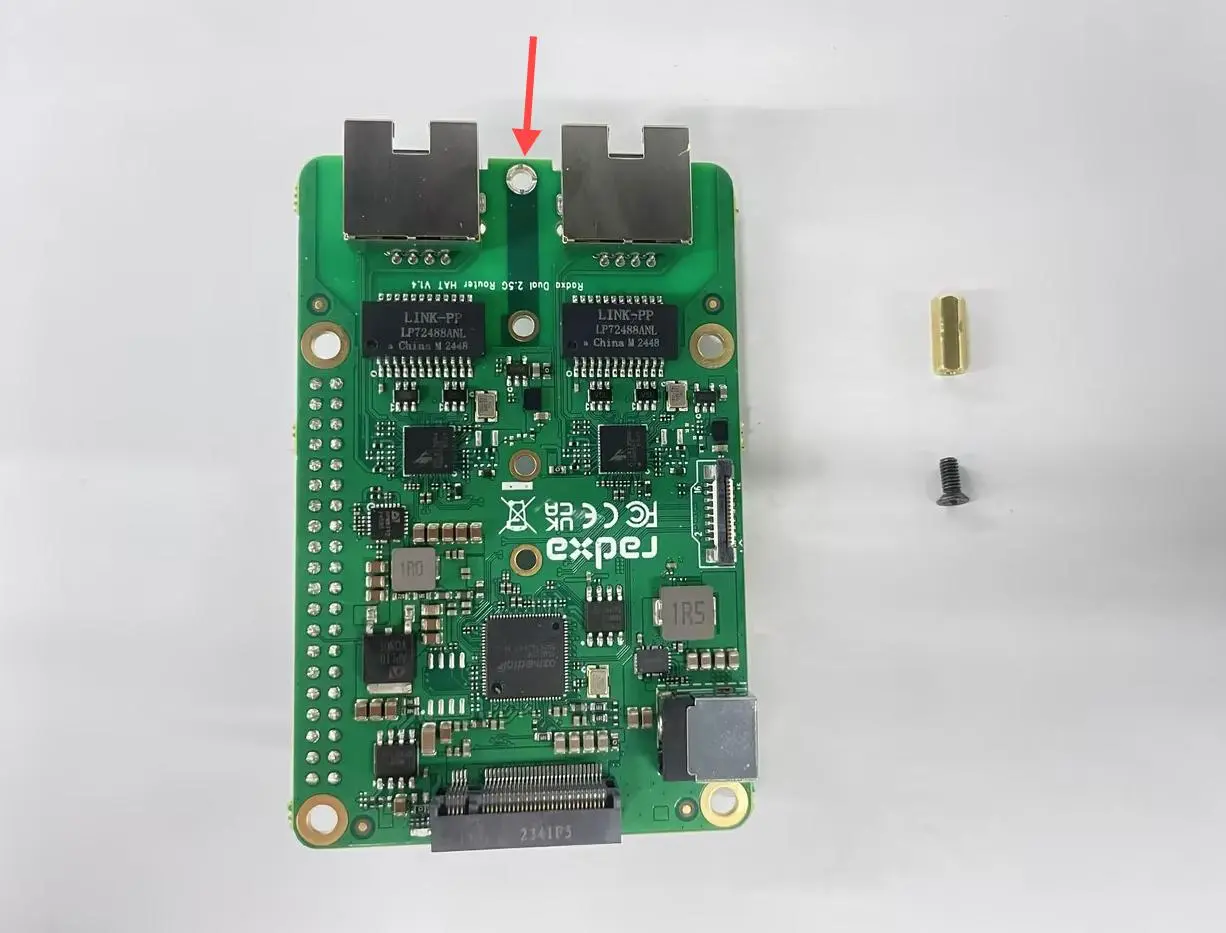
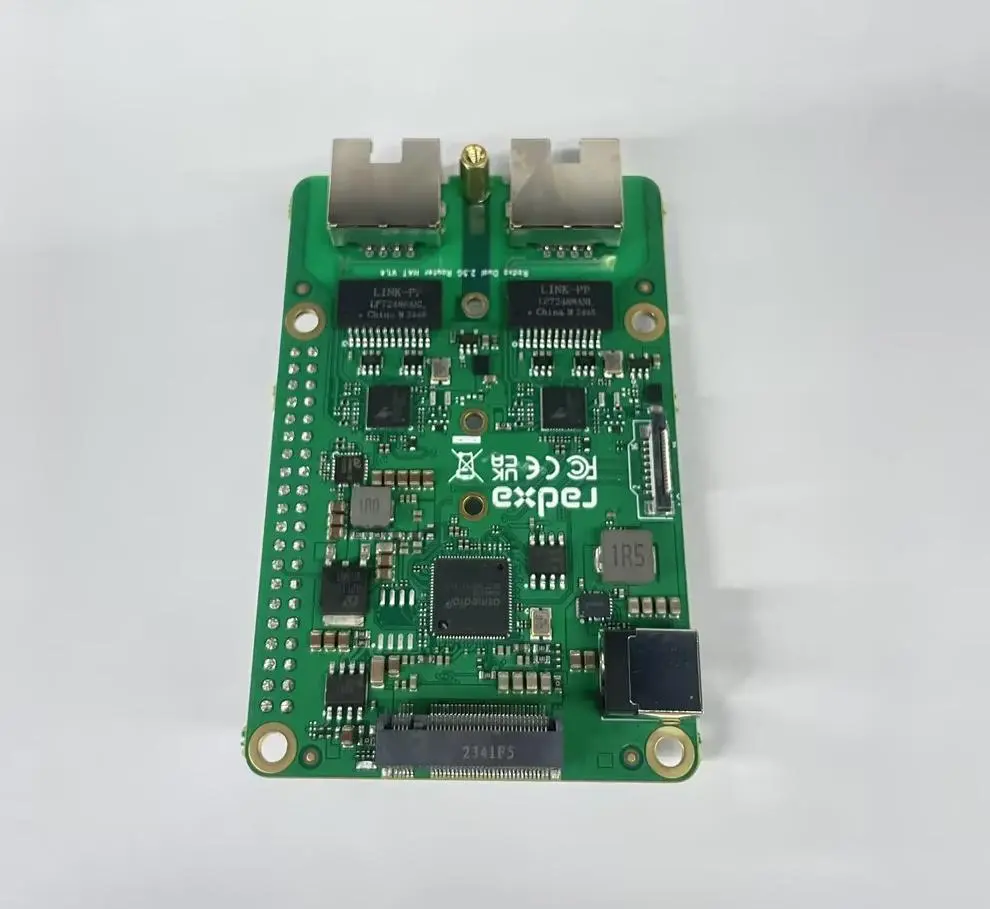
On the Radxa Dual 2.5G Router HAT
- Locate the mounting holes on the Radxa Dual 2.5G Router HAT
- Install the copper pillars using:
- M2×8.5 copper pillars
- M2×4×5 screws
Installing the FPC Cable
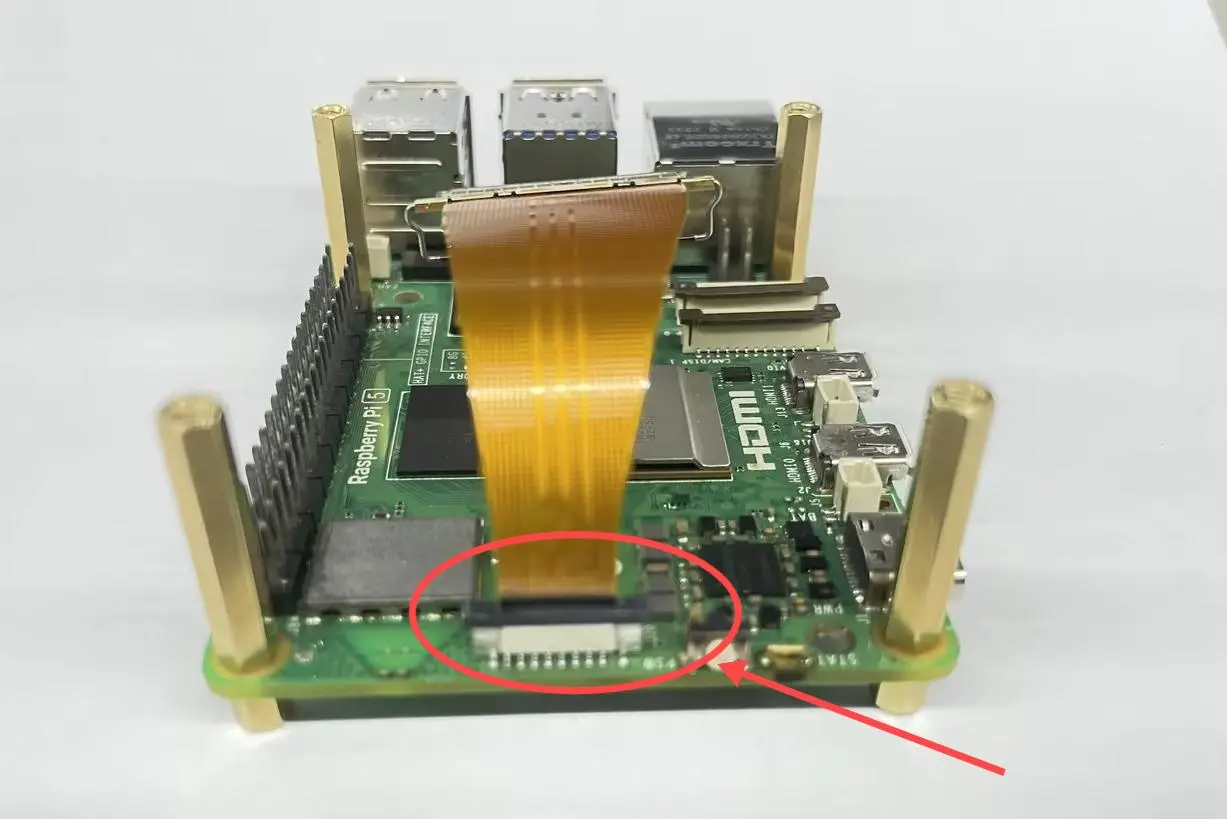
- Locate the FPC connector on the Raspberry Pi 5
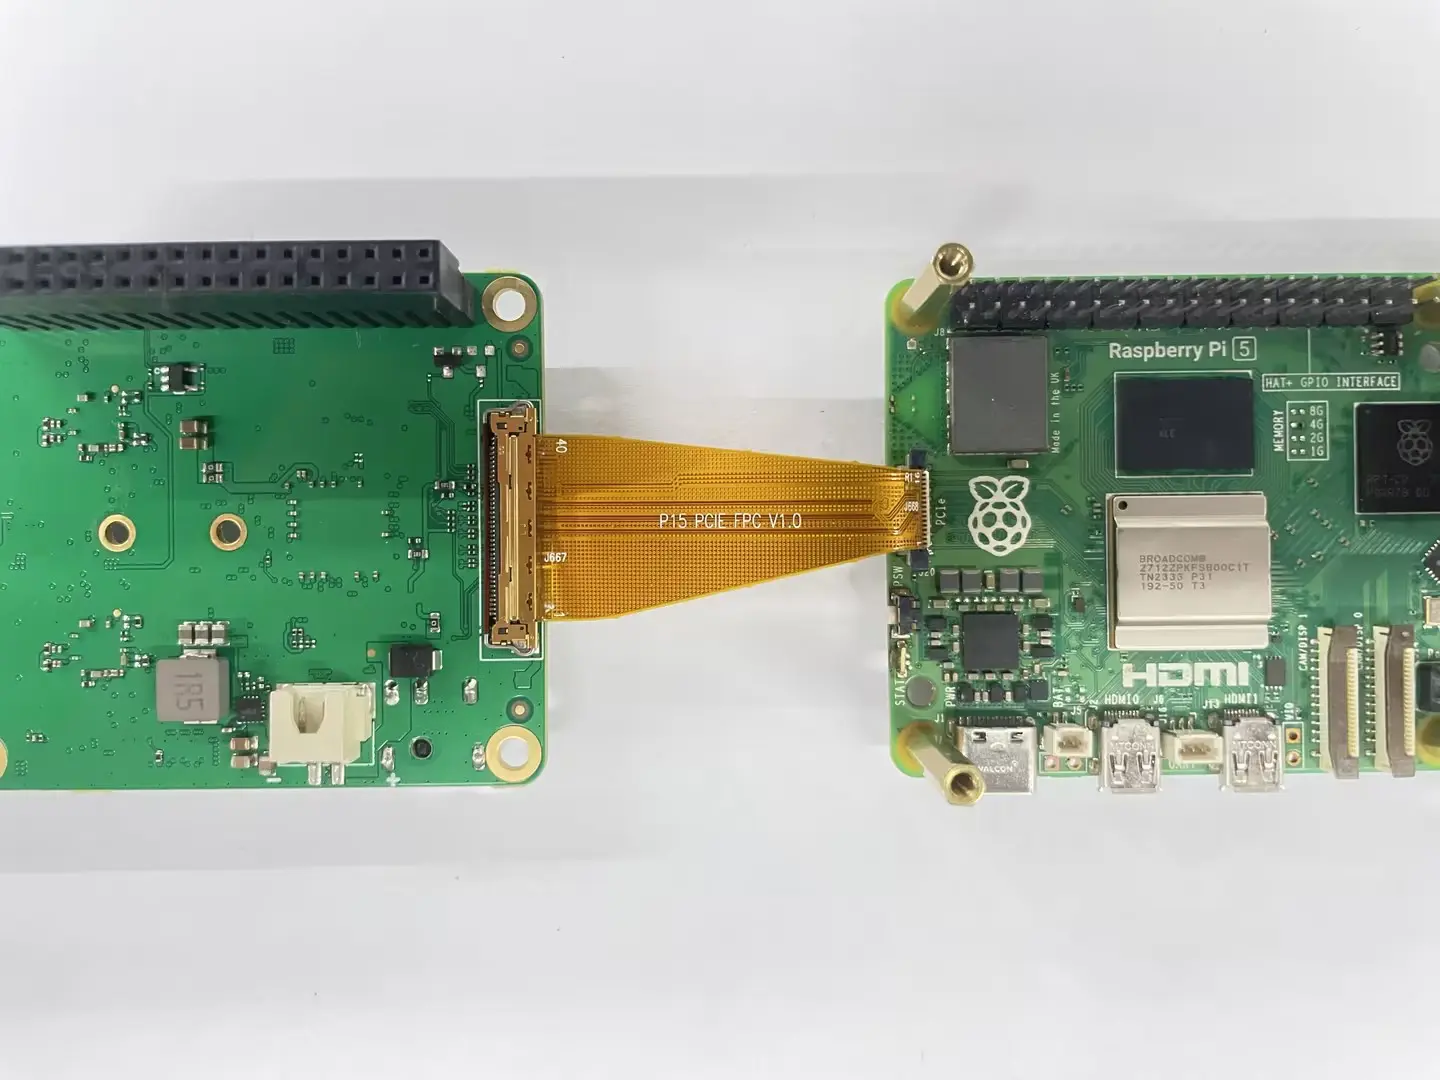
- Carefully insert the FPC adapter cable into the FPC connector on the Raspberry Pi 5
- Connect the other end to the IPEX connector on the Radxa Dual 2.5G Router HAT
⚠️ IMPORTANT: When installing the FPC adapter cable into the FPC connector on the Raspberry Pi 5, ensure that the black side of the FPC cable faces outward.
Connecting the HAT to Raspberry Pi 5
- Carefully align the 40-pin header on the Radxa Dual 2.5G Router HAT with the 40-pin GPIO header on the Raspberry Pi 5
- Gently press down to connect the two boards together
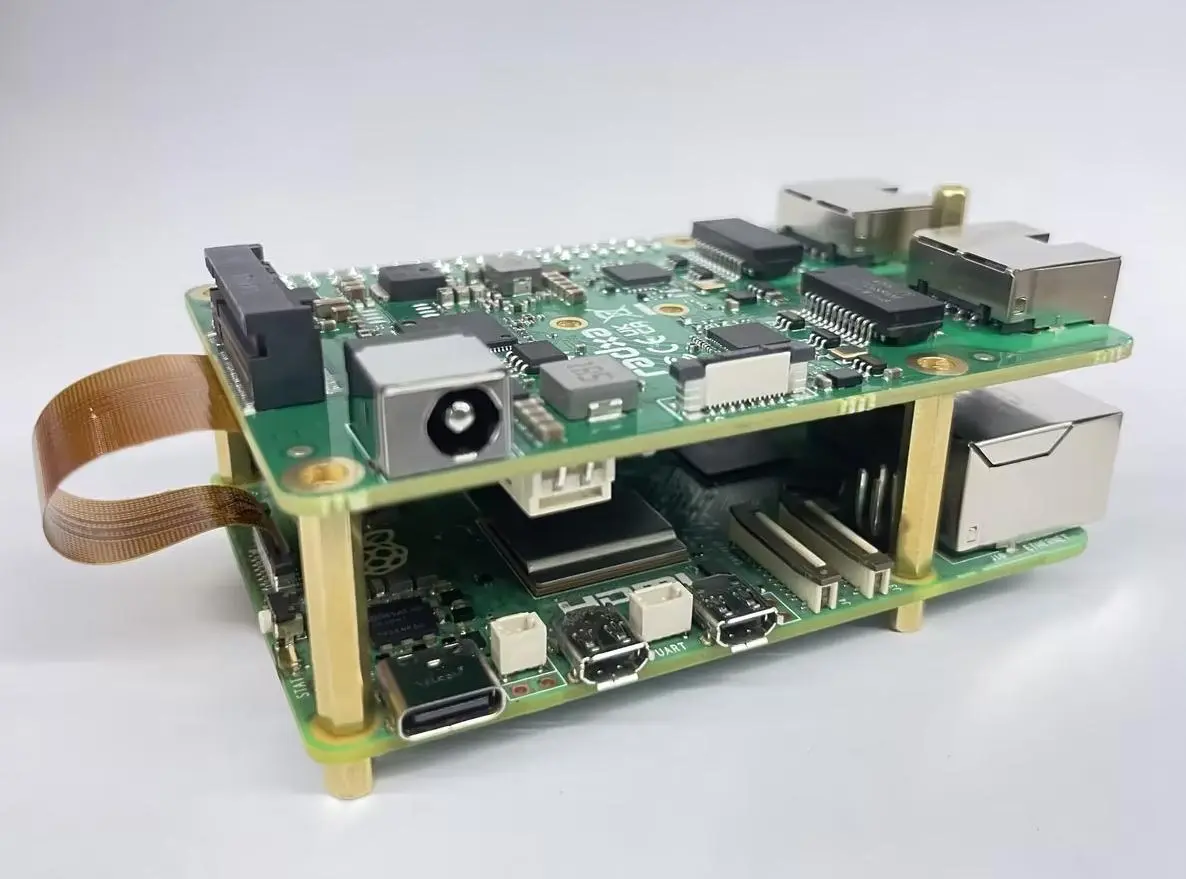
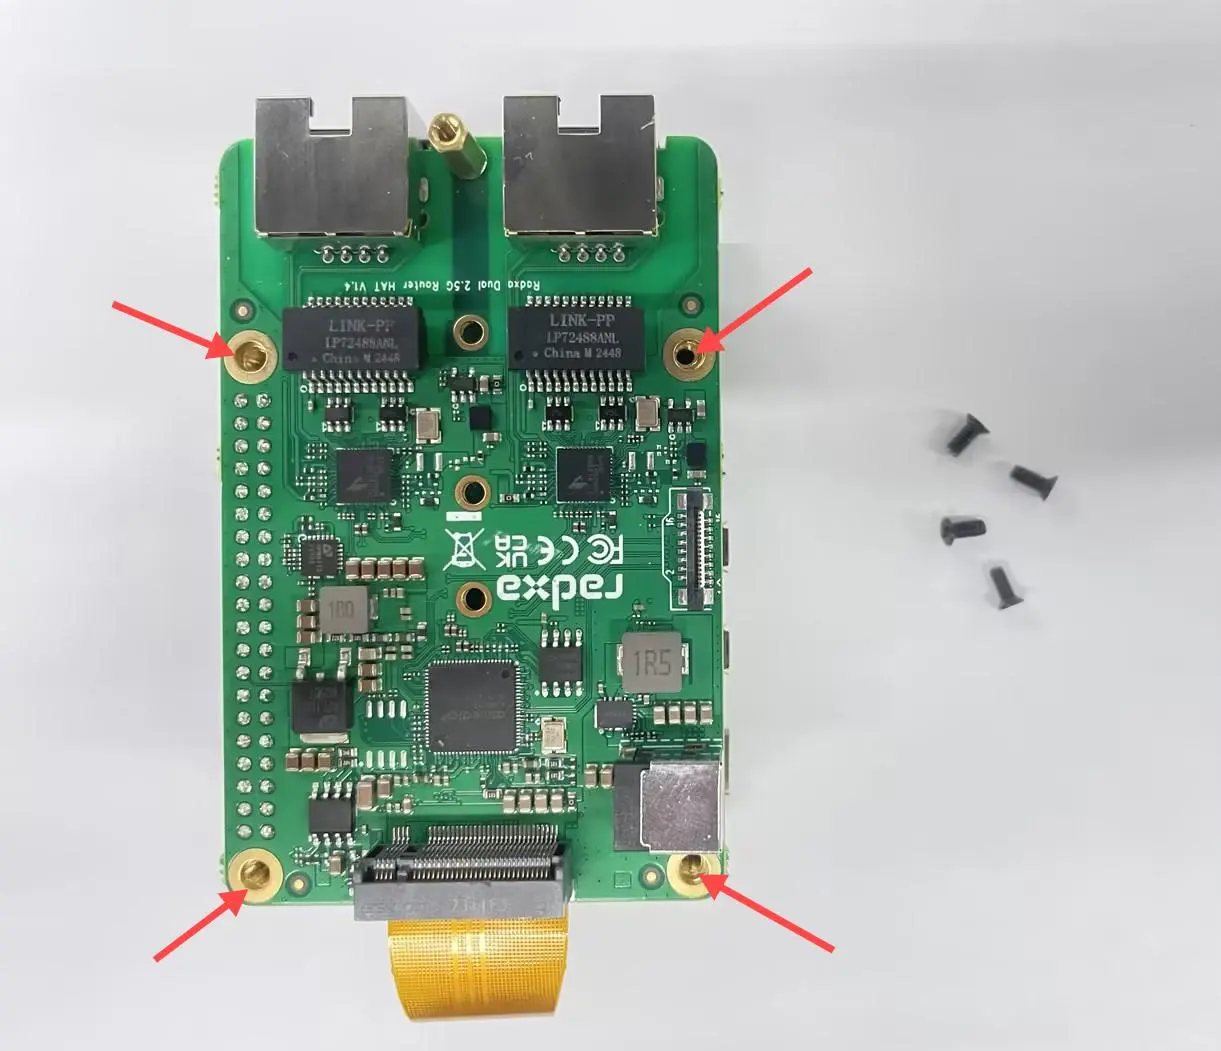
- After connecting, secure the boards using M2.5×4×4 screws in the positions shown in the following images:
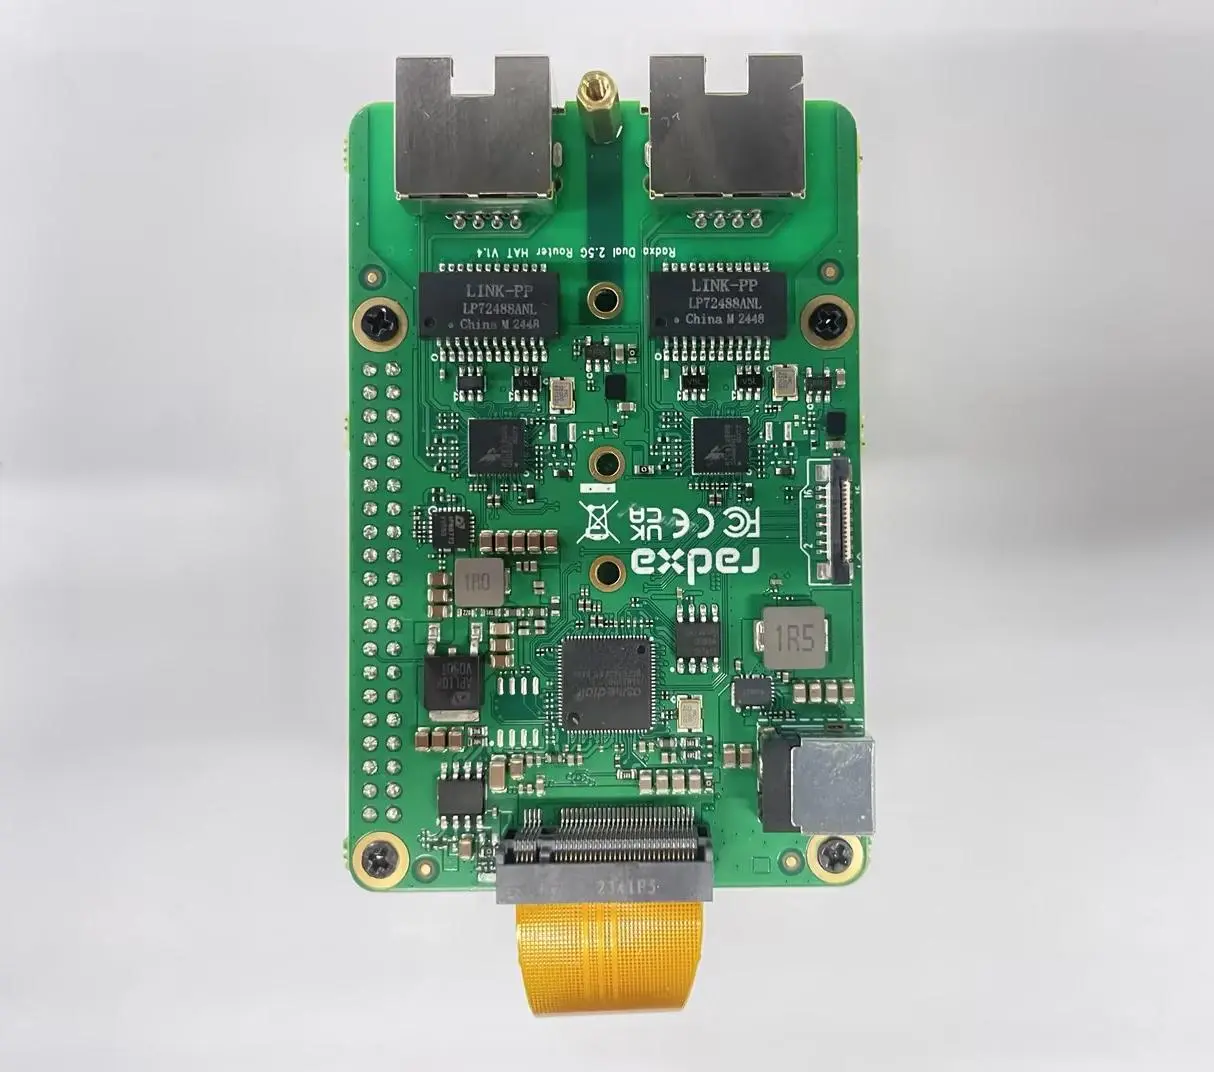
Installing the Heatsink
- Locate the Asmedia PCIe switch chip on the Radxa Dual 2.5G Router HAT
- Remove the protective film from the thermal pad on the bottom of the heatsink
- Carefully align and attach the heatsink to the position shown in the following images:
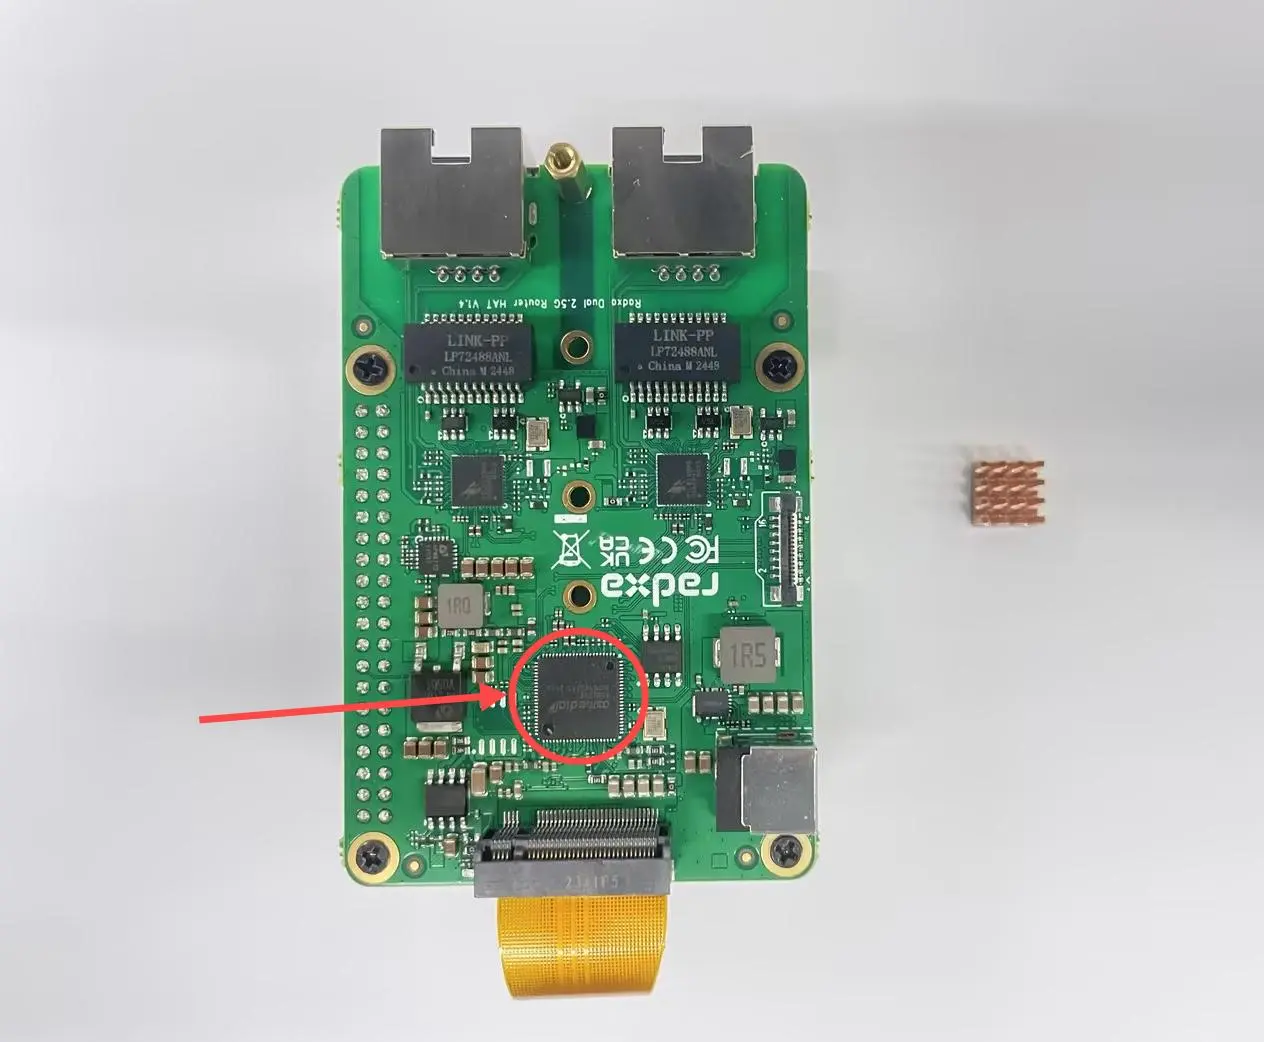
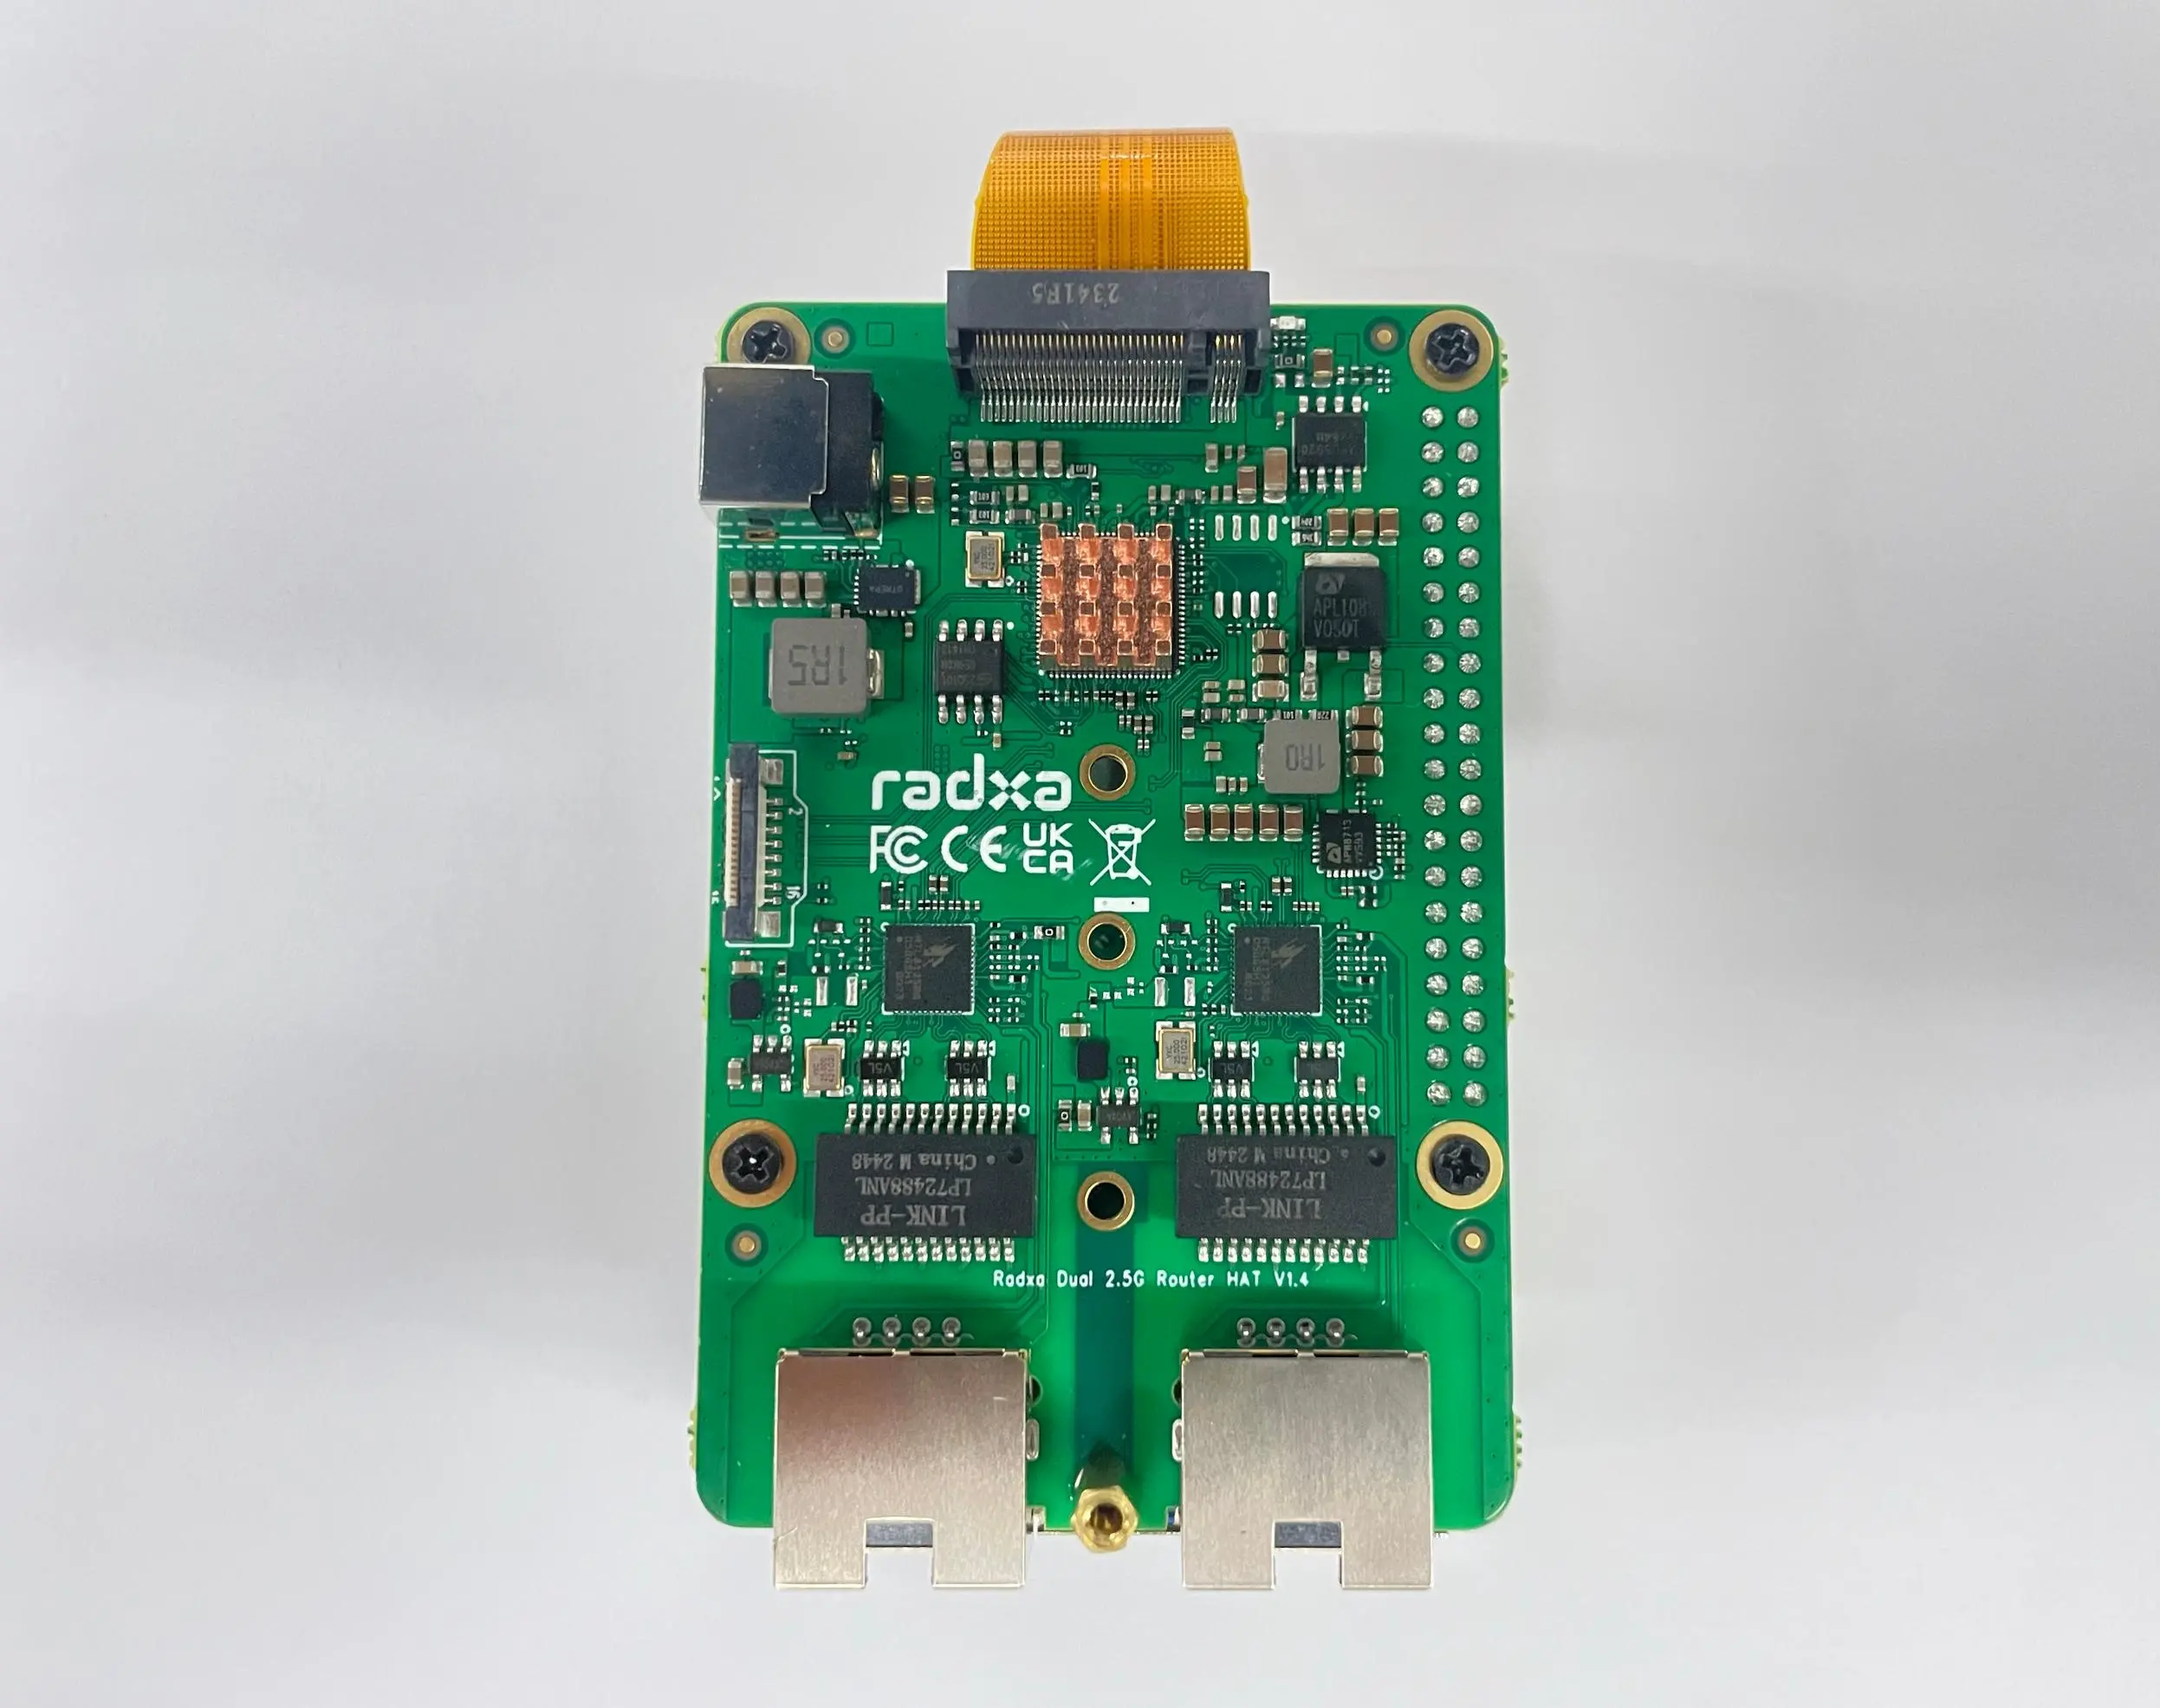
⚠️ NOTE: The heatsink is essential for proper thermal management. Do not operate the HAT without the heatsink installed.
Installing the SSD
- Locate the M.2 M-Key slot on the Radxa Dual 2.5G Router HAT
- Insert your M.2 NVMe SSD at a 30-degree angle into the slot
- Gently press down the SSD and secure it with M2×4×5 screws as shown:
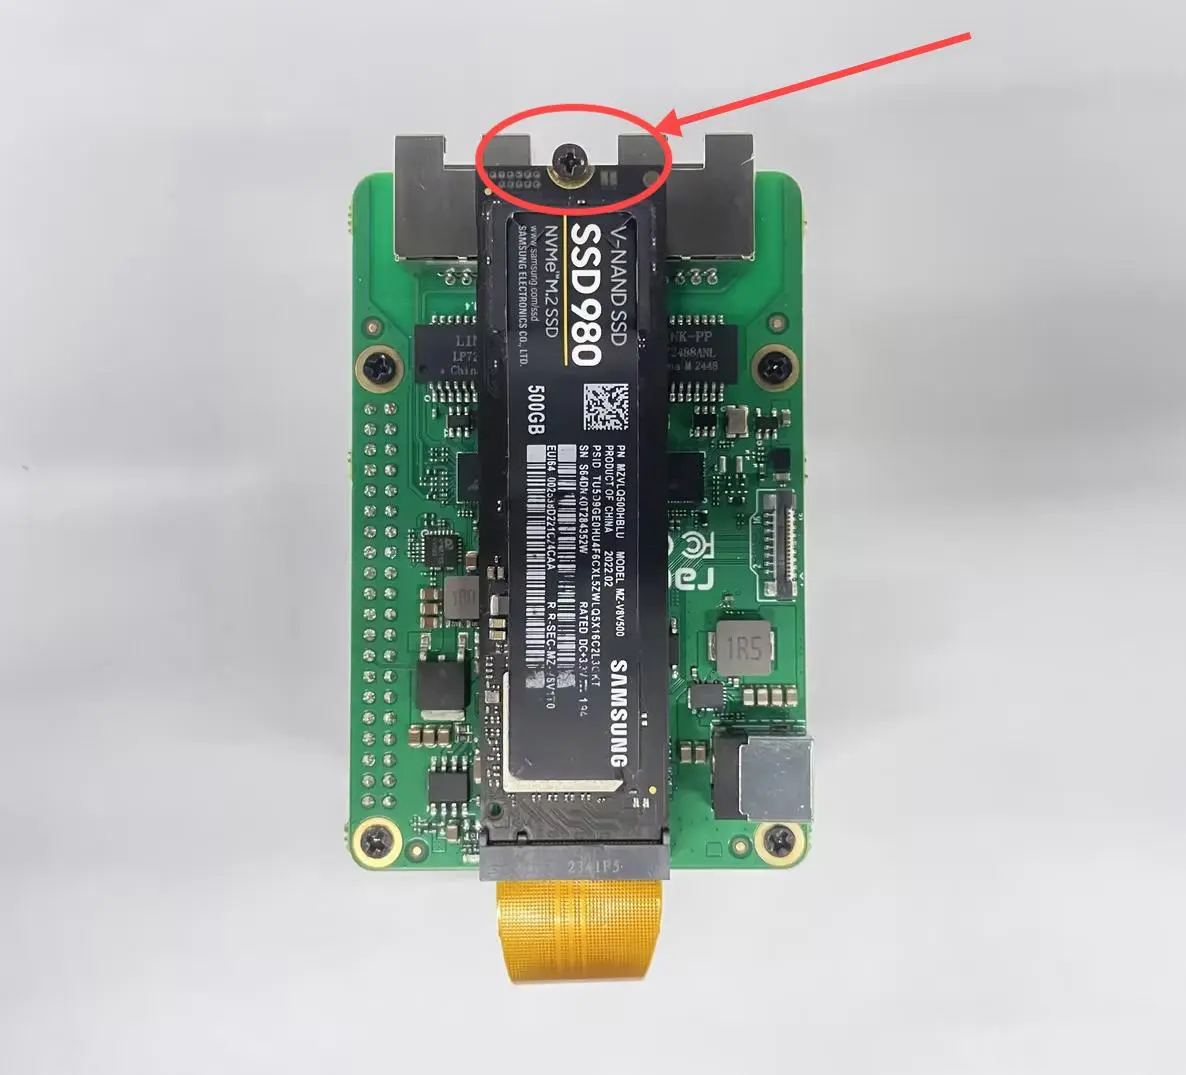
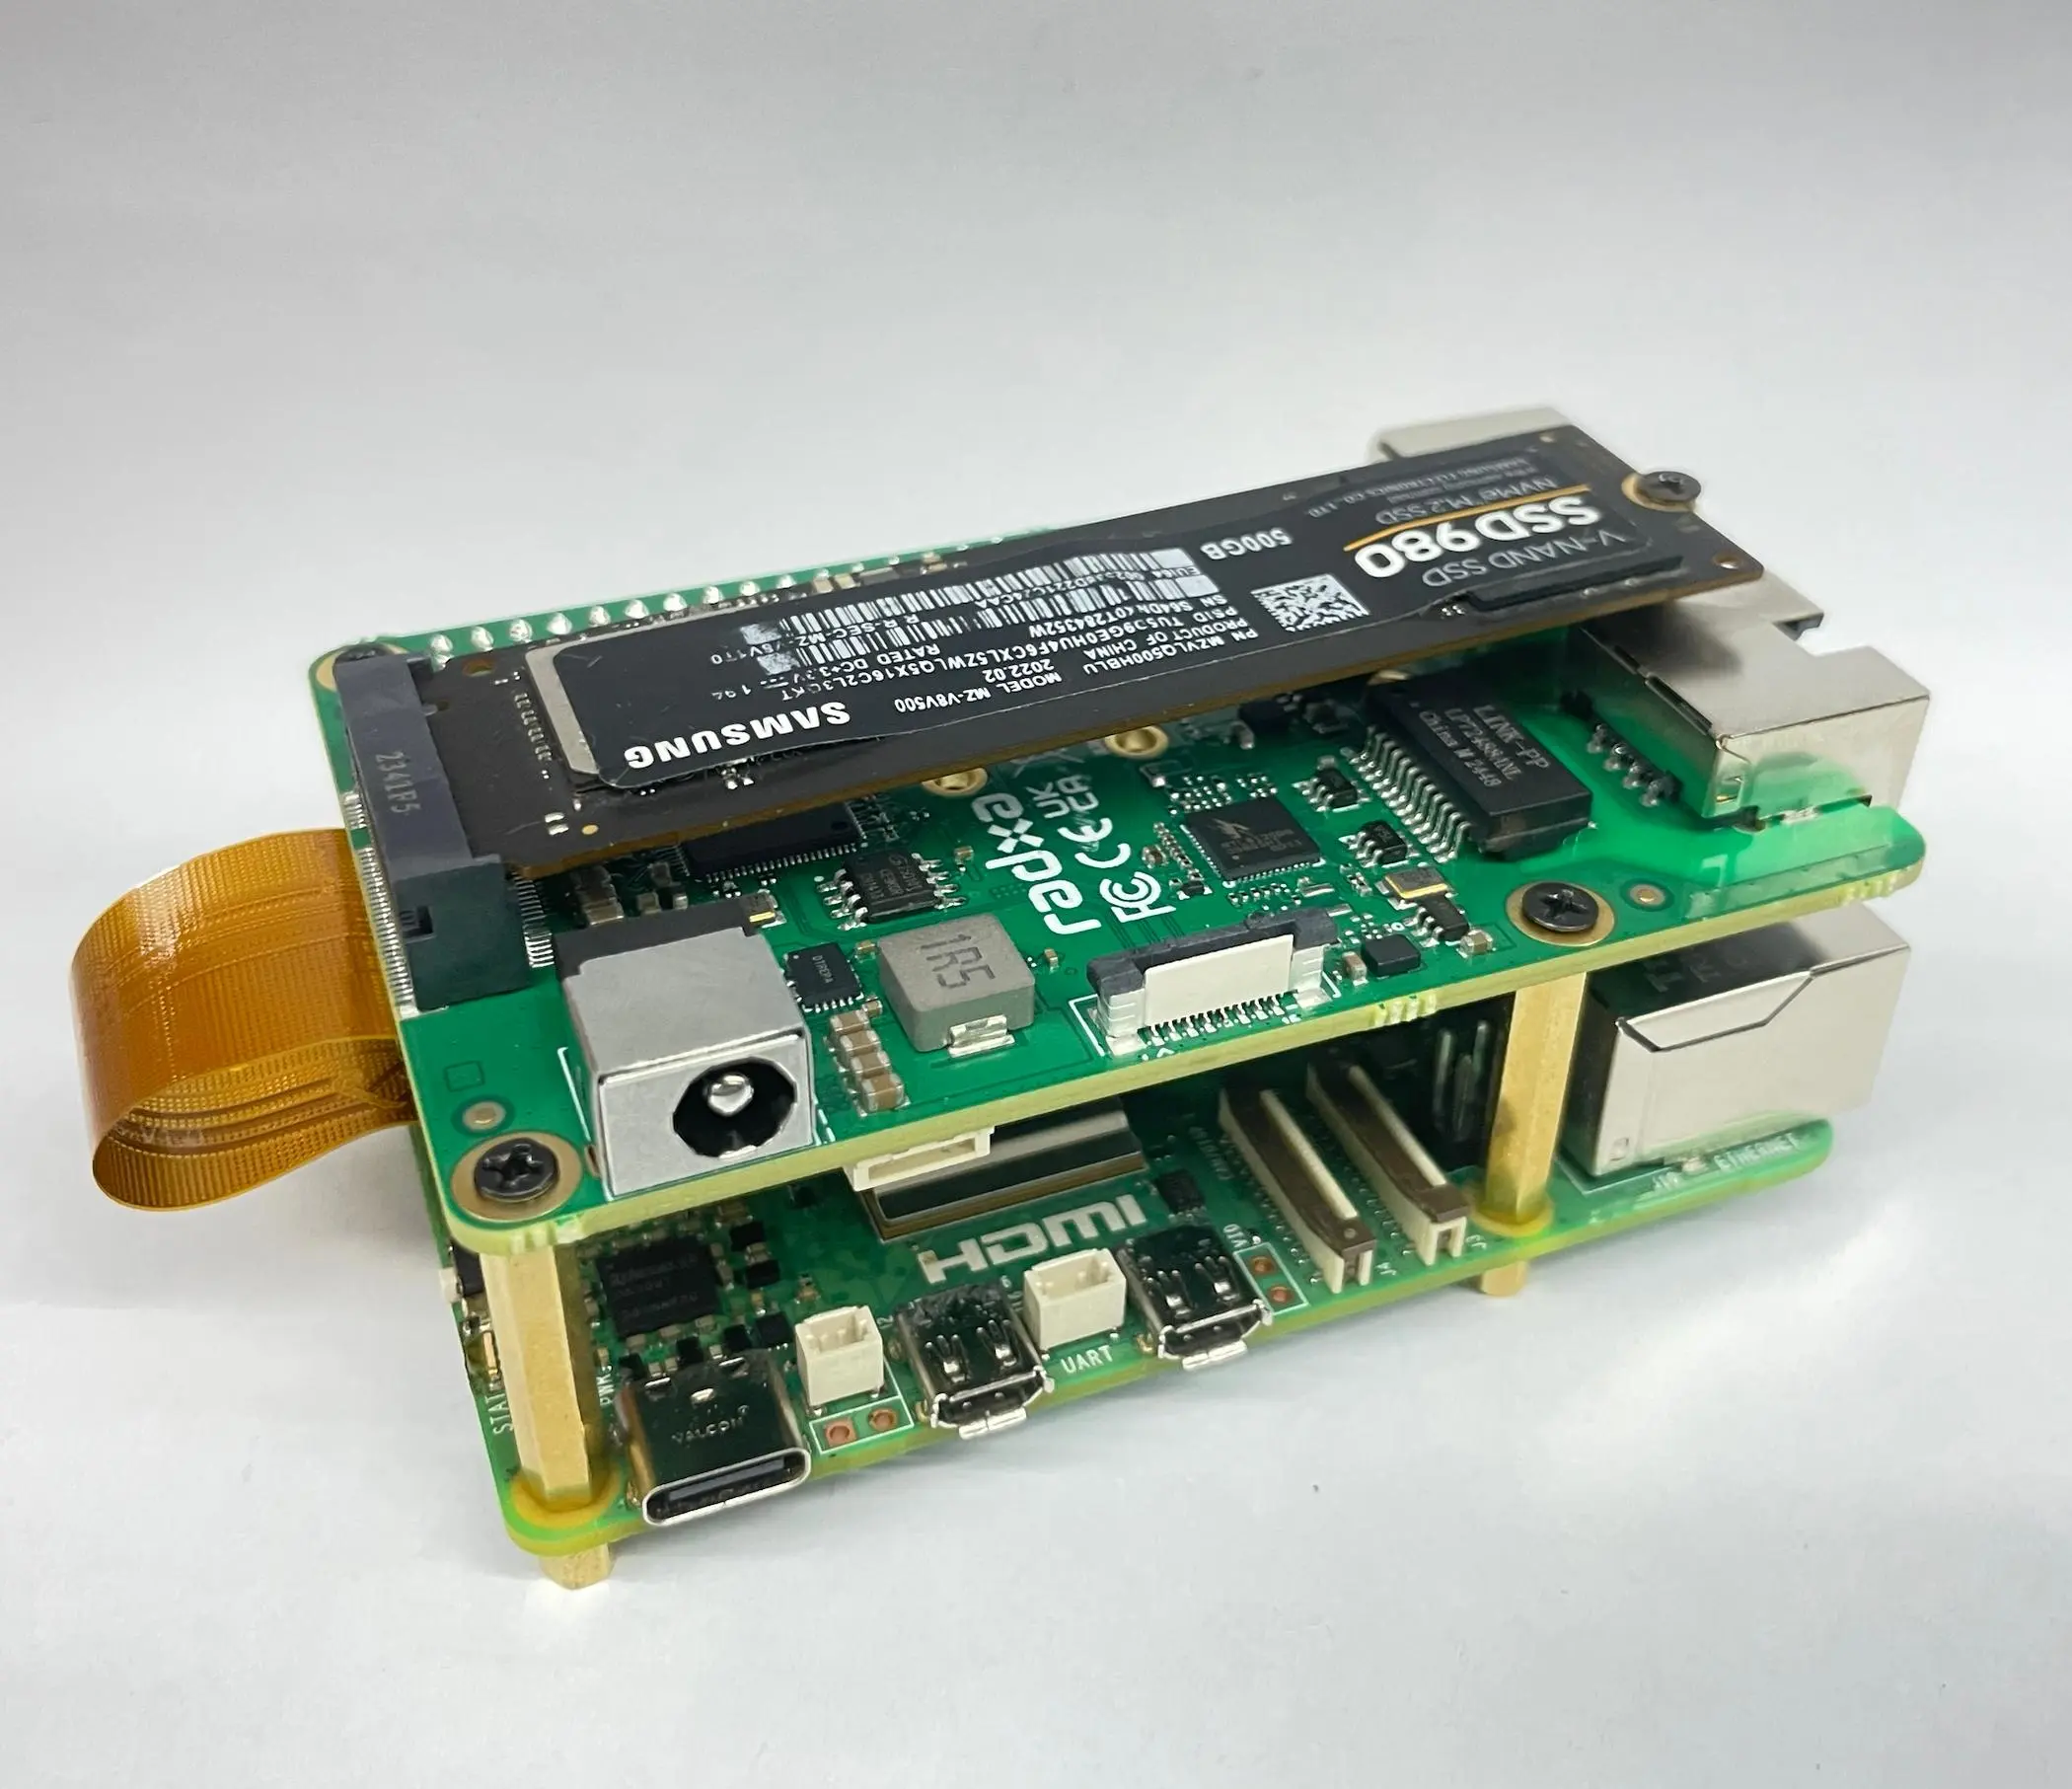
⚠️ NOTE: Ensure the SSD is compatible with the M.2 M-Key interface and is properly seated before securing with screws.
Using the FPC Expansion Interface
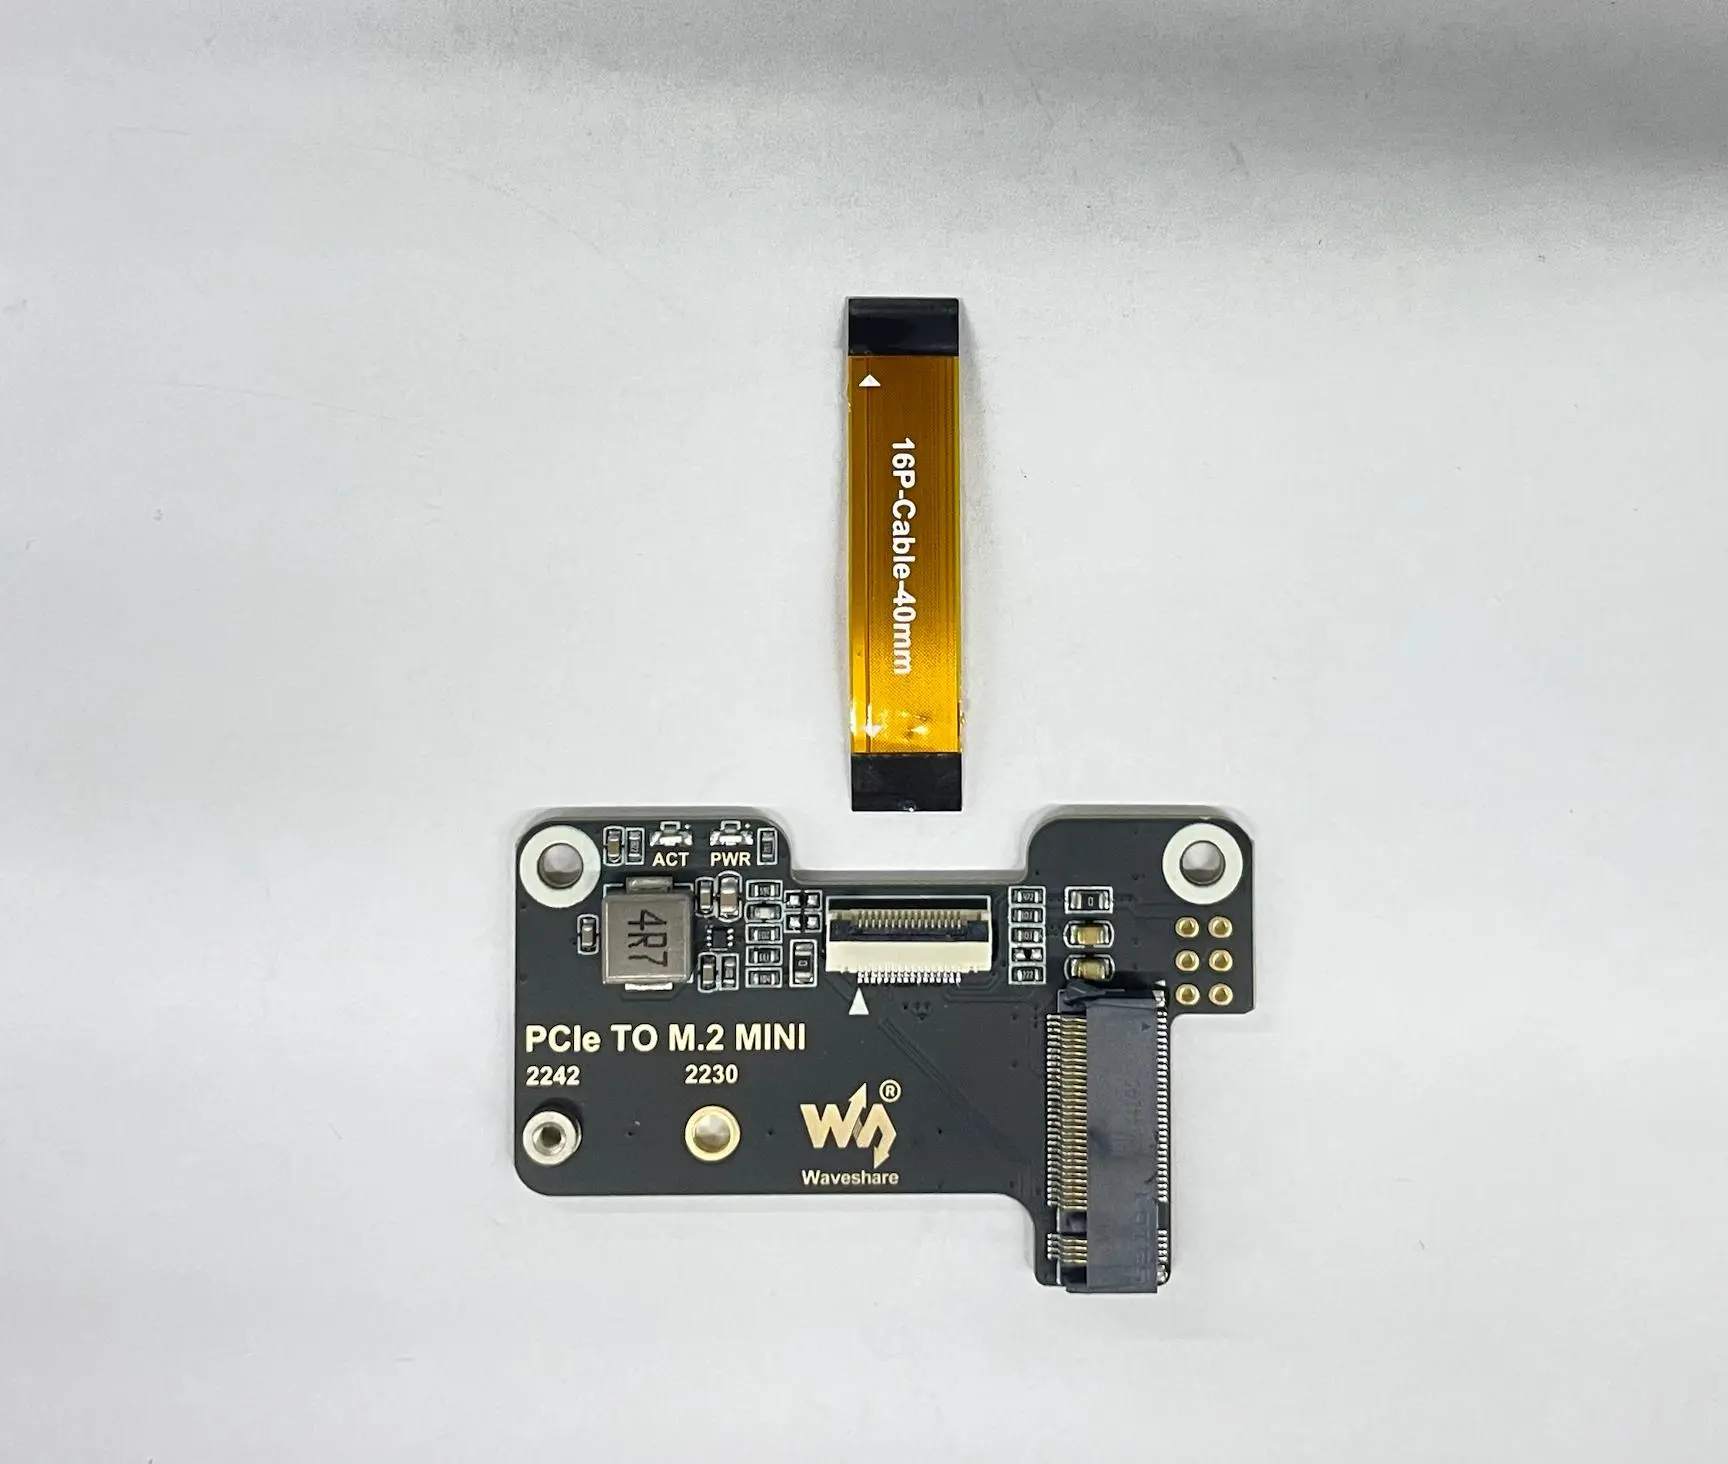
The Radxa Dual 2.5G Router HAT includes an FPC interface that allows for additional PCIe expansion. Below is an example using the MicroSnow PCIe to M.2 MINI adapter board.
Required Components
- MicroSnow PCIe to M.2 MINI adapter board
- FPC cable
- M.2 SSD (MINI size)
Installation Steps
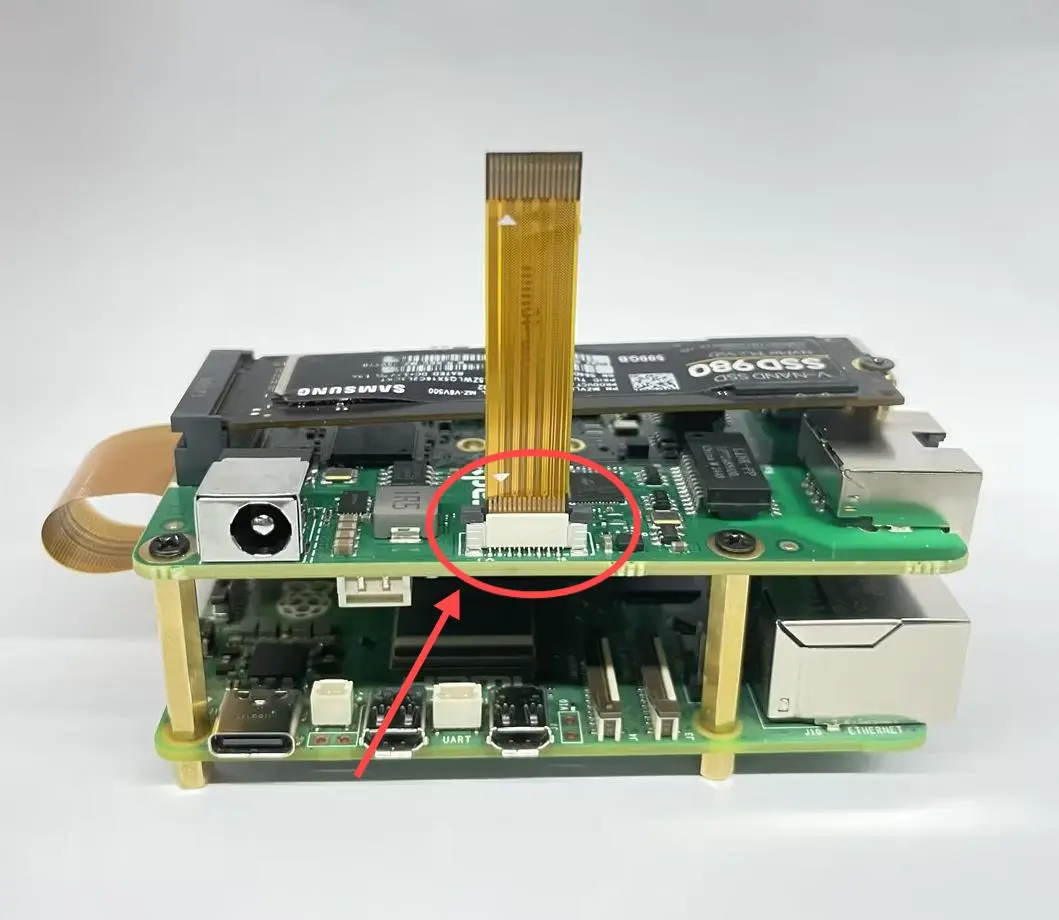
- Locate the FPC interface on the Radxa Dual 2.5G Router HAT
- Carefully connect one end of the FPC cable to this interface as shown:
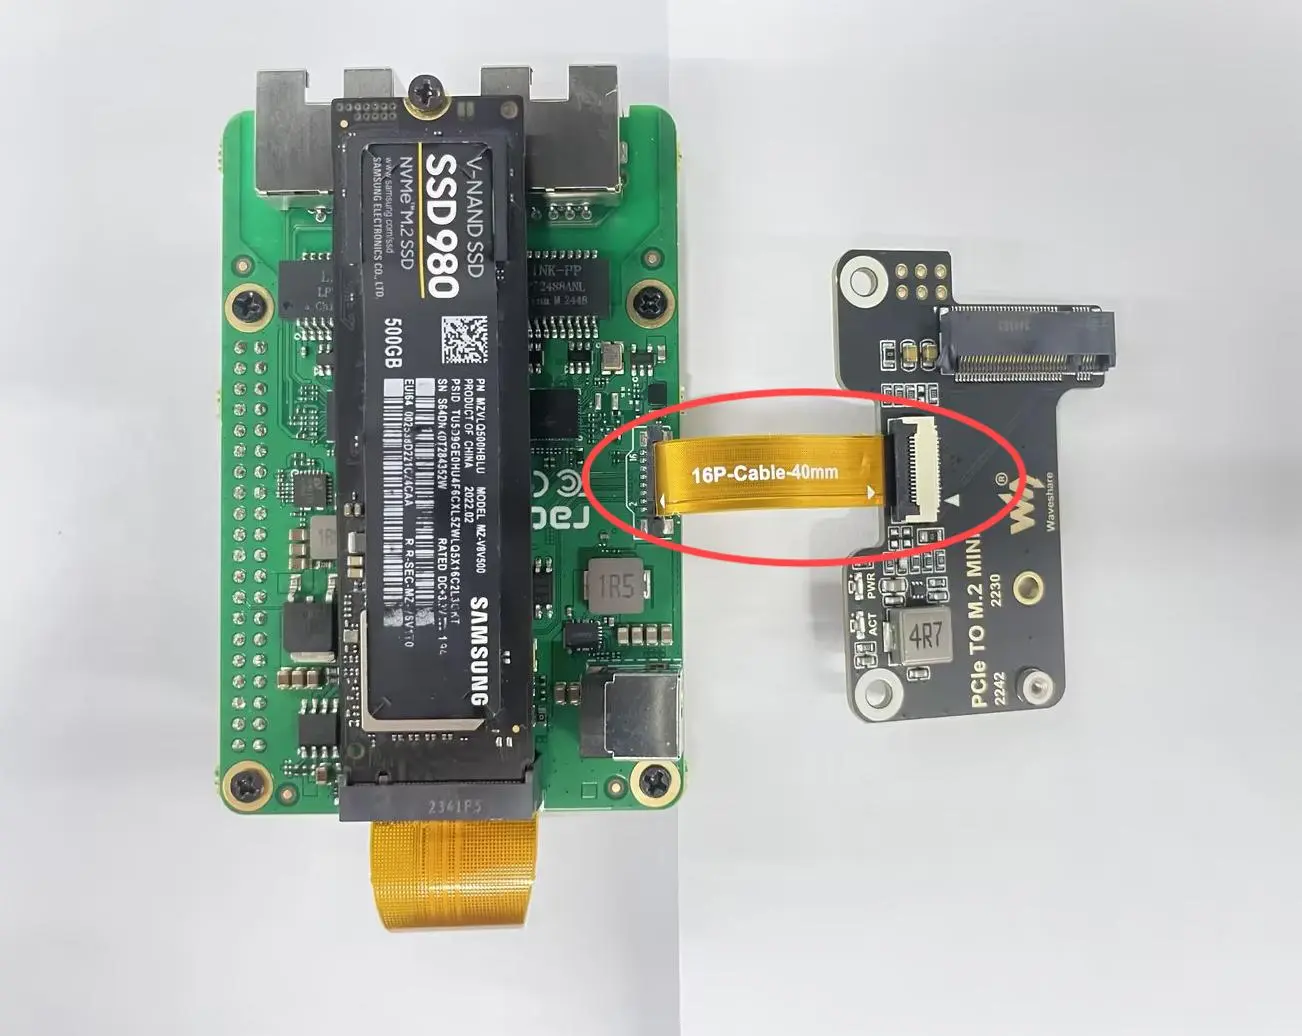
- Connect the other end of the FPC cable to the MicroSnow PCIe to M.2 MINI adapter board:
- Insert an M.2 SSD into the MicroSnow adapter board and secure it:
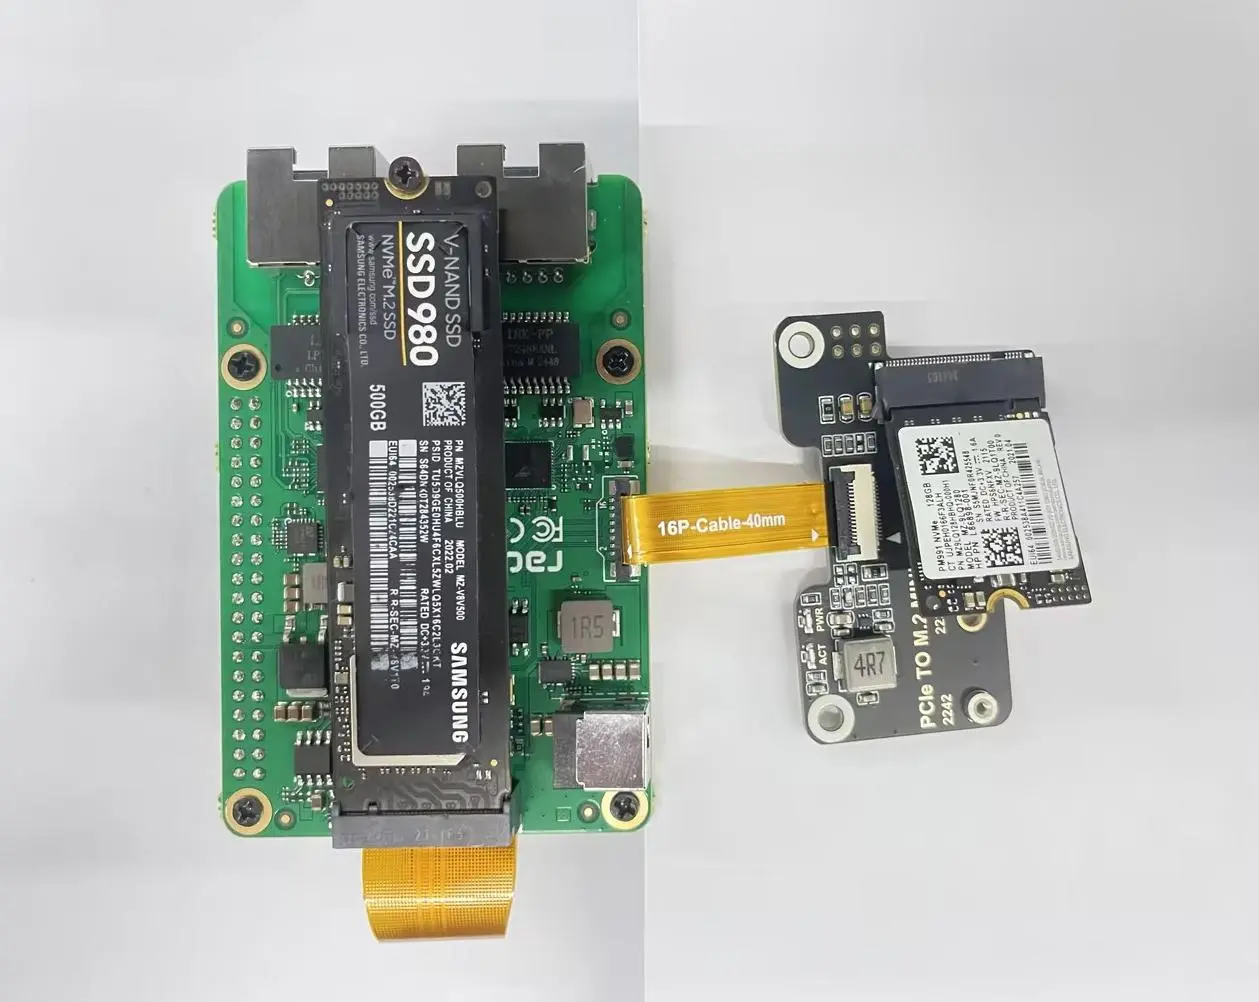
⚠️ NOTE: The FPC interface shares PCIe lanes with the onboard M.2 slot. Performance may be affected when both are in use simultaneously.
Final Steps
- Double-check all connections and ensure all screws are properly tightened
- Connect a 12V power supply to the DC jack on the Radxa Dual 2.5G Router HAT
- Power on your Raspberry Pi 5
Your Radxa Dual 2.5G Router HAT is now ready to use!