Booting from NVMe SSD
Overview
Booting your Raspberry Pi 5 directly from the NVMe SSD offers several advantages:
- Faster Performance: SSDs provide significantly faster read/write speeds compared to microSD cards
- Improved Reliability: SSDs typically have longer lifespans and better durability than microSD cards
- Increased Storage Capacity: NVMe SSDs offer much larger storage options
By default, Raspberry Pi 5 devices boot from the microSD card. This guide will walk you through configuring your Raspberry Pi 5 to boot directly from the NVMe SSD connected via the Radxa Dual 2.5G Router HAT.
Prerequisites
- Raspberry Pi 5 with Radxa Dual 2.5G Router HAT properly installed
- NVMe SSD installed in the M.2 slot of the Router HAT
- Working Raspberry Pi OS installed on a microSD card
- PCIe interface enabled (as described in the Getting Started guide)
Step 1: Update the Raspberry Pi Firmware
-
Boot your Raspberry Pi 5 from the microSD card
-
Ensure your system is up-to-date:
sudo apt update
sudo apt full-upgrade -y -
Update the Raspberry Pi firmware to the latest version:
sudo rpi-updateNote: The
rpi-updatecommand installs experimental firmware. In most cases this is safe, but if you prefer to stay on stable releases, you can skip this step and just ensure your system is fully updated withapt full-upgrade. -
Reboot your system:
sudo reboot
Step 2: Configure the EEPROM to Boot from PCIe
-
After rebooting, open the EEPROM configuration for editing:
sudo rpi-eeprom-config --edit -
This will open a text editor. Add or modify the following lines:
BOOT_ORDER=0xf416
PCIE_PROBE=1
The
BOOT_ORDER=0xf416setting configures the boot sequence as follows:- Try SD card first (4)
- Then try PCIe storage (1)
- Then try USB mass storage (6)
- Finally try network boot (f)
The
PCIE_PROBE=1setting ensures that PCIe devices are detected during the boot process.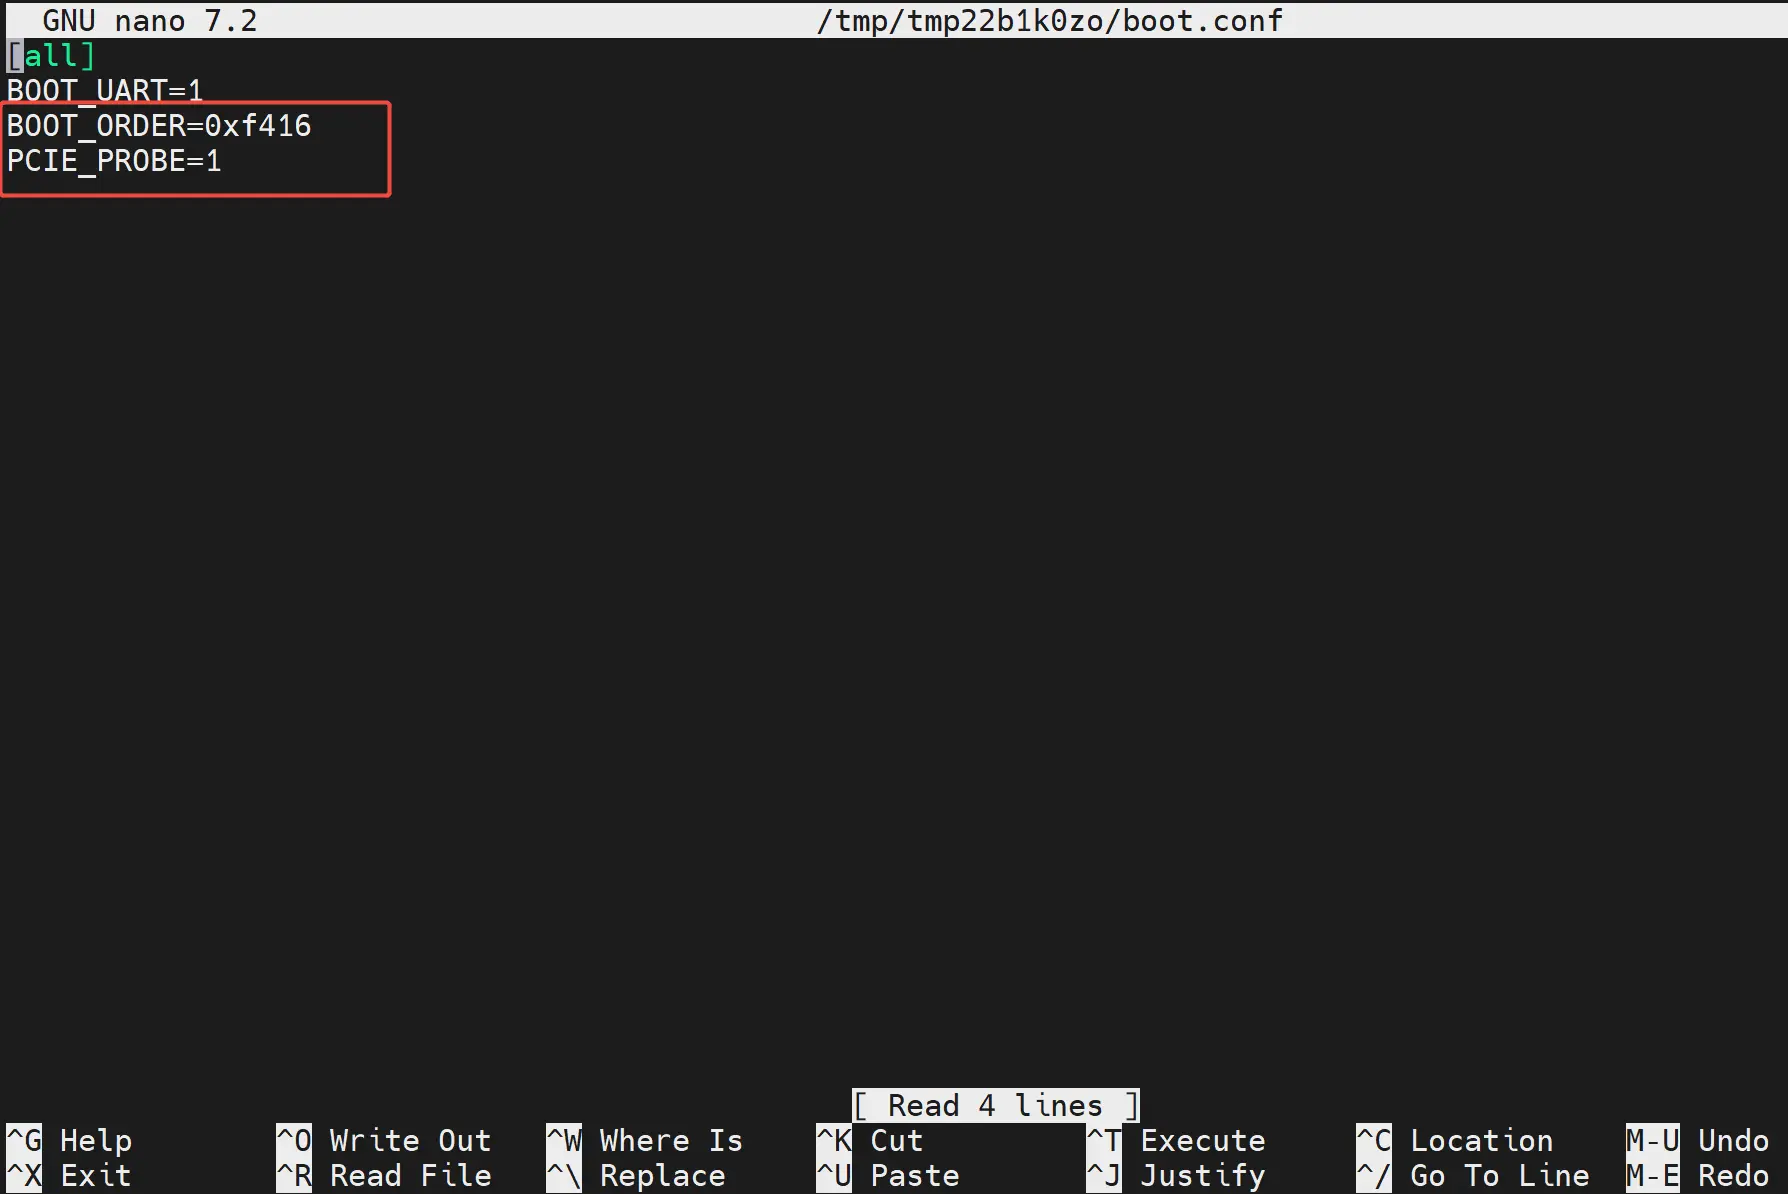
-
Save the file and exit the editor (in nano, press Ctrl+O to save, then Ctrl+X to exit)
-
Apply the EEPROM configuration update:
sudo rpi-eeprom-update -a -
Reboot to apply the changes:
sudo reboot
Step 3: Install the Operating System on the NVMe SSD
Option 1: Clone Your Existing SD Card to the SSD
-
After rebooting, ensure your NVMe SSD is detected:
lsblkYour NVMe SSD should appear as
/dev/nvme0n1or similar. -
Install the required tools:
sudo apt install -y rsync -
Create a partition on the NVMe SSD:
sudo parted -s /dev/nvme0n1 mklabel gpt
sudo parted -s /dev/nvme0n1 mkpart primary fat32 1MiB 256MiB
sudo parted -s /dev/nvme0n1 mkpart primary ext4 256MiB 100% -
Format the partitions:
sudo mkfs.vfat -F 32 /dev/nvme0n1p1
sudo mkfs.ext4 /dev/nvme0n1p2 -
Mount the partitions:
sudo mkdir -p /mnt/boot /mnt/rootfs
sudo mount /dev/nvme0n1p1 /mnt/boot
sudo mount /dev/nvme0n1p2 /mnt/rootfs -
Clone the current system to the SSD:
sudo rsync -axv /boot/ /mnt/boot/
sudo rsync -axv / /mnt/rootfs/ --exclude /boot --exclude /proc --exclude /sys --exclude /dev --exclude /mnt -
Update the fstab file on the SSD:
sudo sed -i 's/mmcblk0p/nvme0n1p/g' /mnt/rootfs/etc/fstab -
Unmount the partitions:
sudo umount /mnt/boot /mnt/rootfs
Option 2: Fresh Installation Using Raspberry Pi Imager
Alternatively, you can perform a fresh installation directly to the SSD:
-
Shutdown your Raspberry Pi:
sudo shutdown -h now -
Remove the SSD from the Router HAT and connect it to your computer using an M.2 NVMe to USB adapter
-
Use Raspberry Pi Imager to install Raspberry Pi OS directly to the SSD
-
Once complete, reinsert the SSD into the Router HAT
Step 4: Boot from the NVMe SSD
-
Shut down your Raspberry Pi 5:
sudo shutdown -h now -
Disconnect the power
-
Remove the microSD card
-
Ensure the NVMe SSD is properly seated in the M.2 slot on the Radxa Dual 2.5G Router HAT
-
Reconnect the power
Your Raspberry Pi 5 should now boot directly from the NVMe SSD.
Troubleshooting
System Won't Boot from SSD
If your Raspberry Pi 5 doesn't boot from the SSD, try the following:
-
Reinsert the microSD card and boot from it
-
Verify the EEPROM configuration:
sudo rpi-eeprom-configEnsure that
BOOT_ORDER=0xf416andPCIE_PROBE=1are set correctly -
Check if the SSD is detected:
lsblk -
Ensure the PCIe interface is enabled:
grep pciex1 /boot/firmware/config.txt
Slow Boot Times
If the system takes a long time to boot from the SSD:
-
Ensure you're using PCIe Gen 3 mode as described in the Getting Started guide
-
Check for any boot errors:
dmesg | grep -i error
Performance Optimization
To get the most out of your NVMe SSD boot setup:
-
Enable TRIM support for better SSD longevity:
sudo systemctl enable fstrim.timer
sudo systemctl start fstrim.timer -
Adjust the scheduler for better SSD performance:
echo 'none' | sudo tee /sys/block/nvme0n1/queue/schedulerTo make this persistent across reboots, add the following to
/etc/udev/rules.d/60-scheduler.rules:ACTION=="add|change", KERNEL=="nvme[0-9]*", ATTR{queue/scheduler}="none" -
Consider overclocking your Raspberry Pi 5 for even better performance (but be aware this may require better cooling)